Hi, this article is about How to make vignettes in DaVinci Resolve.
Yes, there are many ways and techniques to work with these tools, but I will show you a straightforward and effective way, nothing complicated, just the basic stuff and really easy way. Let’s start with this tutorial. Creating a vignette in Davinci Resolve is really easy.
For all beginners who have no idea how to create a vignette, for example, this is a common and quickest way.
A vignette is the darkened, soft borders of a film frame created by the lens and matte box in traditional cinematography. It was the flaw of the lens, but filmmakers used it to focus the subject more in the frame.
Natural vignettes aren’t any longer made because of advances in camera and lens technology, particularly the introduction of digital video.
However, their disappearance has heightened appreciation for the framing function they offered, and vignettes are now in demand for creative and compositing reasons as a powerful way of guiding the viewer’s eye.
To create a vignette around the center subject, add a circle window to an image and lessen the brightness of the frame surrounding.
How to make vignettes in DaVinci Resolve
1. Creating a simple vignette in Davinci Resolve
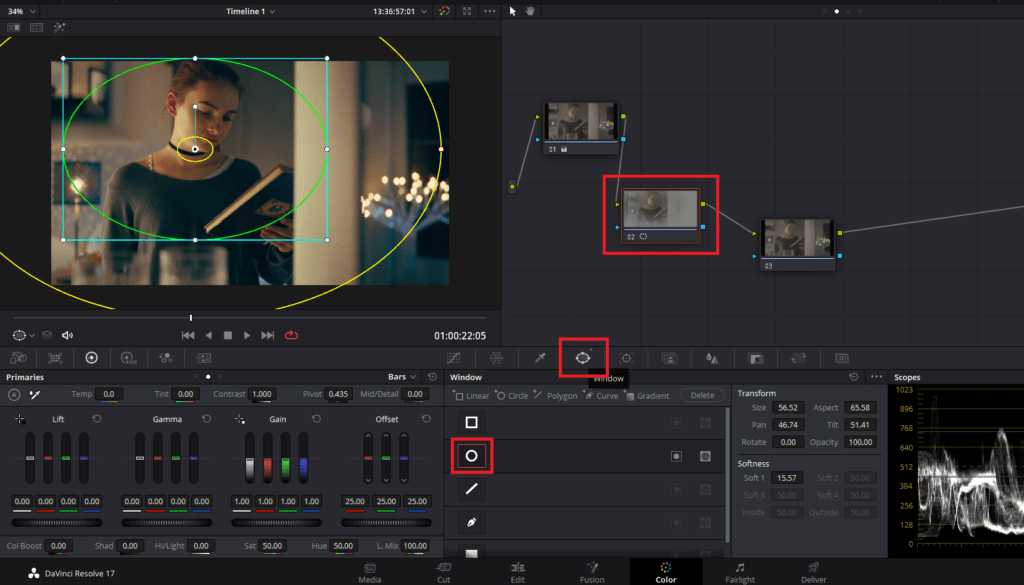
- Make a new serial node with the name Vignette.
- Select the Circle window button from the Window panel.
- Vignettes are frequently elliptical to limit their visibility and allow for smoother blending into the video.
- To entirely fill the viewer frame, use the onscreen transform controls to resize and move the circle.
- Drag one of the red points in the onscreen controls to create a broad, soft boundary around the selection. The Vignette node thumbnail preview in the Node Editor reveals that you have picked the topics in the frame’s center. You’ll need to reverse this selection if you want to utilize the node as a vignette.
- Click the invert icon next to the circular window in the Window palette.
- After you’ve created the vignette shape, you can use the grading options to apply a vignette effect to the image. Drag the Gamma master wheel to the left to reduce the brightness of the specified region. Using the gamma tonal range will prevent you from dimming extremely bright sections of the clip (such as the cloudy sky).

2. Creating The Best Vignettes in Davinci Resolve
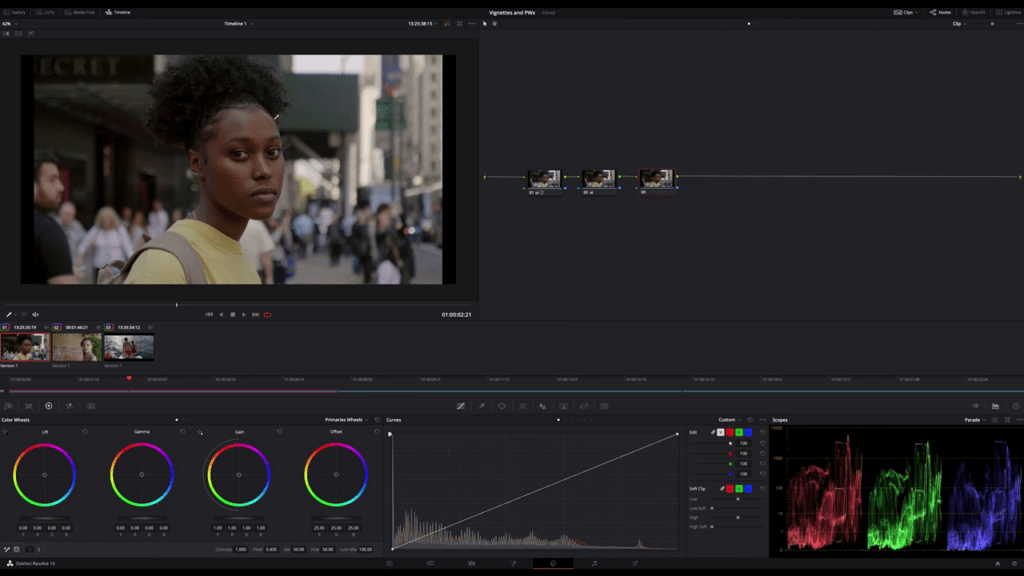
The best vignette is a vignette that can not be seen. It should be more subtle, in other words. I guess you got the idea. So we are here to learn something right, and as you already know, my concern is to help you bring your color grading skills to the next level, and so today, I want to show you how to create better vignettes with just the basics.
The first step I always do is to analyze the image looking for lighting, especially light direction where does the light comes from, and where the shadows are.
Are the shadows important, what angle was this image shot from, and what about the contrast? Those are the main things to consider when reading an image in context with exposure and finally vignettes or dodge and burning. Dodging and burning is nothing else than using power windows to adjust zones or areas in the image differently to introduce a bit more light or mid-tones and a bit more shadow there and, of course, let your subject pop out a bit more.
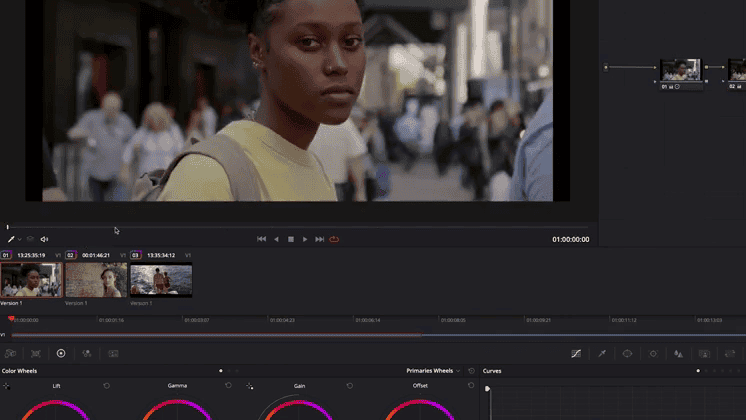
It can also make the image flatter; yes, this can happen. Okay, I have three different shots in my timeline, and I want to show you what we can do in a straightforward but effective way to bring more contrast and more attention to our subject without touching the contrast slider.

Let’s start with this shot not a very good shot in context with colors look this greenish color banding those are typically for early Panasonic GH5, but that’s okay for me because today we want to see how we can affect the image with a more advanced vignette and power windows.
We don’t have to care about colors too much. Today, you will learn a more dodge and burning technique, a more advanced way of applying vignettes in Davinci Resolve than just using a simple vignette.
In the image, the light comes from the top. It’s very diffuse sunlight shining through clouds or is blocked by the building surrounding our subject.
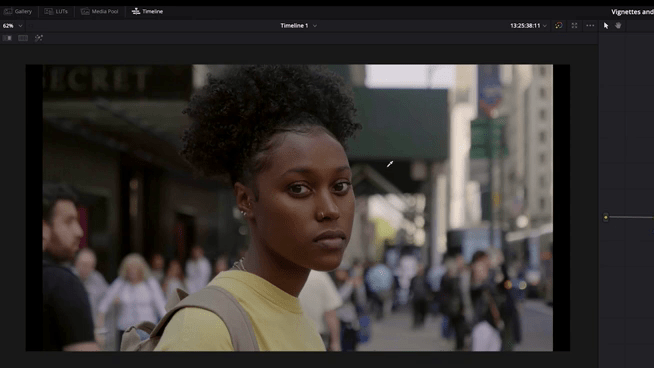
Behind her, in the background, we see a more sunny part. This gives us a very moody image, and it fits our subject, which is not smiling and is not happy, and it seems she is beaten by her day standing alone in between the rushing crowd feeling alone maybe.
Let’s try to bring in more contrast to get a better grading in terms of storytelling because that’s the job of a colorist.
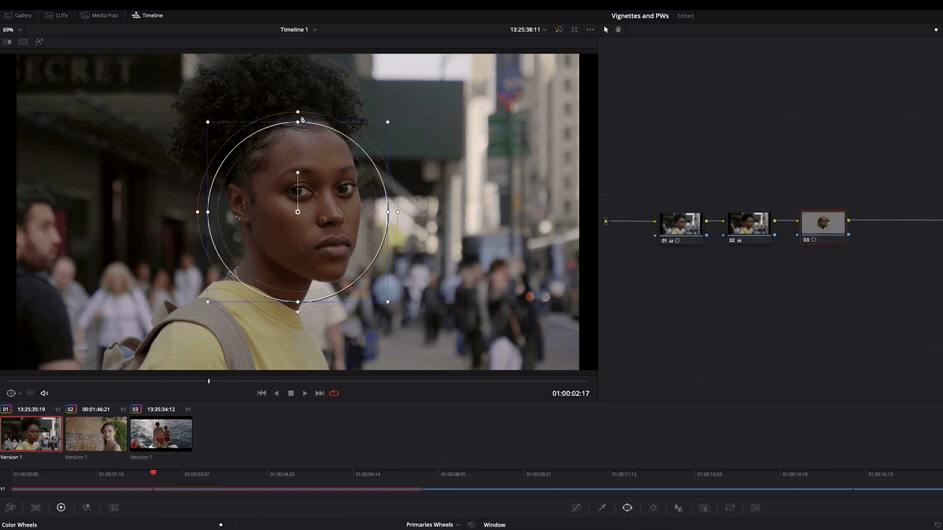
Let’s start with a serial node, and what I usually do now is to bring the subject more in the foreground by decreasing the parts of the image where we have less light or more shadows.
By following the light, in this case, from the top. I start with a simple circle and adjust it to the top where the light comes from.
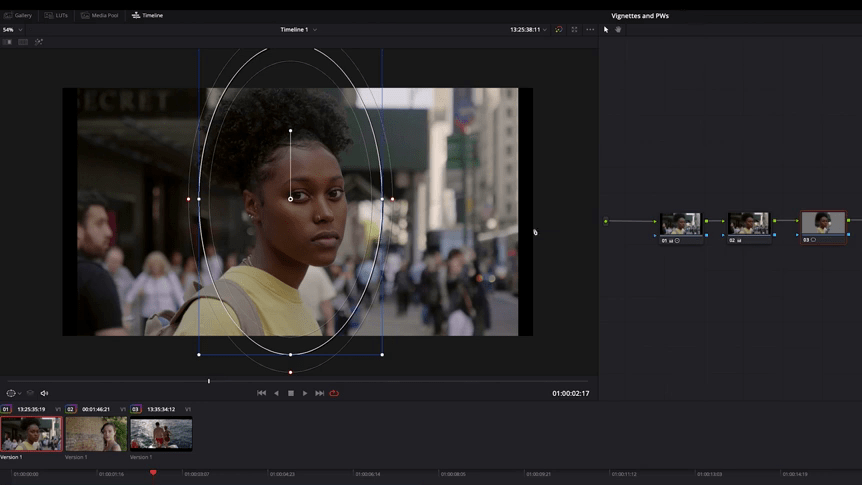
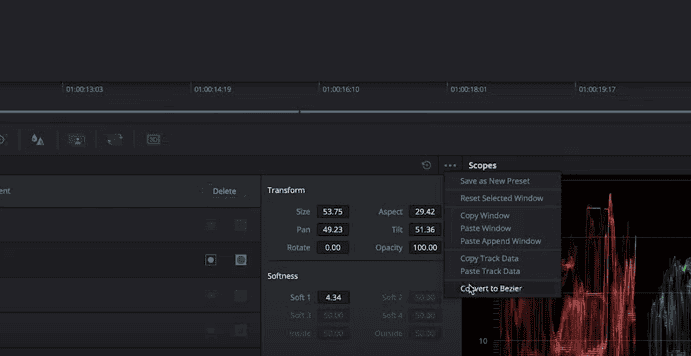
The circle doesn’t fit my light direction enough. Look at this; it’s almost parallel that’s not what I want. It’s too unnatural in the scenery, so I need a more cone-shaped light. Therefore I convert my simple power window to a bezier curve.
Now I can add more points to it; it’s the same as using the curve tool for building my power window.
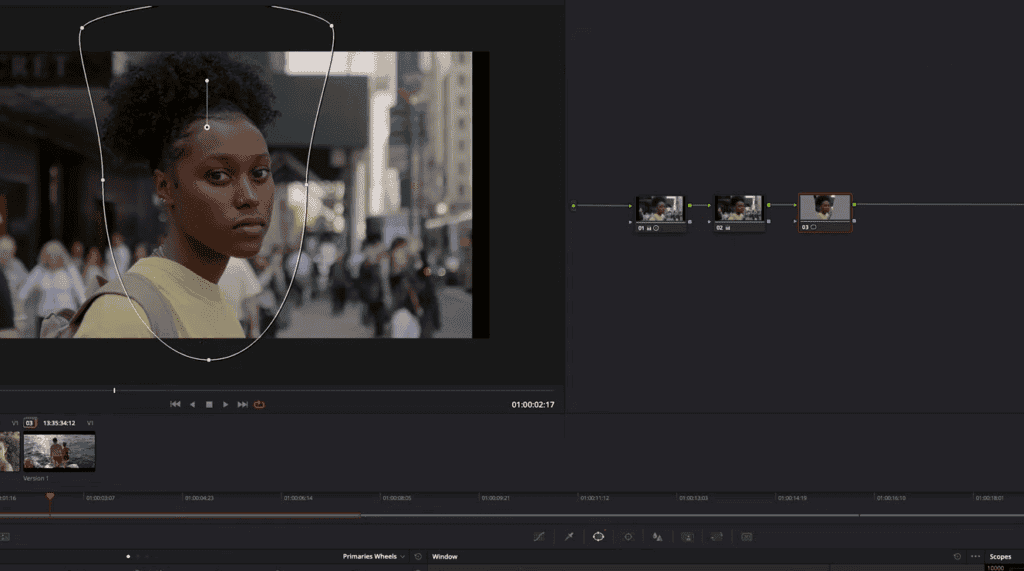
Okay, and I want to shape the circle on top wider, something like this.
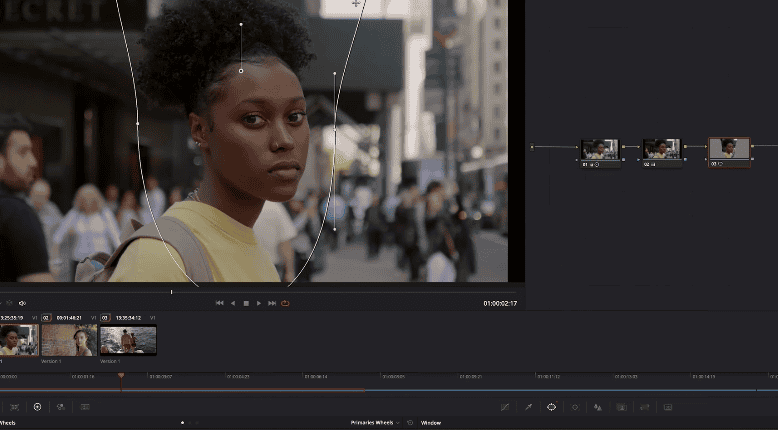
The sun from the background should not be included in the shadows.
I want to use it to connect to the light cone.
Therefore I leave it out of my area, which I want to darken; okay, this looks good enough. Now I invert my window and crank up the softness.
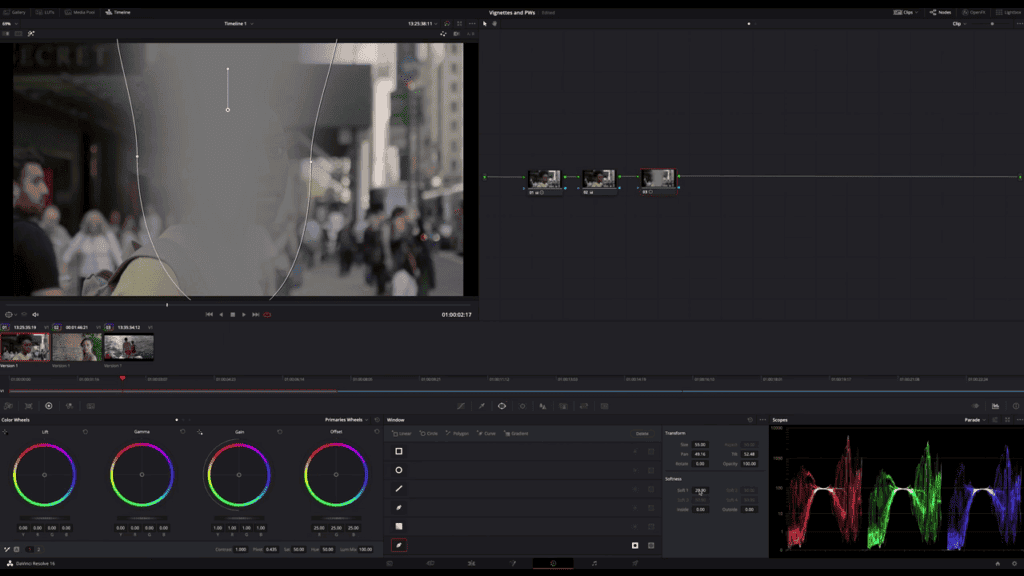
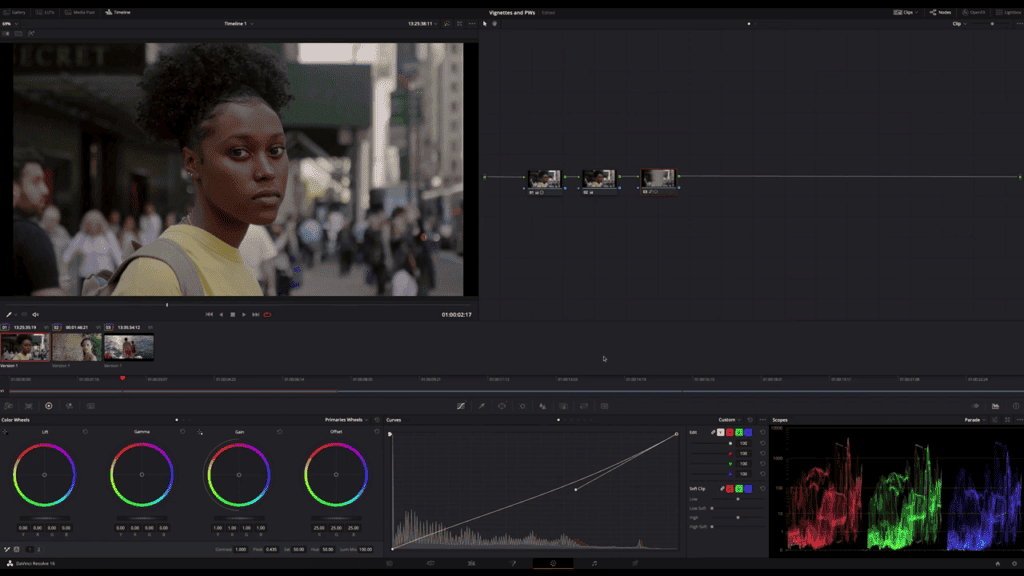
Now I switch my curves and adjust the custom curve to my needs by lowering the highlights. A bit affecting the upper mid-tones, of course too, and look how much more this subject comes out.

Let’s go on, now I add a parallel node, and now I want to do the opposite. Not the same shape, not by creating a simple outside node. The goal is to overlap shadows and highlights more to make much smoother transitions.
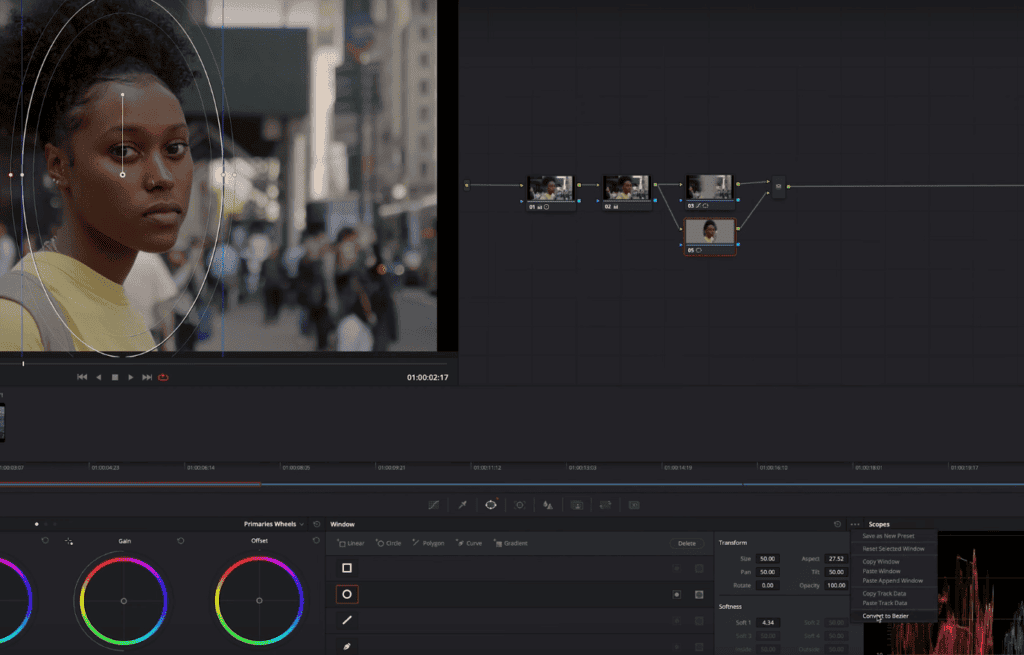
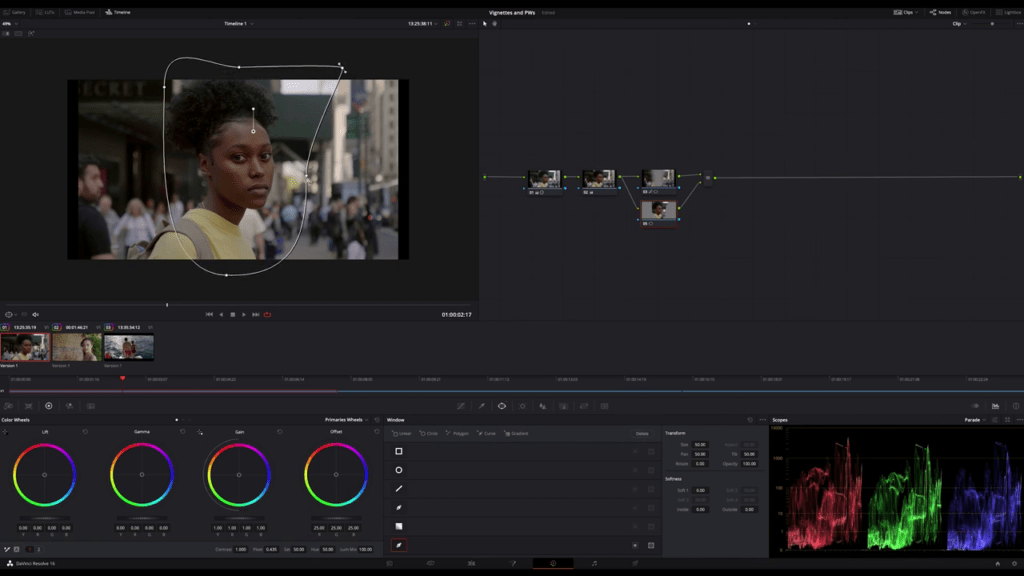
Okay, this first node increases the highlights and upper mid-tones a bit, and this second node will introduce more contrast to our image.

So keep an eye on the whole image; if doing this, my shape looks a bit different, and this time I keep the bezier curve closer to the subject. A lot of softness and increasing brightness using the curves.
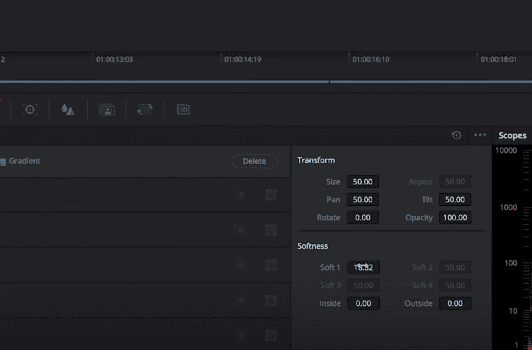

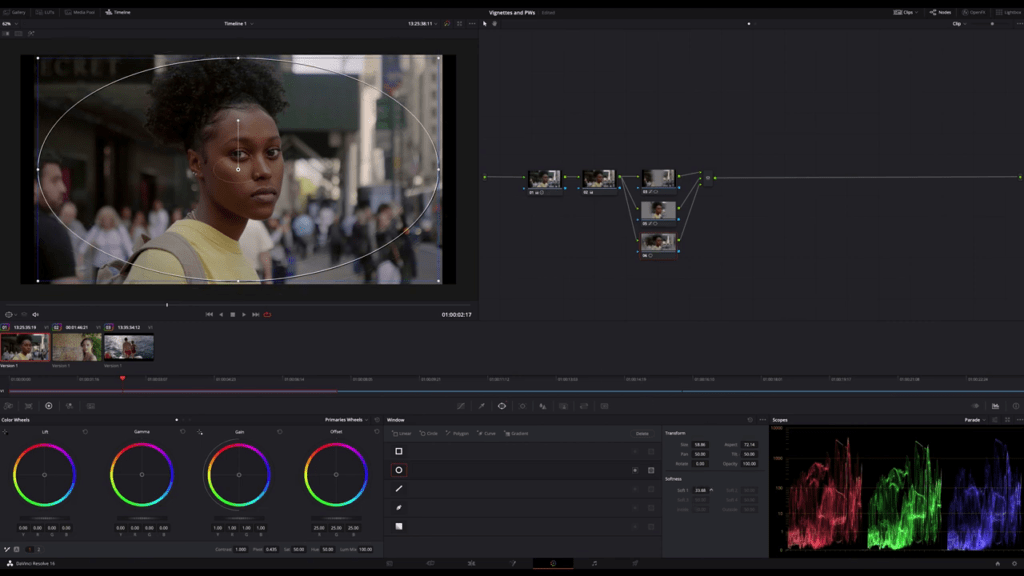
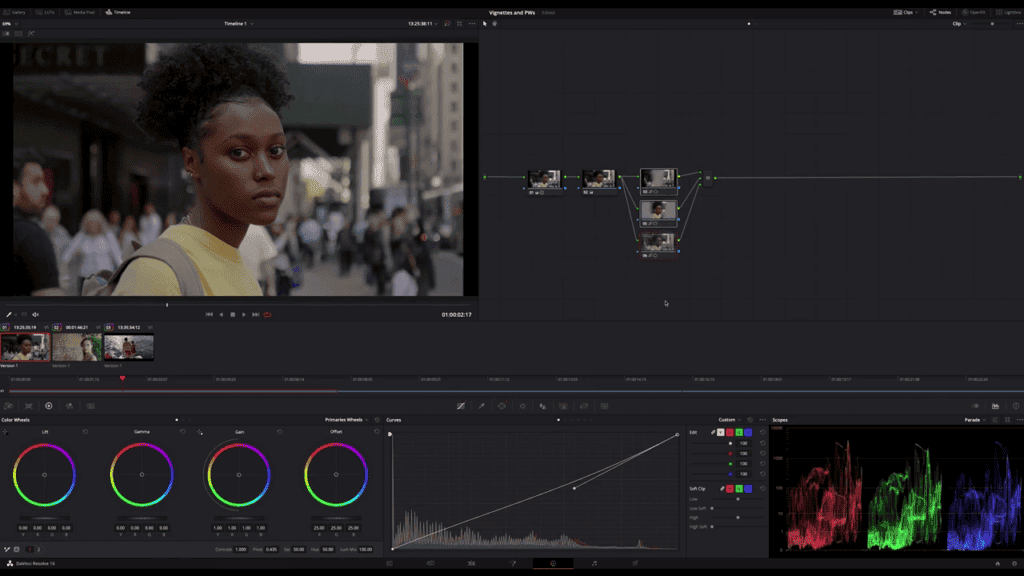
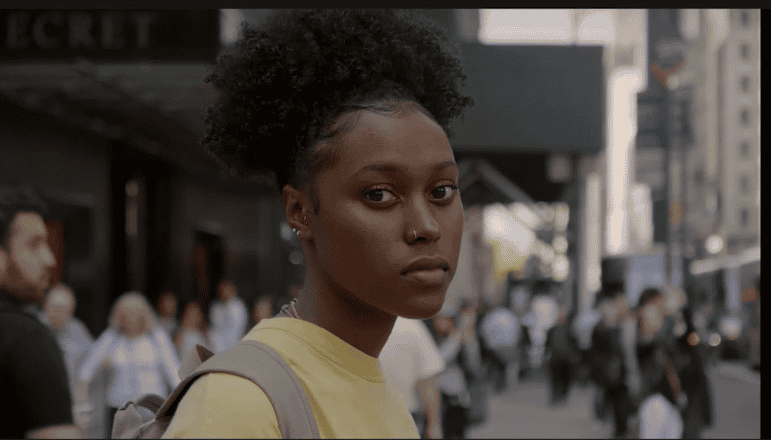
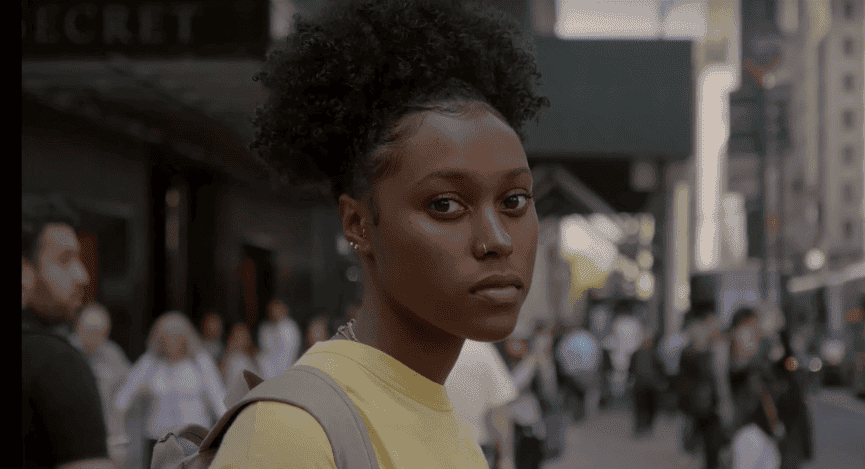
Now I create another parallel node, and it comes to our simple vignette. Now all the nodes together, on and off. Look at this the girl is now popping out. I usually do it more subtle, but now you can see how much we can affect the image. She is now much more isolated, standing clearly in front of the rest of the scenery. By the way, this is an excellent technique to introduce more depth to an image too.
- Also Read-Video Vs Full Data Levels In Davinci Resolve
- Also Read- Move Premiere Pro Timeline to Davinci Resolve (XML Workflow)
- Also Read- How to Reverse a Clip in DaVinci Resolve ( Plus A Smooth Reverse Effect)
3. Second Instance to create contrast with Power Windows
Now we have a similar scenery but with a subject on the right side, leaving the left side more empty, to introduce space for our eyes to breathe the image. We already have a lot of depth, and this shot is well composed. But, all we won’t want to learn here is how to get better vignettes. Okay, the light comes straight from the upper right, so the first thing I want to do is to decrease the most left part of the image.
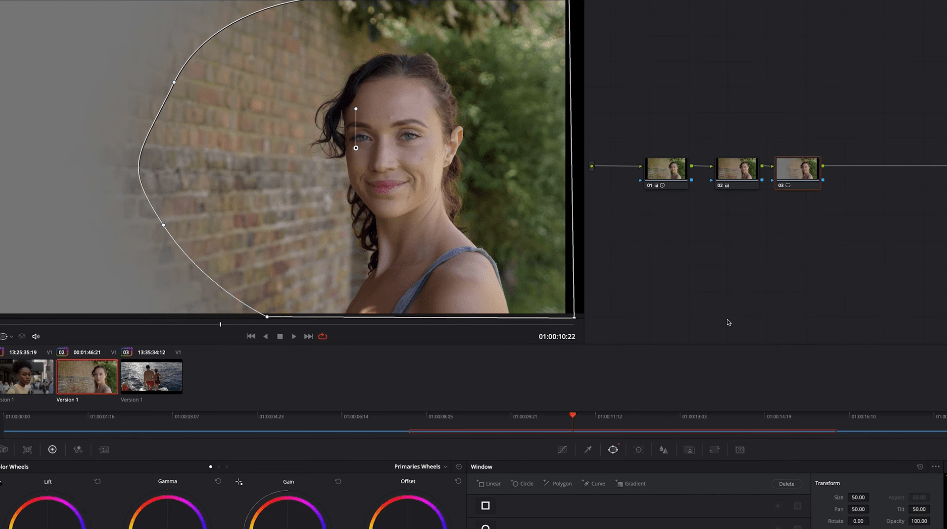
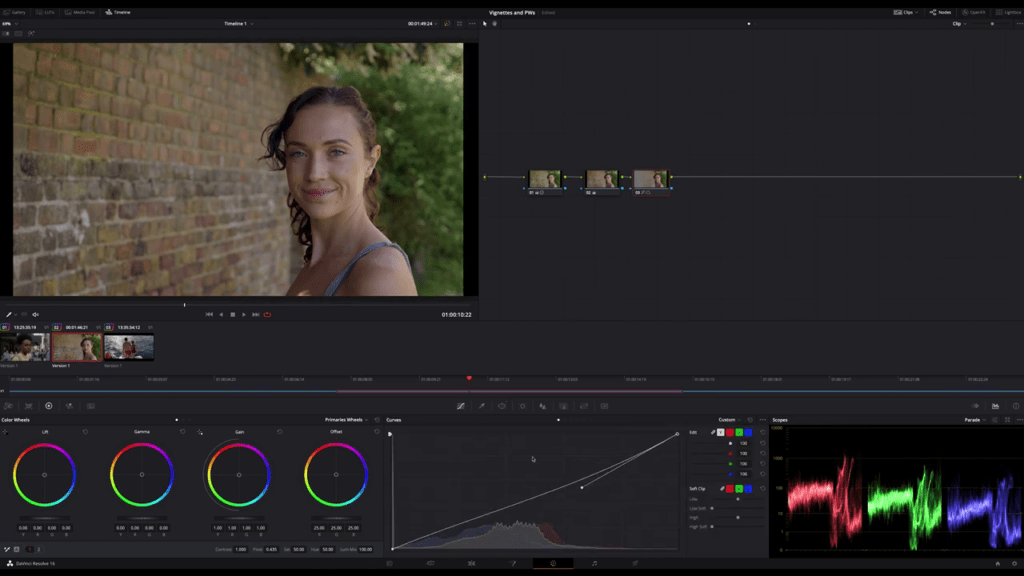
This time I create a curve around my subject, including the whole right part of the image.
Now the second node, which is to lighten up our subject, I want to bring in a shape more like a beam and crossing her face.
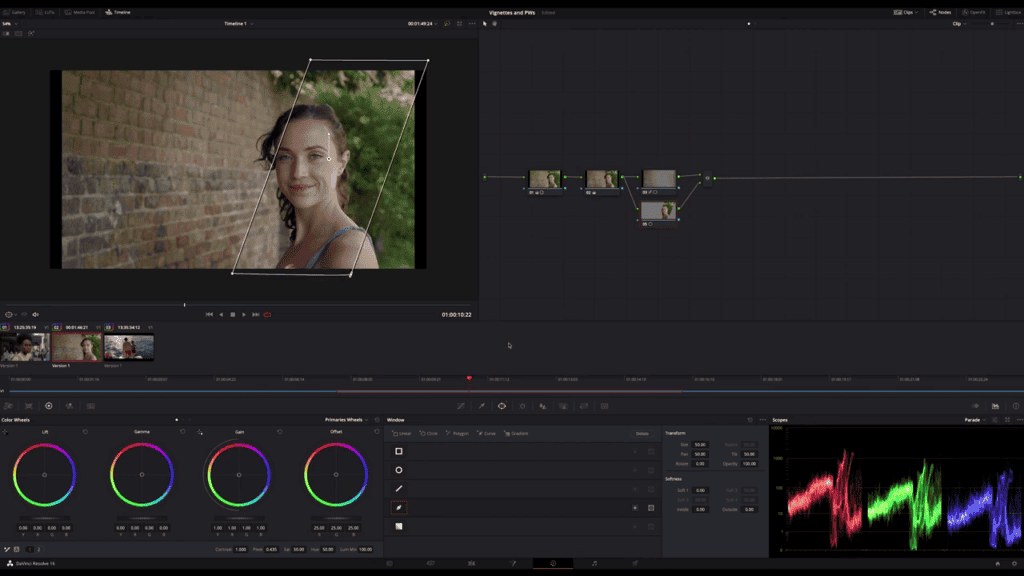
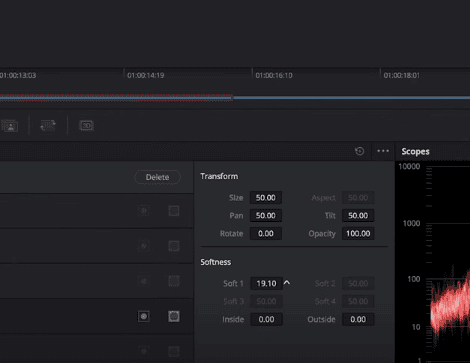
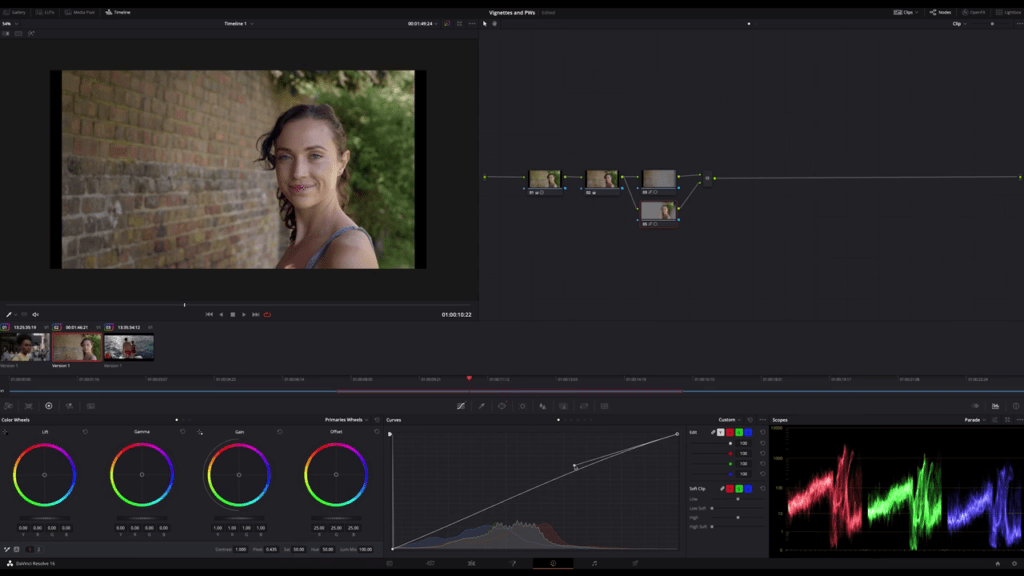
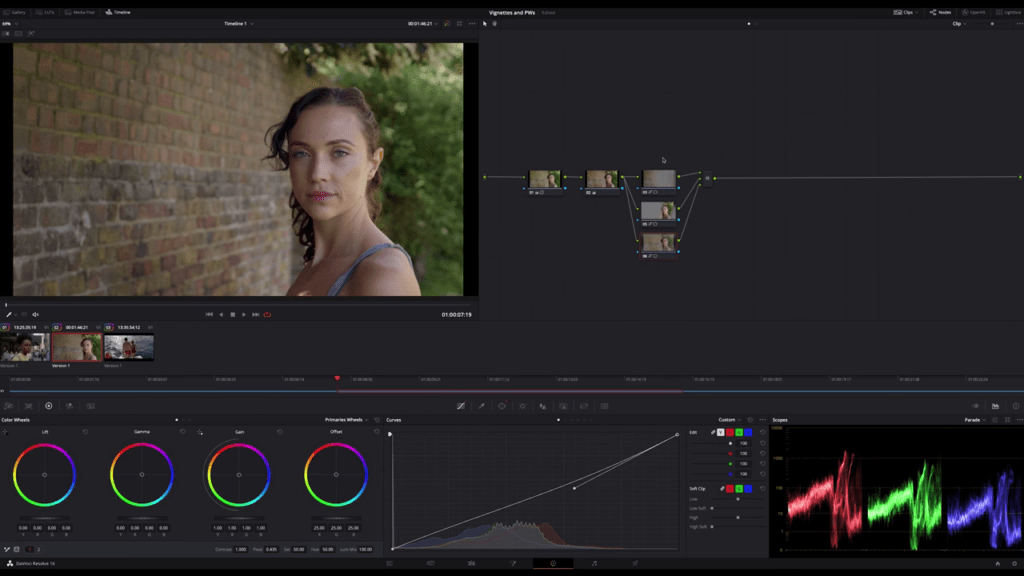
Just a bit on the forehead and increasing it a bit. And then a simple vignette in the third node just like we did before. Let’s see how the image looks all together on and off.
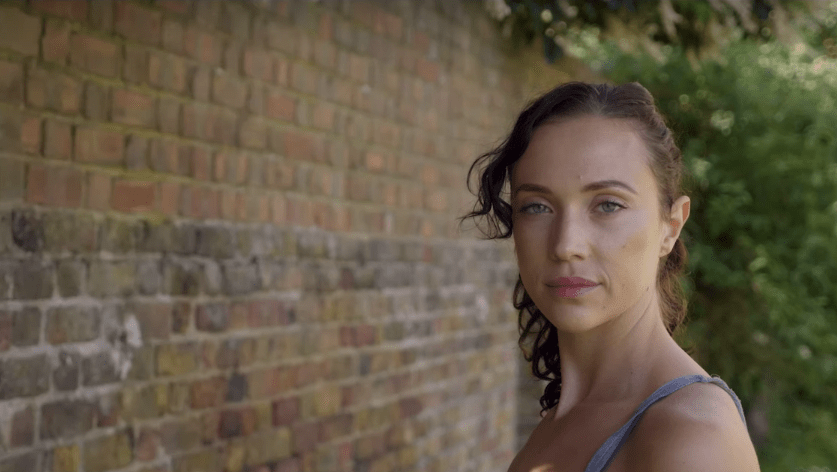
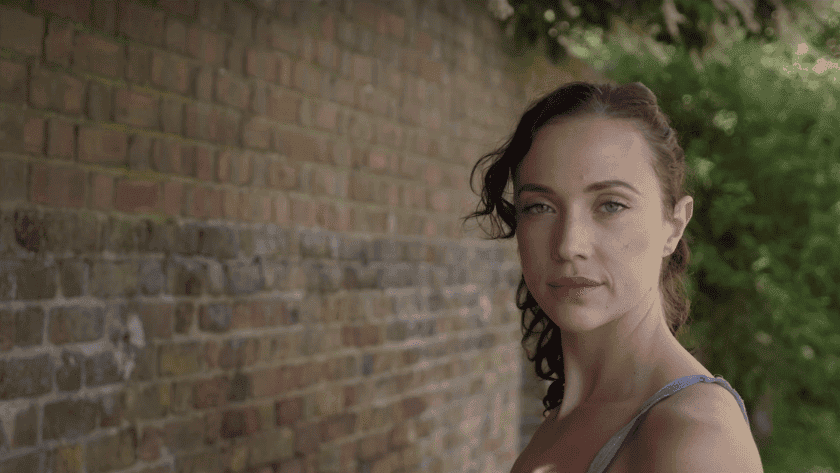
If you look now on parade, on the scopes while you turn these three nodes on and off, you see how much contrast we introduce without using the contrast slider just by dodging and burning by using vignettes in Davinci Resolve.
4. How professionals use vignettes
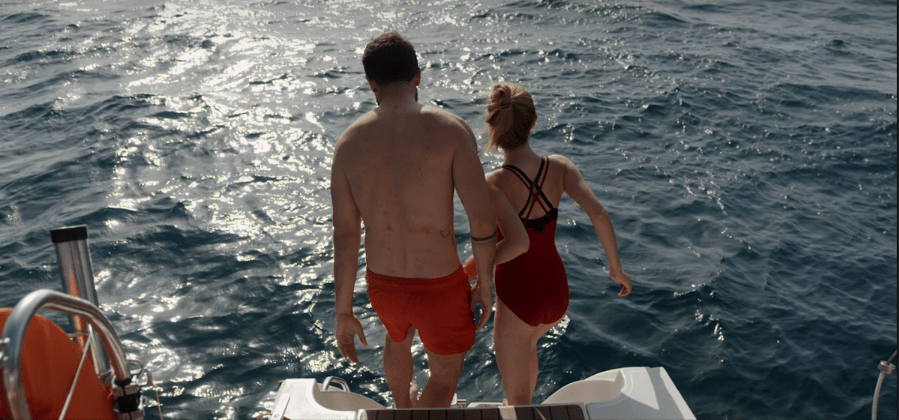
Let’s try another scene, but this time, not a close-up, a wider scene. The light comes from the upper left corner, and the sun is still very high. We have a lot of light, and the shadows on the boat of the woman are very short, so it must be around midday or maybe the early afternoon.
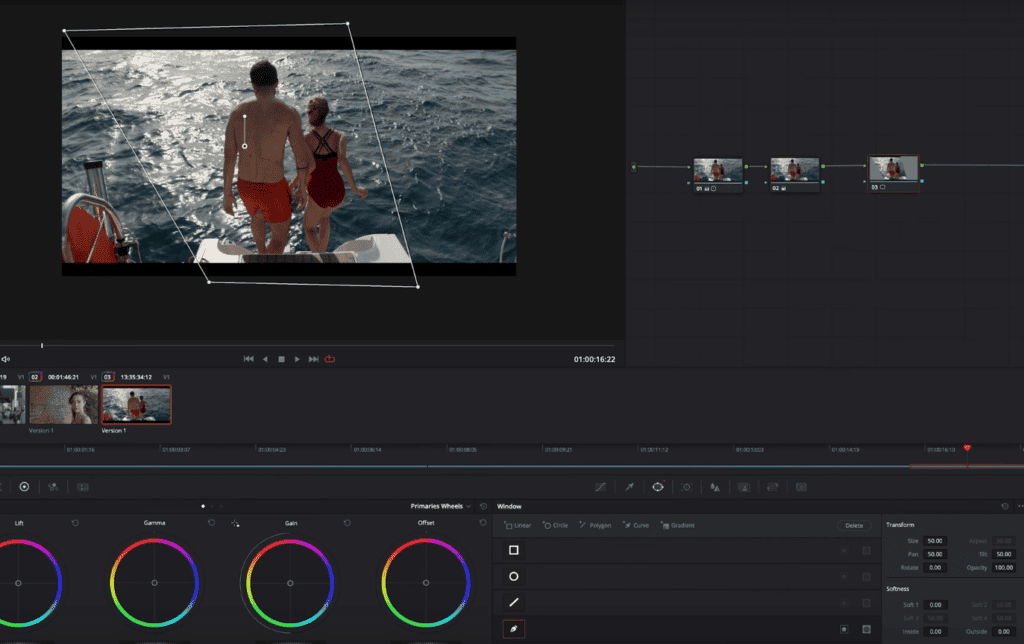
This time we want to create a wider beam of light. Therefore I want to create a shape that follows the light in the water. We have two lines, so we darken the lower-left corner and the upper right part of the image to bring the light out more.
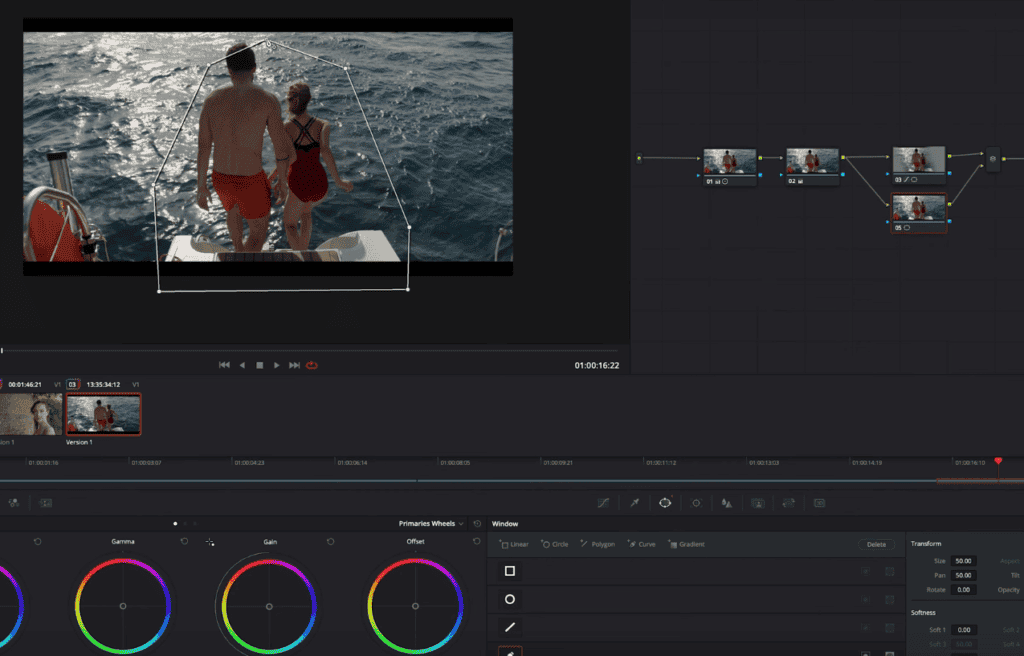
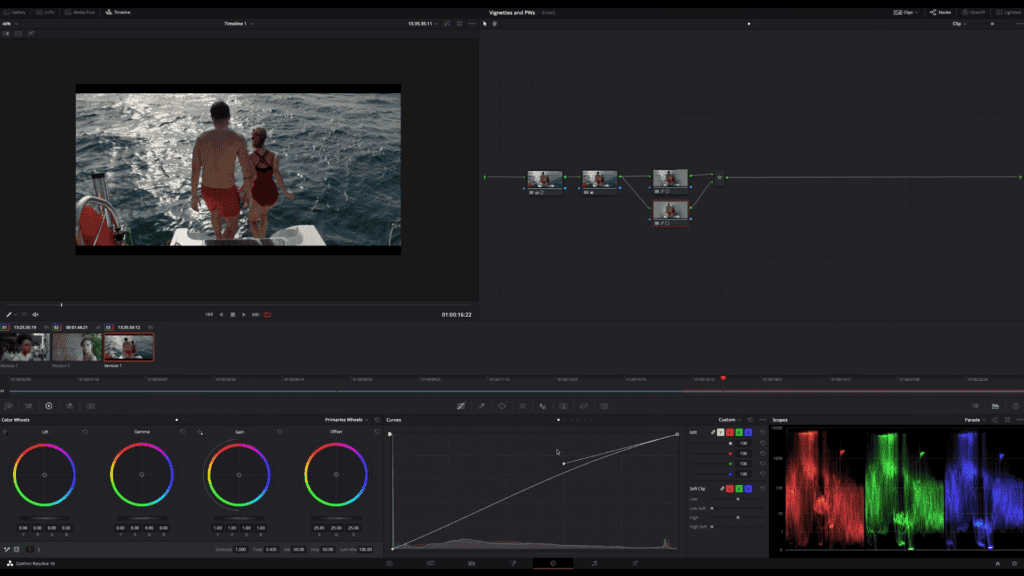
I want to create a speedy and straightforward shape around these two subjects on the second node. Not touching the upper border of the image and again increasing the highlights and upper mid-tones.
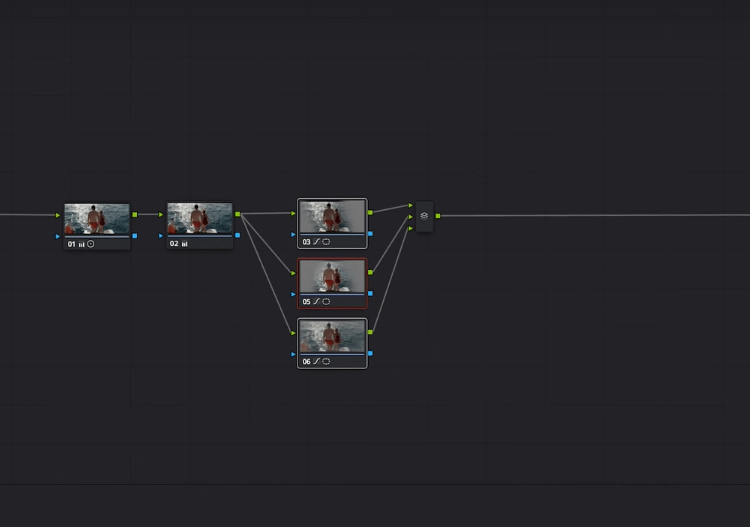
Copy and paste our simple vignette again on the third node to this shot. I don’t particularly appreciate that we decrease the colors in the corner.
Let’s fix this; I did it in the curves to lower my highlights. The problem doing it this way is that we decrease the luma and the chroma simultaneously. Lowering the brightness in highlights reduces saturation, too, and this can be avoided by just doing the luma only. All we have to do is to ungang the curves by clicking the chain-looking icon. (shown in the picture).
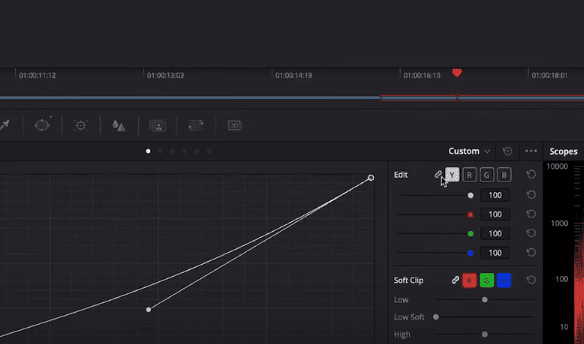
This separates all color channels from each other and, of course, from the luma.
Now we can adjust the channels differently, and now when you change the curves, you won’t be manipulating the color values but just the brightness.

