
Welcome back to Filmmaking Elements, where we examine the various methods and equipment for producing aesthetically compelling videos. In this article will go through how to add shapes in Adobe Premiere Pro. It is one of the most widely known video editing programs used by filmmakers and content creators. Also, I guess we don’t have to mention it but it is our favorite tool too.
2 Ways To Add Shapes In Premiere Pro
1). By using the the legacy tittle
The first way to create shapes in Premiere Pro is by using the “Legacy Tittle”.
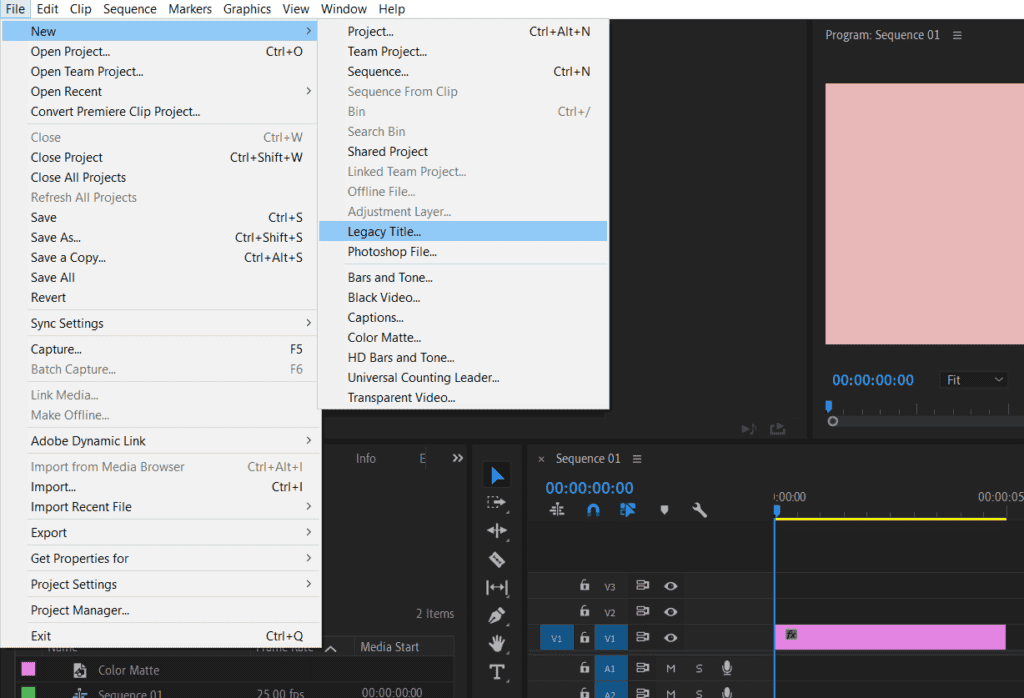
- Simply choose “New”
- Then “Legacy Title” from the “File” menu at the top of the screen to get started.
- After naming your shape, click “OK,” and a dialogue window will show up.
- Those who have used older versions of Adobe Premiere Pro will be familiar with the legacy title feature.
You might not be aware of a helpful option for drawing shapes if you use Premiere Pro’s CC version. You may discover a range of shapes to pick from in the upper left corner of the screen, where you can access this function.
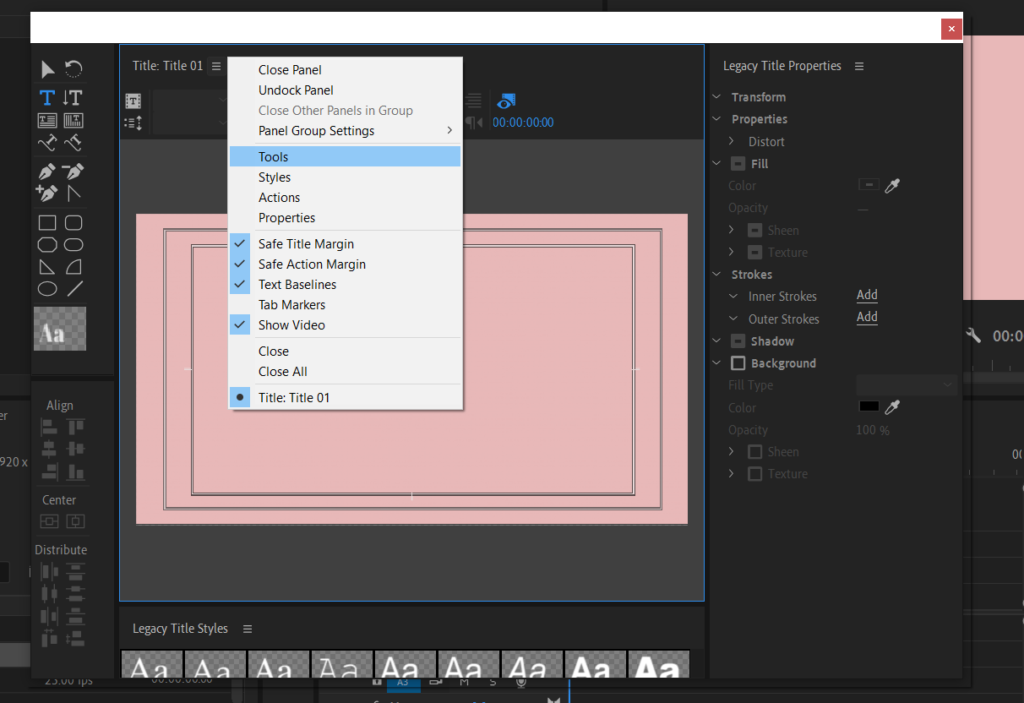
Next, If you can’t see the shapes options, you’ll need to activate the tools by clicking on the three horizontal lines and then selecting “properties” and then “tools.”
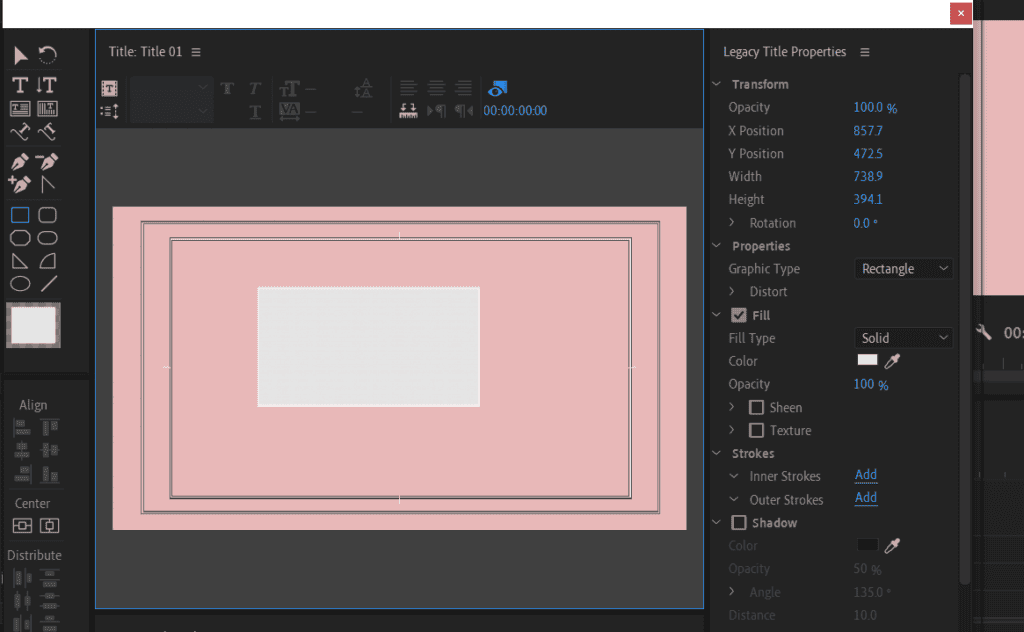
Just left-click in the screen’s centre while dragging your pointer after choosing the shape you wish to use from the menu on the left. This will create the shape on your timeline, that you can then modify by changing its size, colour, and opacity as necessary. In the step below, we will talk about it.
In Adobe Premiere Pro, you can easily customize the shapes you create to suit your needs. Simply navigate to the menu on the right-hand side of the screen to make changes to the shape you just created. Here, you can add color to the shape, adjust its opacity, and make other modifications to enhance its appearance.
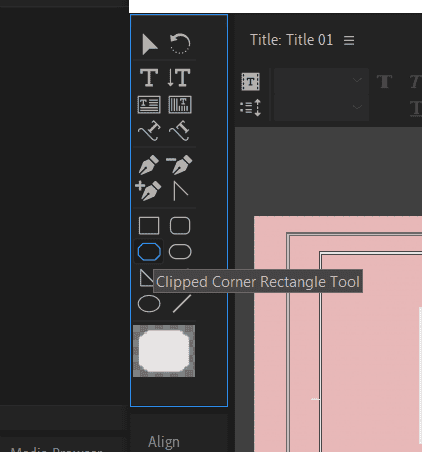
If you’re looking to create a specific shape, such as a clipped corner rectangle, you can select it from the menu at the left of the screen. To adjust the size of the shape, simply shift and drag the cursor to make all sides equal while increasing or decreasing its size. With a variety of shapes at your disposal, you can easily create visually appealing graphics and elements to enhance your video content.
Once you’ve completed drawing your shape in Adobe Premiere Pro, you can simply close the dialog box. After closing the box, you’ll notice that your shapes won’t appear on the timeline. Instead, they’ll be located in the Project panel on the left-hand side of the screen.
To add your shape to the timeline, simply click and drag it onto the timeline. Just like a text object, you can resize your shape to fit the length that you want. With this simple process, you can quickly and easily add shapes to your video projects, giving them a professional and polished look. We’ll discuss the second method of drawing shapes in Adobe Premiere Pro below.
2). By using Essential Graphics
The second method to add shapes in Adobe Premiere Pro is a bit different but just as simple.
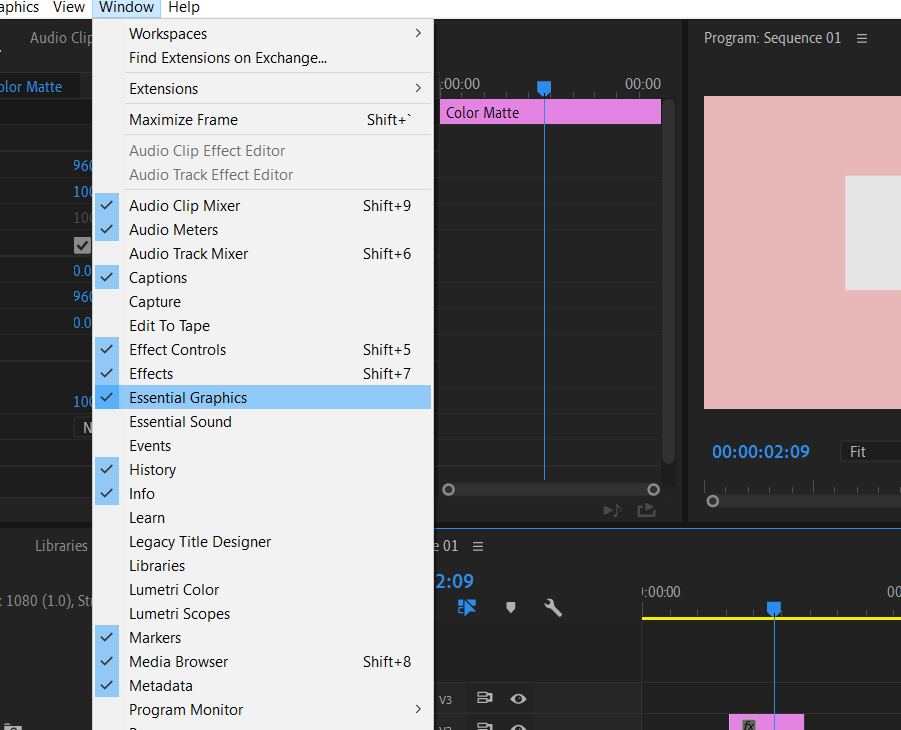
- To begin, navigate to the “Window” menu at the top of the screen
- Look for “Essential Graphics”. Make sure it’s ticked, and a menu will appear on the right-hand side.
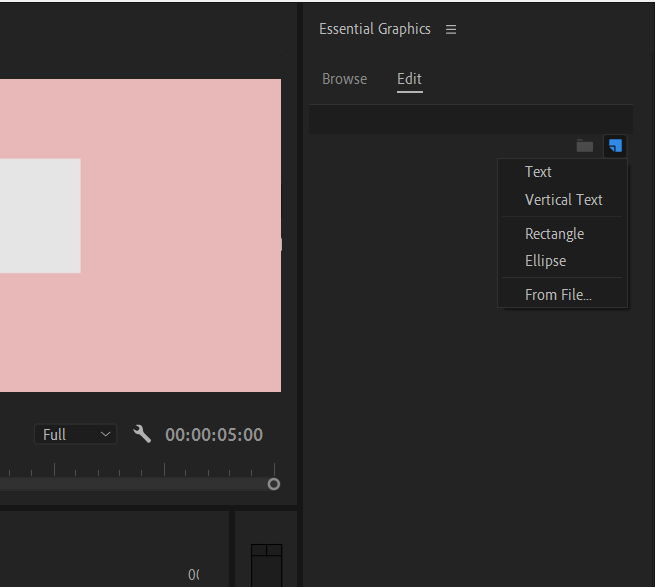
- Under “Essential Graphics”, go to “Edit” and click on the folded page icon that says “New Layer”.
- This will bring up a list of options including text, vertical text, and rectangle.
- To draw a rectangle, simply click on the rectangle option, and it will be added to the timeline.
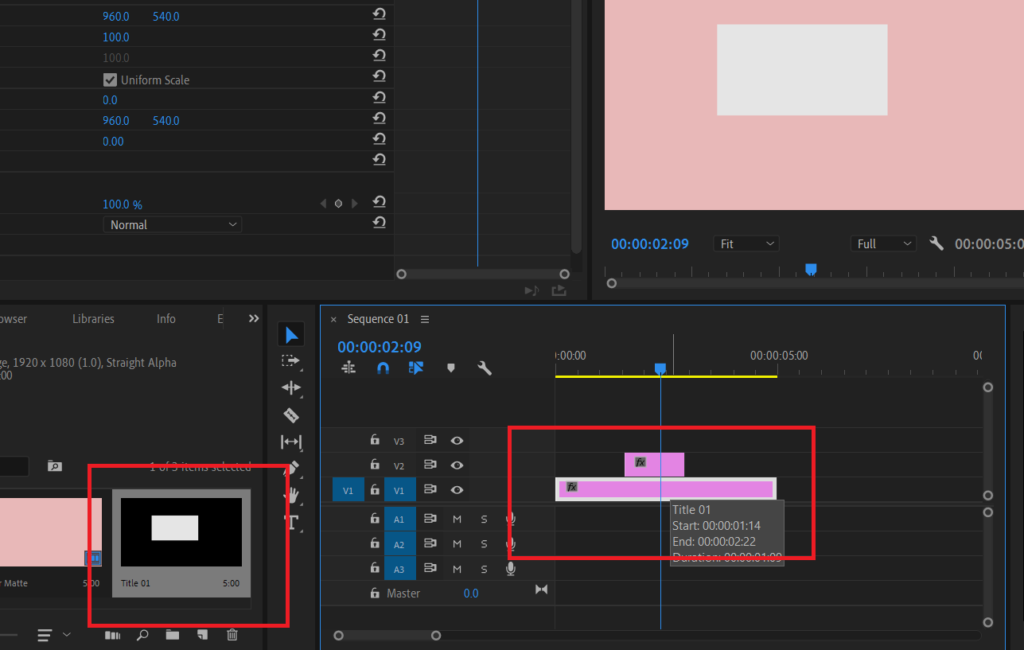
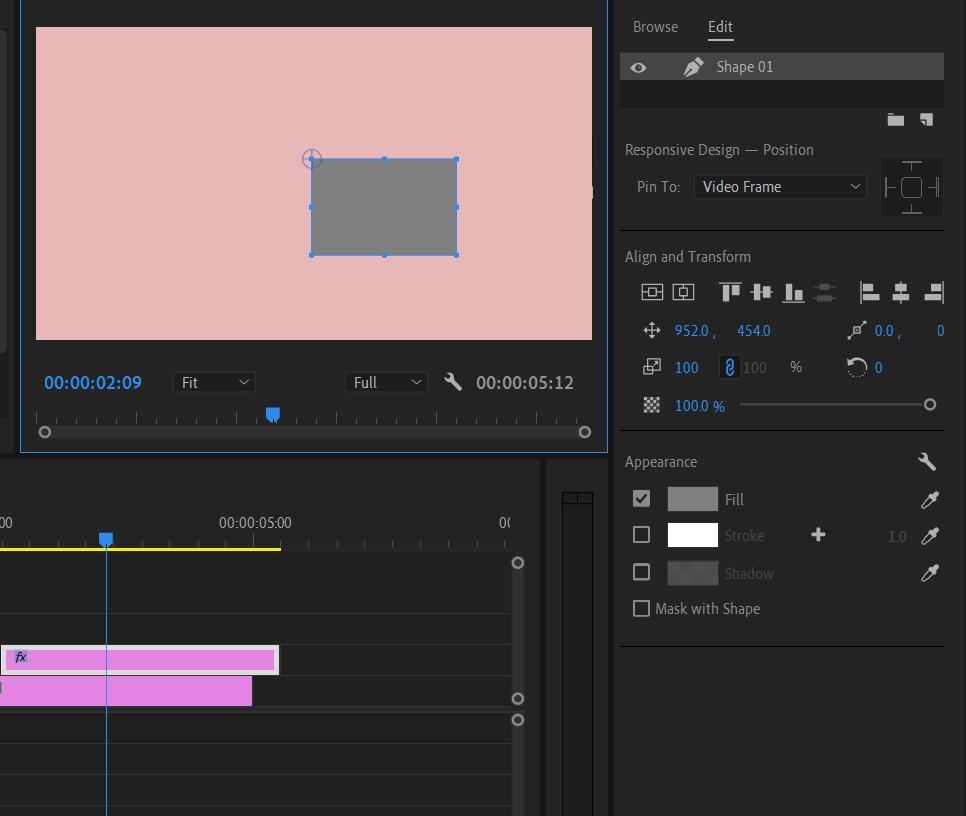
Once you have added a shape to your timeline, you can easily resize it by clicking and holding on the corner and dragging it to your desired size. With this second method, you can make it a square or rectangle and adjust it according to your needs.
However, it’s worth noting that the number of shape options available in the Essential Graphics menu may be limited compared to the Legacy Title tool. But despite this limitation, you can still create visually appealing shapes and graphics for your videos.
And that’s all there is to it! With these two methods, you can add shapes to your Adobe Premiere Pro timeline and make your videos stand out. Give them a try and see how they work for you.
How to circle crop video in Premiere Pro
If you’re looking to create a circle shape mask on your video or image using Premiere Pro, there are two ways to go about it.
1. Creating Circle Crop Video Using Effect Controls
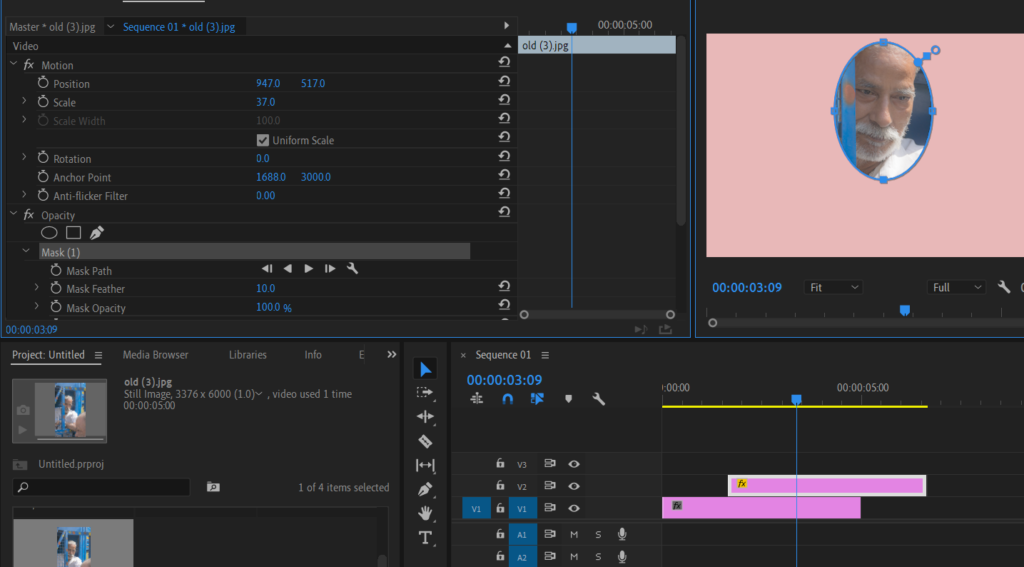
One common method is to use the “Effects Control” panel on the left side of the screen. Under the opacity option, you’ll see an icon that looks like a circle. Simply click on this and it will create a circle shape mask on the selected video or image in the timeline.
The advantage of this method is that you can easily drag the circle to wherever you want it on the program monitor. However, the main drawback is that the circle may not be a perfect shape.
The first method of creating a circle mask in Premiere Pro may not always result in a perfect circle, which can be a drawback.
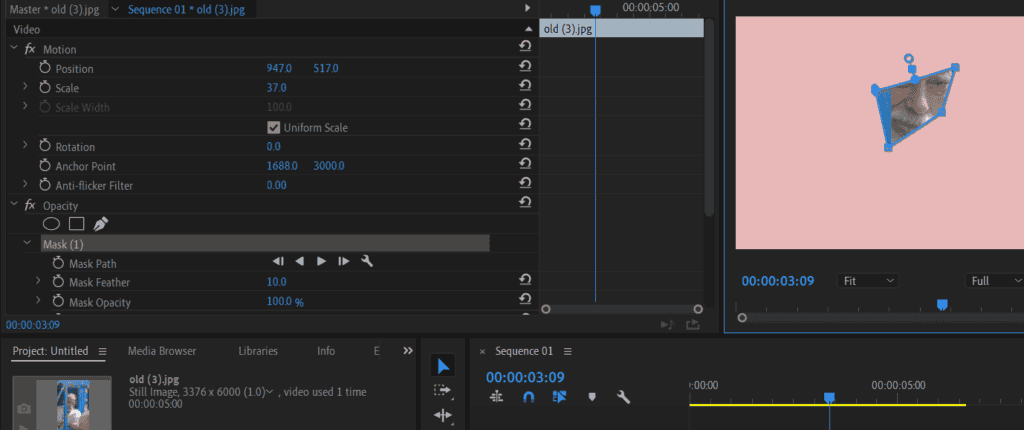
However, there is a benefit to using this method as it allows for the creation of any kind of shape, including a freehand bezier shape. This can be useful for creating unique and custom shapes. But, it should be noted that freehanding the shape can make it difficult to replicate across different videos and projects.
2. Using an effect known as “Circle”
In Premiere Pro, there is a second and better method to create a circle crop effect on your video. To do this, follow the steps:
- Head over to the effects panel and search for an effect called “circle”.
- You can find this under the “Obsolete” option.
- If not in “Obsolete” it can be in the “Generate” depending on the version you are using.
- Simply click and drag this effect onto your clip, but initially, it won’t look like much.
- However, you can switch a few parameters in the “effect controls” to get the desired effect. In the blending mode, change it from “none” to “stencil alpha”.
- This will create a perfect circle crop effect on your video, which is a much better option than using the circle shape mask.
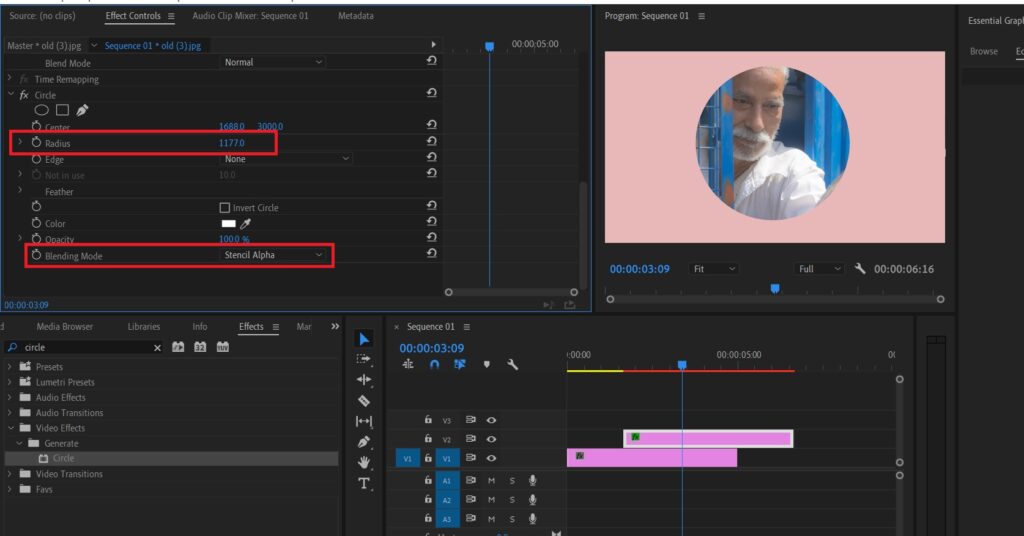
After adding the “Circle” effect from the effects panel to the selected clip, you can adjust the size and position of the circle using the parameters in the “Effect Controls” panel.
By extending the radius and changing the center of the circle, you can reframe your image. You can also click and drag the center of the circle to adjust its position on the image. After reframing, you can use the parameters under “Motion” to position the framed circle anywhere you want in the frame.
Adding a stroke to your circle crop video
Now, we’re going to learn how to add a stroke to the circle we created earlier in Premiere Pro. To do this, we’ll need to go back to the effects panel at the bottom left and search for the “paint bucket” effect.
Once we find it, we can click and drag it onto our clip. At first, it might look a little crazy, but don’t worry, we just need to adjust a few more parameters in the Effect Controls panel.
For the “fill selector” drop-down menu option, we need to select the alpha channel.
Then, in the “stroke” drop-down menu, we can select the “stroke“. Initially, the stroke may be hard to see, but we can adjust its size by selecting “stroke width” and setting it to the desired value.
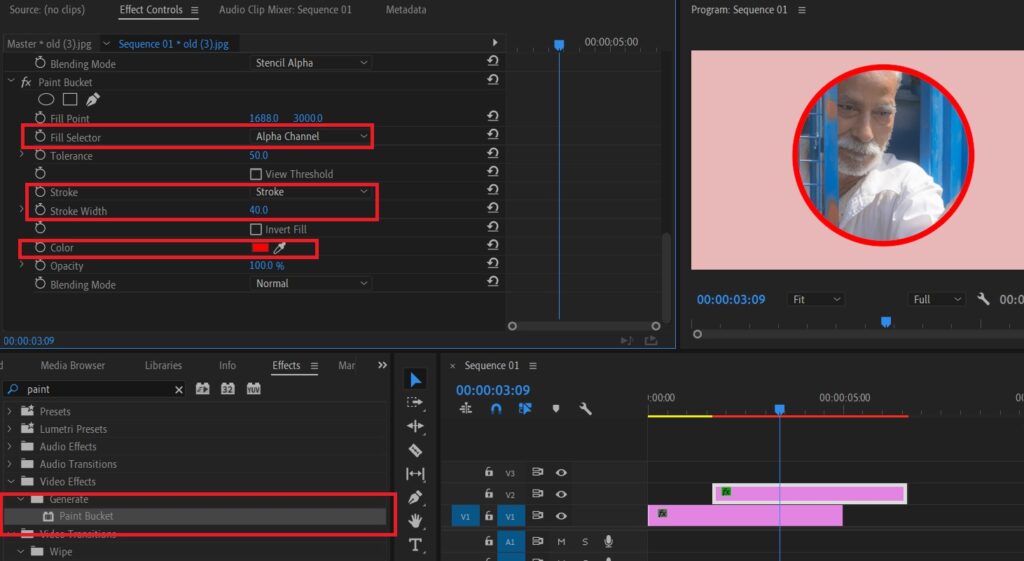
To add some finishing touches to the circle crop effect, you can customize the stroke color and add a drop shadow to make the image or video stand out. To change the stroke color, simply navigate to the “Color” option in the “Effect Controls” and select the desired color.
Additionally, you can add a drop shadow effect by going back to the effects panel and searching for “drop shadow”. Drag the effect onto your clip and adjust the settings to your liking. With these final touches, your circle crop effect is complete and your image or video is now framed in a perfect circle within Premiere Pro.
How to animate shapes in Premiere Pro
Now, we will discuss how to simply animate shapes in Premiere Pro.
- To begin, open a new project by going to File>New>Project.
- Next, import the video that you want to use.
- Then, go to File>New and Legacy Title and click OK in the pop-up window.
- Draw a shape in the dialogue box that appears.
- If you are unable to see the shapes options, you will need to enable those tools by clicking on the three horizontal lines and checking the “properties” and “tools” options.
- After you have drawn a shape in the dialogue box sucessfully, you can also adjust its color or opacity as desired. After closing the shape, it will appear in the project window.
- To add it to the timeline, simply drag and drop it onto the timeline, where you can adjust its length by dragging its sides.
- To animate the shape, select the shape layer (which will be named as title) on the timeline, and go to Effect Controls on the left side.
- If Effect Controls is not visible, open it from the “Window” menu and select “Effect Controls”.
- To add movement to your shape, position the playhead where you want your animation to start and add a keyframe by clicking on the stopwatch icon next to Position under the Motion menu in the Effect Controls panel.
- This keyframe represents the starting point of your animation.
- Then, move the playhead to the point where you want your animation to end, and adjust the position of the shape by changing the value under Position in the Effect Controls panel.
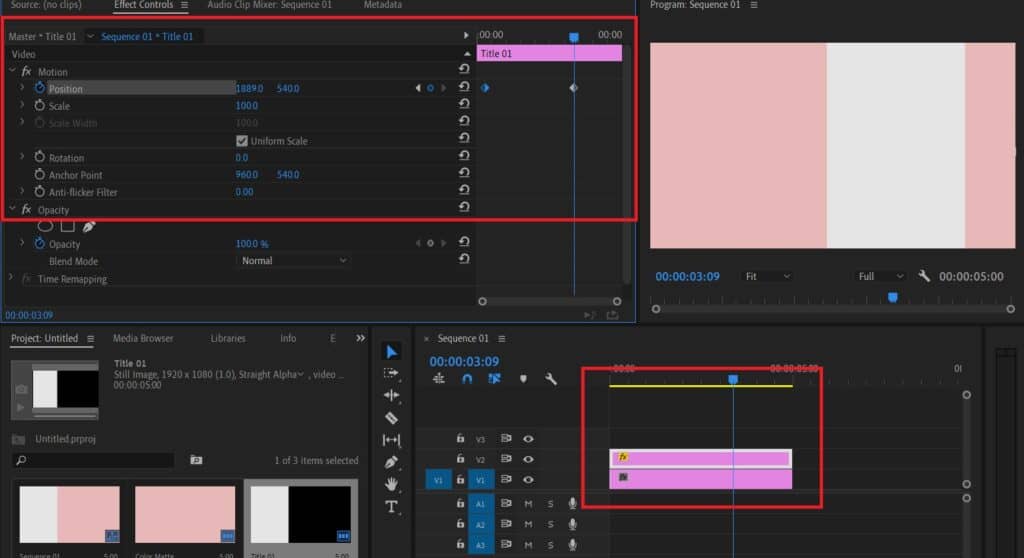
This will automatically add another keyframe, representing the end point of your animation.To make your animation faster, you can select the diamond-shaped keyframes under the “Effect Controls” panel and move them closer together. This will cause the shape to move more quickly between the two positions. If you want to make further changes to your shape, simply double-click on the title in the timeline to open the shape editor and make any necessary adjustments.
Conclusion
In conclusion, it is very simple to add shapes in Premiere Pro. It can help you to enrich your video production with creative elements.
So, that’s how you can add shapes to your videos or images in Premiere Pro! Whether you want to use a circle mask, a circle effect, or other tools, there are plenty of options available to help you achieve the look you want. For more of such informative content, read more of our articles!