Hi, I’m Salik, the author of FilmmakingElements.com. I have been a filmmaker for over 10 years. I am also a certified DaVinci Resolve Trainer and I have used DaVinci Resolve for many of my projects. In this article, we are teaching how to Export 5.1 Audio From Davinci Resolve.
After completing the edit and color grading process, it’s common to receive a 5.1 audio mix to add to your timeline before exporting your final master. However, this can raise some questions.
How do you deal with 5.1 audio? And if you’re given separate tracks and streams, how do you combine them so that DaVinci Resolve recognizes them as a surround track?
Fortunately, exporting 5.1 audio from DaVinci Resolve is a straightforward process.
Well, let’s talk about that in this article.
Export 5.1 Audio From Davinci Resolve (2 Ways)
1. If you get a 5.1 mix one audio file
First, head to the Media Pool and select the 5.1 audio folder from your desktop. Once you’ve located the folder, switch to List View to view all of the files.
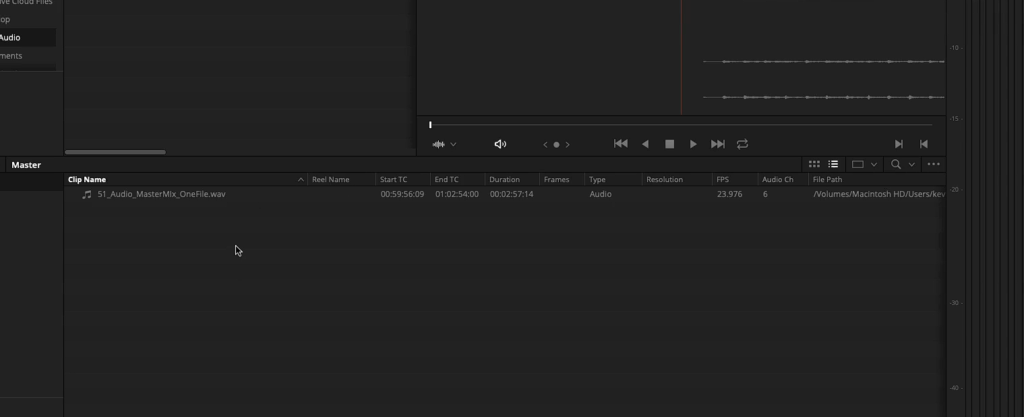
Ideally, you’ll want to have all of your 5.1 tracks embedded into one audio file. This makes the process much smoother and easier to manage. Having to deal with separate tracks and streams can be cumbersome and time-consuming.
So, take a look at your audio files and see if you have a single file with all the 5.1 tracks embedded. If you do, simply bring that file into your project.
Before bringing in your 5.1 audio files, it’s essential to understand how they are composed and how to set up your project correctly. To understand it better and visually, I opened the same 5.1 mix in Adobe Audition to see all the channels.
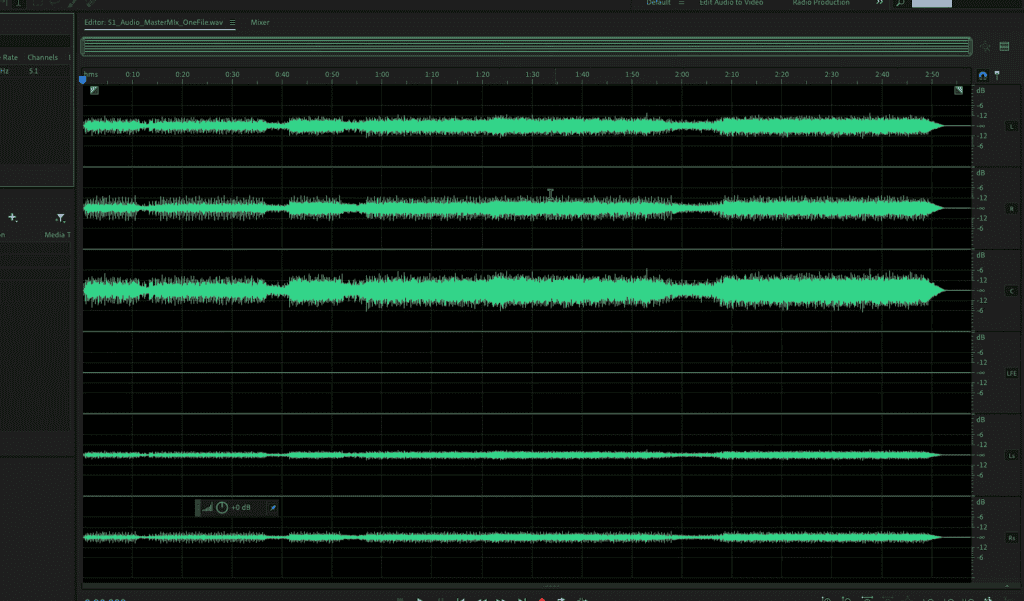
By understanding the composition of 5.1 audio tracks and using tools like Audition, you can set up your DaVinci Resolve project for 5.1 audio effectively. This will make the editing process much smoother and allow you to export a final project with high-quality surround sound.
Now the order of those six channels, I’ll say in North America, is left, right, center, sub, left surround, and right surround. One thing to note is that the sub-channel may be blank in some cases, and that’s perfectly fine. It’s not always necessary to include a subwoofer in your audio mix, and some projects may not require it.
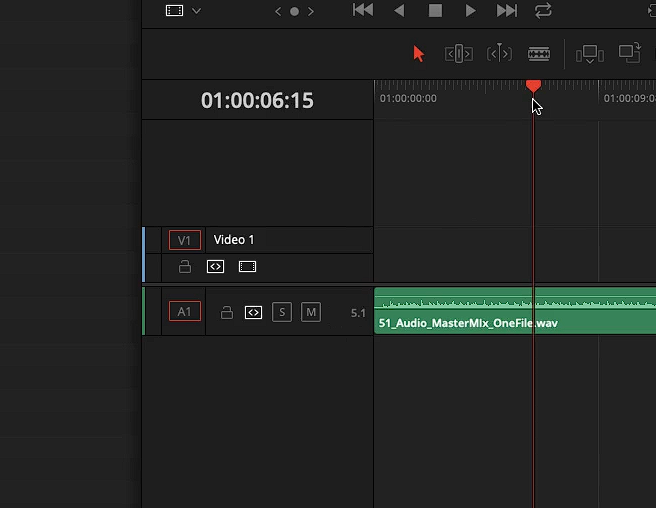
So let’s just head back into Resolve, Ideally, you would be given a 5.1 audio track that you can simply drag and drop into your timeline. Resolve will recognize it as a 5.1 audio track and set it up accordingly. However, there’s one problem that you will encounter.
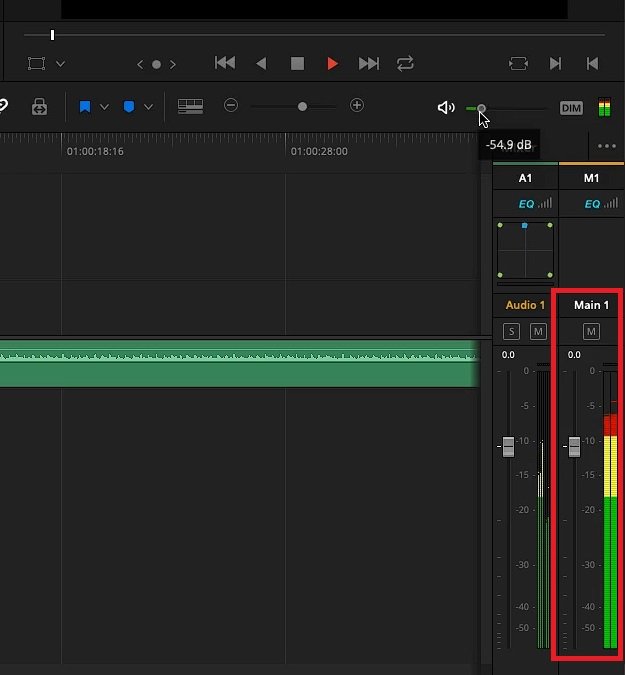
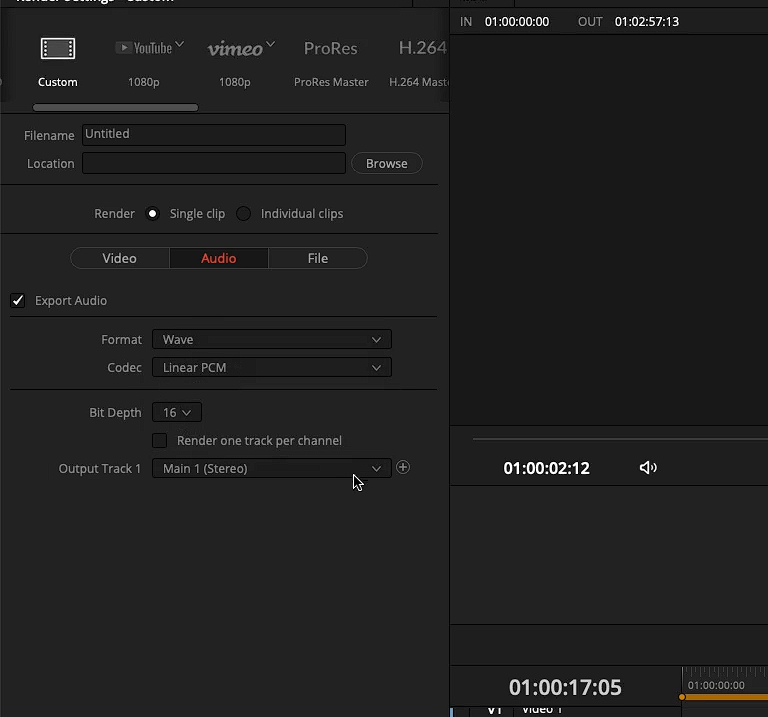
You will encounter the issue of only hearing stereo output, which you can see on the right-hand side of your timeline in the “Mixer”. Also if you go to the Delivery page, and go to the “Audio” section, you will see that your “Output Track Mix 1” is still set to “Bus 1 Stereo” audio.
To resolve this issue, you need to manually set the bus channel to 5.1. By default, Resolve may not recognize that you’re working with a 5.1 audio track, so you need to tell it explicitly that you want to output in 5.1. This will ensure that your final output accurately reflects the surround sound experience you intended for your audience.
By default, those channels are stereo.
Switching Bus Format to 5.1 In Davinci Resolve
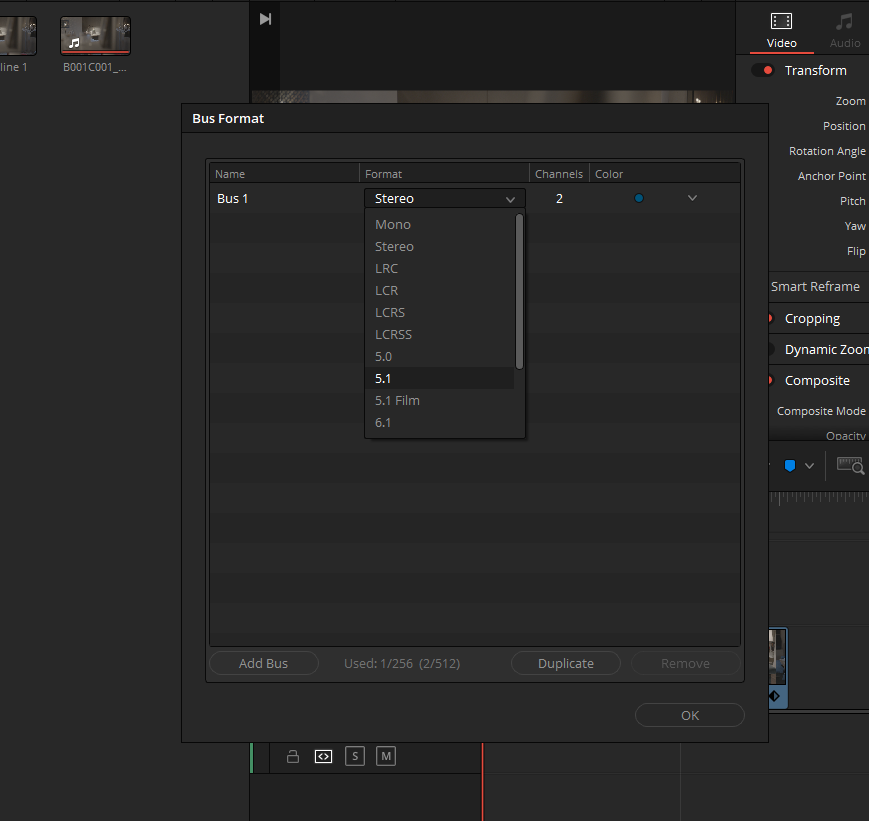
- To switch the output bus channel from stereo to 5.1 in Davinci Resolve, we need to navigate to the Fairlight dropdown menu at the top and select “Bus Format”.
- By default, “Bus 1” is set up to be “Stereo”, but we can change it to “5.1”.
- This can be done by selecting the 5.1 option from the dropdown menu.
- Once the format has been changed, we can see the 5.1 audio tracks in the mixer on the timeline on the right-hand side.
- If the mixer is not visible, we can click on the “Mixer” button on the top right corner to make it visible.
- When we switch from stereo to 5.1, we can see that we now have six tracks in total for the 5.1 audio configuration.
Channel Order Difference Between 5.1 and 5.1 Film
Now you might be thinking to yourself, what’s the difference between “5.1” and “5.1 Film”? The order for the “5.1” mix is left, right, center, sub, left surround, and right surround. The order for the “5.1 Film” mix is, left, center, right, left surround, right surround, and sub. So you can see the format is actually different.
Now like I said, I’m talking about North American film and television right now, and I’m dealing with 5.1. Even when I do stuff for digital cinema, I’m using the standard 5.1 layout as well.
Okay? As soon as I switch over to 5.1, I can say okay, I don’t even need to know anything about 5.1 mixing. I can hit play, I can see all of those channels playing out in 5.1, in the mixer.
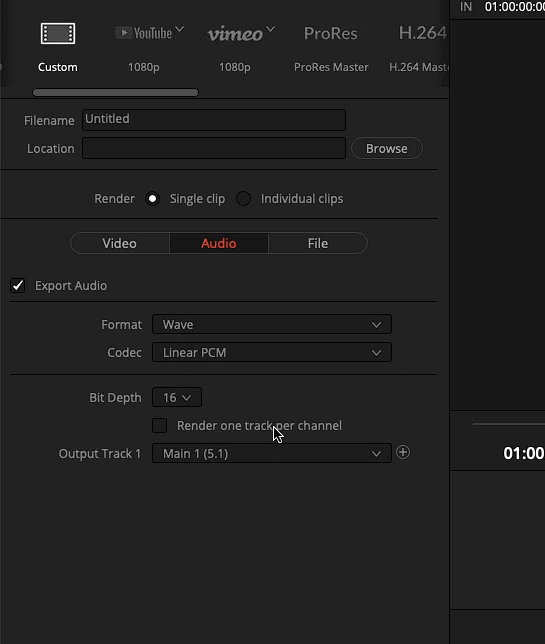
More importantly, when I switch over to the Deliver page, go to Audio, if you have a 5.1 mix on the timeline. Davinci Resolve will automatically shift to “Main 1 (5.1)” in “Output Track”.
You can now hit “Add to Render Queue” and “Start Render” to export 5.1 Audio From Davinci Resolve.
2. If you get all the channels of 5.1 as individual channels
Now let’s talk about the other most common scenario I basically run into when dealing with 5.1 audio tracks. And it’s probably more common than having one file that will have your entire master mix or your entire 5.1 embedded in.
In this scenario, we will bring in the actual individual stems into the media pool and then drag and drop them into our project. You’ll notice that there will be one channel per file. This is the scenario when a post house gives you a 5.1 mix, providing you with six individual channels.
Directions to place all six channels of 5.1 in order in Davinci Resolve
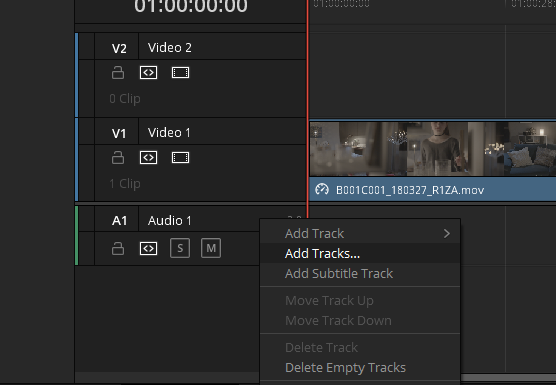
- Head back to your timeline, and right-click on the audio track that is there by default.
- Select “Add Tracks”
- In the “Audio Tracks” section, select 6 in “Number Of Tracks”
- Change “Audio Track Type” to “Mono”
- Hit “Add Tracks”
- Right-click on the audio track which is named “A1”
- Click on “Delete track”
- Now you will be left with 6 mono tracks to drag and drop your 6 individual audio stems.
- Now let’s head up to the media pool where you have your audio files and start dropping them in 5.1 order that is left, right, center, sub, left surround, and right surround.
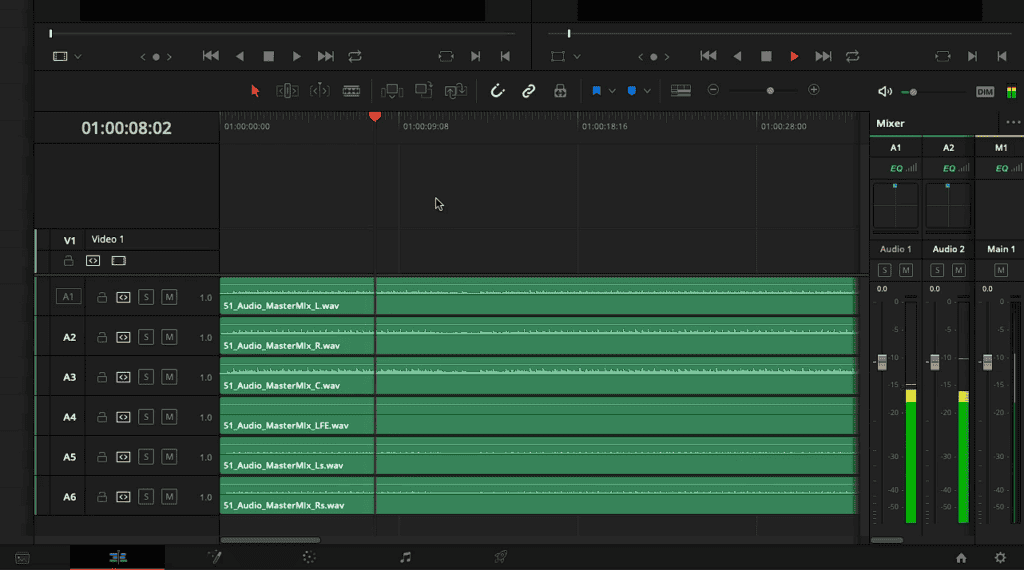
We will again encounter almost the same kind of problem in this case too. The problem with this is that when you press play, things might not go the way you want them to. You’ll see everything is actually now going through the center channel, in the “Mixer” at the right of your timeline, which is not what we want.
This is because these six individual channels need to be treated as a 5.1 channel. In other words, you need to tell Davinci Resolve to group them together and treat them as a single 5.1 audio track.
What we need to do is to link these audios together so that Resolve sees them like that.
Now it’s similar to what we had done before by going to the Fairlight dropdown menu at the top.
Link Group all six channels as 5.1 In Davinci Resolve
- Just head over to the Fairlight page, you don’t need to know anything about Fairlight
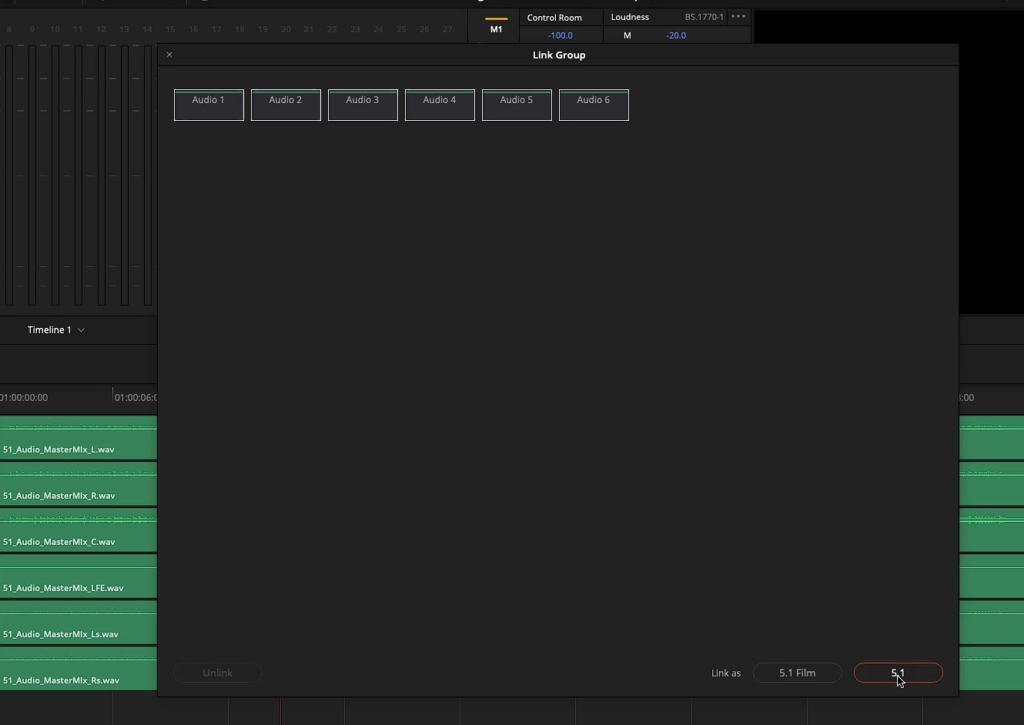
- Go to the Fairlight drop-down menu on top and select “Link Group”
- A window will appear that says “Link Group”
- It will show you all the audio channels that are on the timeline
- Select all the channels and click on the 5.1 button.
- This will let Davinci Resolve know that we want these channels to be treated as a 5.1 track.
- Once we have linked them together, we can go back to the Edit page and play the audio track, and we will see our 5.1 channels working correctly in the mixer.
- We can now output the audio in our final master file, ready for delivery wherever we need it to go.
- When you switch over to the Deliver page, go to Audio, Davinci Resolve will automatically shift to “Main 1 (5.1)” in “Output Track”.
- You can now hit “Add to Render Queue” and “Start Render” to export 5.1 Audio From Davinci Resolve.
Conclusion
In conclusion, working with 5.1 audio tracks in Davinci Resolve can seem overwhelming at first, but with the right knowledge and tools, it can be a straightforward process. It’s important to understand the configuration of the 5.1 channels and how to set the output bus to 5.1 in order to properly output the audio. Additionally, when working with individual stems, it’s crucial to link them together as a 5.1 track to ensure proper playback. By following these steps, you can create professional-grade audio mixes that are compatible with a variety of delivery platforms.