Welcome back to filmmakingelements.com! In this blog post, we’re going to dive into the process of desqueezing anamorphic footage in Davinci Resolve. While it may seem complex, this comprehensive guide will break down each step, making it easy to follow. We will focus on the most common anamorphic aspect ratio, 2.39:1, which is often referred to as cinemascope.
Factors to Consider for Anamorphic Footage
When working with anamorphic footage, it’s important to remember that the results depend on several factors:
- Anamorphic Lens Type and Stretch Factor: The type of anamorphic lens you have and its stretch factor will impact the final result. Common stretch factors include 1.33x, 1.6x, 1.8x, and 2x.
- Camera Sensor Aspect Ratio: The aspect ratio of your camera’s sensor will also play a role in the final outcome.
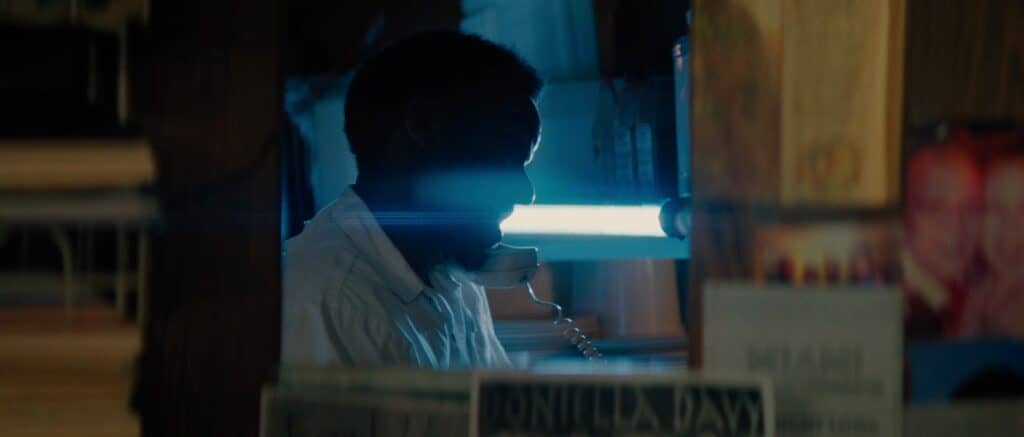
Using a full-frame anamorphic lens, such as the Vazen 50mm 1.8x anamorphic, can produce a full-frame anamorphic image. However, some cameras, like the Sony A7S III, do not have an open gate mode, so you will need to shoot in the full 16:9 aspect ratio of the sensor, which leads to a very wide image.
To desqueeze your anamorphic footage, you’ll need to crop the left and right sides of the image, which will be lost in the final aspect ratio. However, if you want to preserve more of the image, you can set your project to a wider aspect ratio, such as 2.66:1.
Setting Up Your Project in DaVinci Resolve for Anamorphic Footage
In this section, we’ll walk you through the process of setting up your project in DaVinci Resolve to work with anamorphic footage. We’ll cover how to open your project settings, determine your timeline resolution, and choose the correct aspect ratio.
Opening Project Settings
- Start by opening a new project in DaVinci Resolve.
- To access the project settings, press Shift+9.
Setting the Timeline Resolution
- Determine your desired aspect ratio and resolution for your project. A great resource for this is the Aspect Ratio Cheat Sheet on WeAreTheFirehouse.com. Here, you’ll find a list of aspect ratios and their corresponding resolutions.
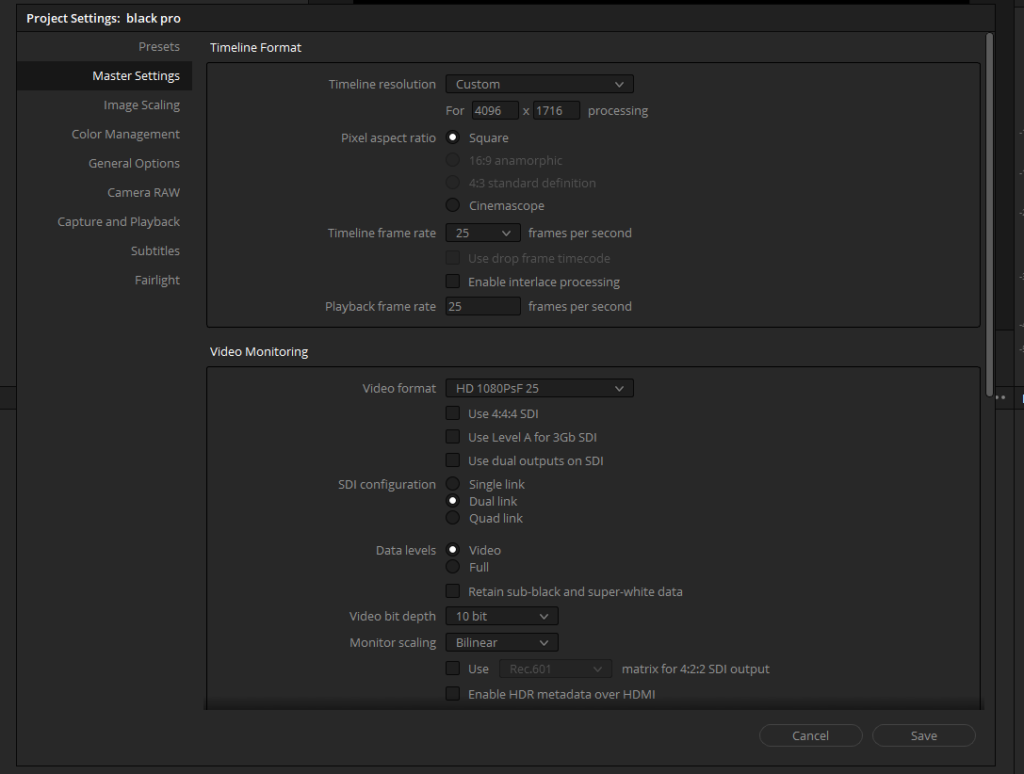
- For a Scope or 2.39:1 aspect ratio, the Cinema DCP 4K resolution is 4096×1716. Feel free to explore other aspect ratios and resolutions to find the best fit for your project.
- In the project settings, go to the Master Settings tab and set the Timeline Resolution to “Custom” and input your chosen resolution (e.g., 4096×1716).
- Save your project settings.
Adjusting the Pixel Aspect Ratio
While you might be tempted to change the “Pixel Aspect Ratio” in the project settings to “Cinemascope,” it’s best to leave this setting as “Square.” We’ll be adjusting the pixel aspect ratio on the footage itself later on.
Importing and Adjusting Anamorphic Footage in DaVinci Resolve
In this section, we’ll guide you through the process of importing your anamorphic footage into DaVinci Resolve and adjusting the clip attributes. This includes previewing your footage, changing the frame rate, and setting the correct pixel aspect ratio.
Importing Footage
- To access the Media tab, press Shift+2 or click on the Media tab button.
- Locate and preview your footage. You’ll notice that the project settings display a 2.39:1 aspect ratio, while your footage might be in a 16:9 aspect ratio. We will desqueeze them now.
- Import your footage by dragging and dropping it into the project. Do not change the project frame rate for now.
Desqueeze Anamorphic Footage In Davinci Resolve
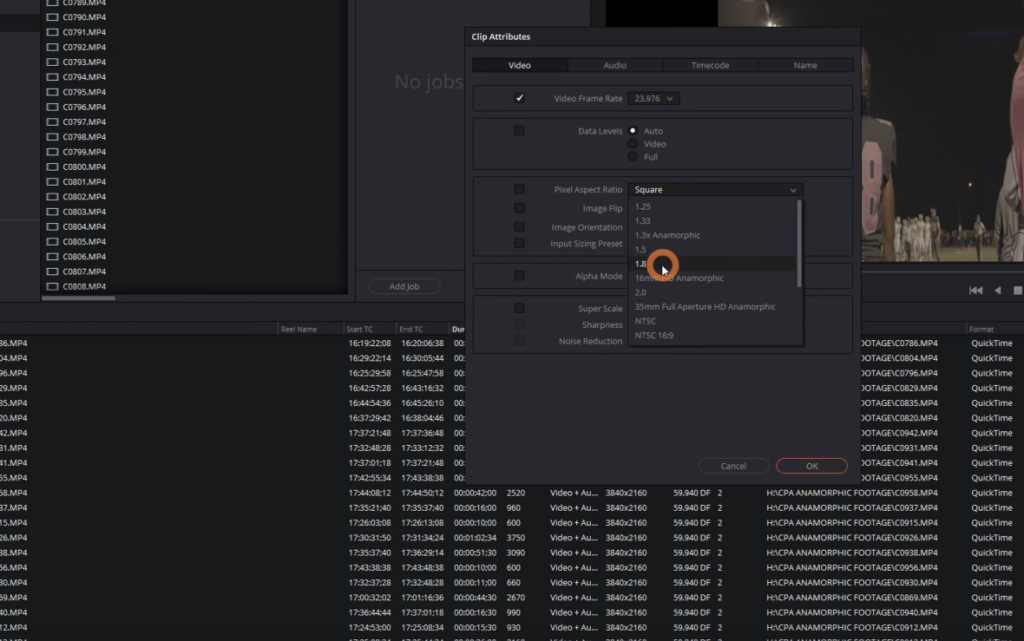
- Select all the imported clips right-click and select “Clip Attributes” to open the Clip Attributes window.
- Change the “Video Frame Rate” to your desired frame rate, such as 24 fps. This will automatically slow down your footage if it was shot at a higher frame rate, like 60 fps.
- In the Clip Attributes window, locate the “Pixel Aspect Ratio” drop-down menu. Choose the stretch factor that matches the anamorphic lens you used when shooting your footage (e.g., 1.8x).
- Click “OK” to apply the changes. Your footage will now be stretched out according to the selected stretch factor.
Creating a New Timeline
- To make a new timeline, select all the footage in your media tab
- Right-mouse click and select, Create New Timeline Using Selected Clips.
- Double-click the new timeline you just created to open it in the Edit tab.
By following these steps, you’ll have imported your anamorphic footage into DaVinci Resolve and adjusted its clip attributes to match your project settings. In the next part of our guide, we’ll cover how to work with your anamorphic footage in DaVinci Resolve, including cropping the image and fine-tuning your edits to achieve a stunning cinematic look.
Desqueeze Anamorphic Footage in DaVinci Resolve: Scaling and Reframing Tips
In this section, we will discuss how to desqueeze anamorphic footage in DaVinci Resolve by focusing on scaling and reframing your clips. These steps will help you achieve the desired look while maintaining your project’s aspect ratio.
Image Scaling Options for Desqueezing Anamorphic Footage
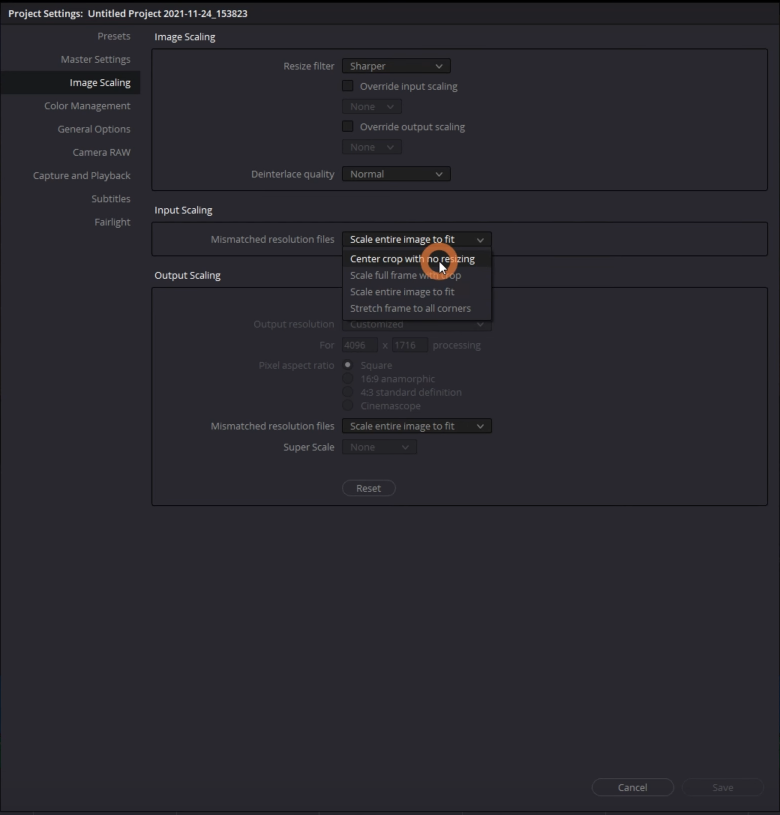
- To desqueeze anamorphic footage in DaVinci Resolve, navigate to your project settings and find the Image Scaling tab.
- Explore the various input scaling options available in DaVinci Resolve:
- Scale Entire Image to Fit (default): This option will scale your anamorphic footage to fit the aspect ratio of your project.
- Center Crop with No Resizing: Resolve doesn’t attempt to fit the footage into the aspect ratio, leaving it up to you to manually scale the footage.
- Scale Full Frame with Crop: Automatically scales the anamorphic footage to fill the frame, cropping as needed. This option works best for projects with settings and equipment similar to those mentioned in the transcript.
- Stretch Frame to All Corners: Stretches the anamorphic footage to fit the aspect ratio, which may not be suitable for all projects.
Zooming and Reframing Desqueezed Anamorphic Footage in DaVinci Resolve
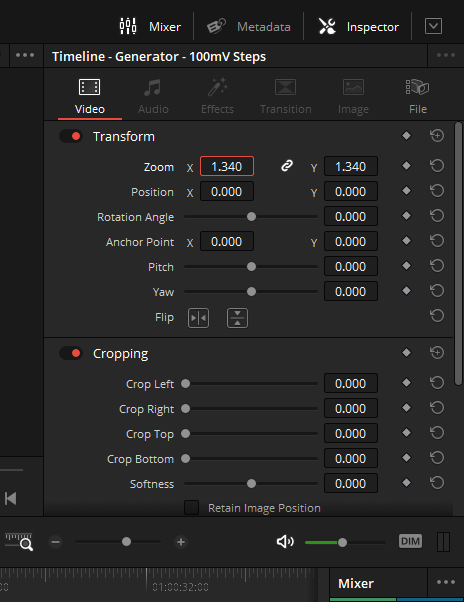
- If you need to zoom in on your desqueezed anamorphic footage to fill the aspect ratio, you can do so by adjusting the “Zoom” slider in the Inspector panel.
- To apply the zoom setting to all clips, copy the setting from one clip and paste it to the others using Alt+B (Option+B on Mac) to open the Paste Attributes box.
- With your desqueezed anamorphic footage zoomed in, you’ll have extra real estate on the left and right sides of the image. You can reframe your footage by adjusting the X-axis position in the Inspector panel. This allows you to fine-tune your composition and make the most of the additional image area.
Choosing the Right Scaling Option to Desqueeze Anamorphic Footage in DaVinci Resolve
Experiment with the different scaling options in DaVinci Resolve to determine which one works best for desqueezing your anamorphic footage. For instance, the “Scale Full Frame with Crop” option is recommended for projects using similar settings, cameras, and lenses as described in the transcript. However, the “Stretch Frame to All Corners” option may not work well for all projects, as it can overstretch the footage.
By following these steps, you’ll be able to desqueeze anamorphic footage in DaVinci Resolve, achieving the desired aspect ratio and composition for your project. Understanding the various scaling options and knowing how to zoom and reframe your footage will help you create a visually stunning and professional-looking final product.