DCP creation has become a trending topic since a lot of indie filmmakers are creating beautiful movies. In today’s ever-evolving world of digital cinema, filmmakers are constantly seeking cost-effective ways to produce and distribute their work.
One crucial aspect of the distribution process is creating a Digital Cinema Package (DCP), a collection of digital files that make up a movie, designed for playback on digital cinema servers. While this process can be expensive, there is good news for indie filmmakers – it’s possible to create a DCP in Final Cut Pro for free!
This article is a comprehensive guide that will walk you through the process of creating a professional-quality DCP using Final Cut Pro, for free.
Step 1: Exporting the Project in 4K with ProRes 4444 (Detailed Version)
To create a high-quality DCP for your film in Final Cut Pro, you’ll want to begin by exporting your project in 4K resolution and using the Apple ProRes 4444 codec. This ensures that your project maintains the best quality possible. Here’s a detailed step-by-step guide on how to do this:
- Ensure optimized original media:
- Open your project in Final Cut Pro.
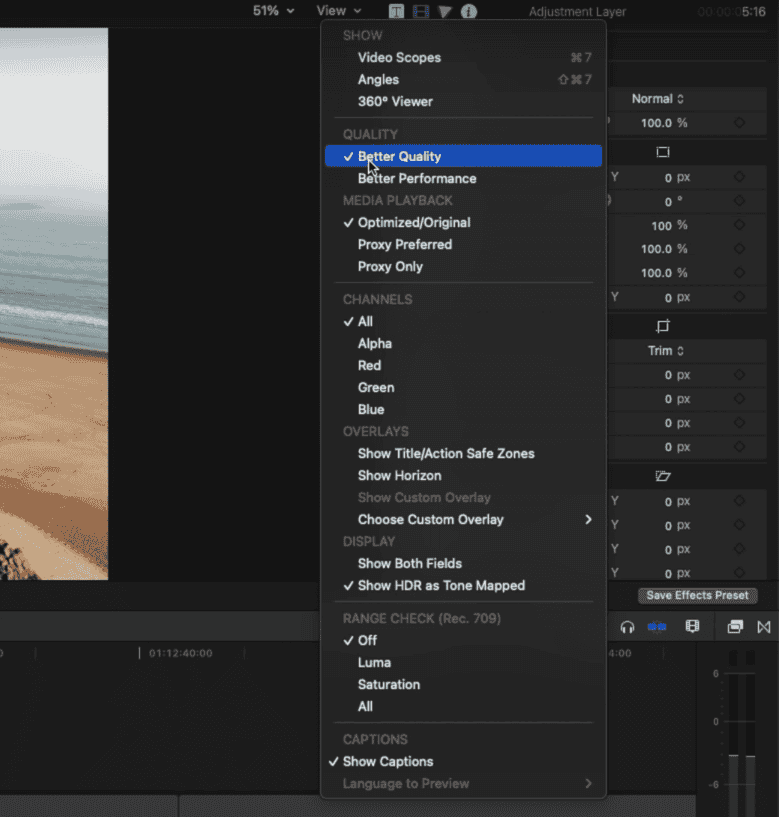
- Go to the “View” drop-down menu located in the top-right corner of the viewer.
- Go to “Media Playback.”
- In the media playback options, select “Optimized/Original.” According to Apple’s guidelines, this setting is essential for achieving maximum quality upon export. Additionally, you can choose “Better Quality” in the quality drop-down menu for added assurance.
- Check your project resolution and settings:
- Press Command + J to open your project settings.
- Click the “Modify” button to view and change your project settings.
- Make sure your project resolution matches your video resolution.
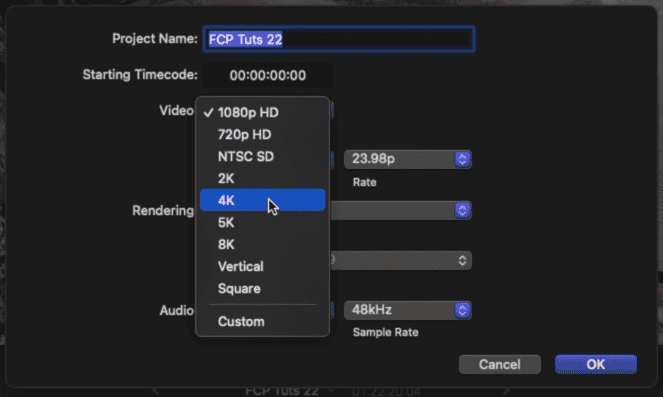
- Change the project resolution to 4K:
- Make sure you are set to 4K resolution for video and project resolutions.
- To do this, click the “Modify” button in the project settings window.
- Under “Video,” select the appropriate 4K resolution for Format and Resolution.
- Also make sure, 24p is selected in the “Rate” drop-down menu. It is very essential that your project is exported at 24 fps, since most projectors across the globe support it, making it easier to send your film to film festivals confidently.
- Select the timeline area to export:
- Go to the beginning of your project on the timeline.
- Press “I” on your keyboard to set the in point.
- Move to the end of your project on the timeline.
- Press “O” to set the out point. This process selects the entire timeline for export.
- Create a new export destination:
- Click the export icon (a square with an upward arrow) located in the top-right corner of the workspace.
- Click “Add Destination” at the bottom of the destinations list.
- In the “Destinations” window, drag “Export File” from the list on the right to the destinations bar on the left.
- Rename the new destination according to your preference by right-clicking on it and selecting “Rename.”
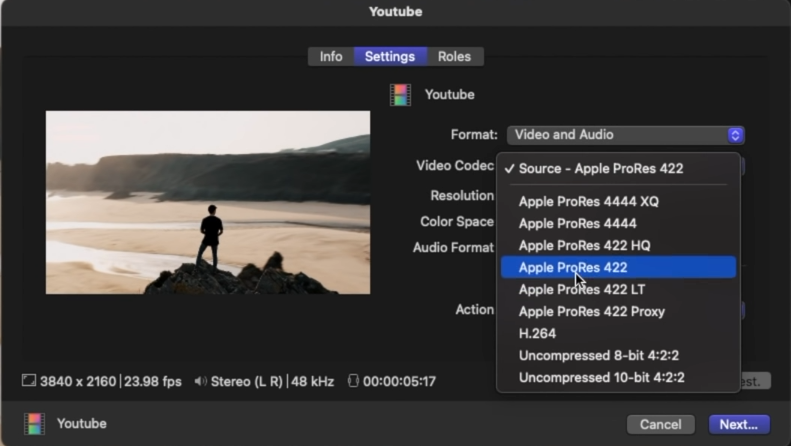
- Adjust export settings:
- Go back to the export icon and click on the new export destination you created. From the drop-down menu.
- Select “Video and Audio” in the “Format” drop-down menu.
- For the video codec, choose “Apple ProRes 4444” from the “Video Codec” drop-down menu to ensure maximum quality.
- Select “Save Only” from the “Action” drop-down menu so that the file doesn’t automatically open in QuickTime after exporting.
- Export the project:
- Click “Next” to proceed to the save location window.
- Choose a location on your computer to save the exported file and provide a file name for the video.
- Click “Save” to begin exporting your project in 4K resolution and using the Apple ProRes 4444 codec.
By following these detailed steps, you’ll export your project in 4K resolution and using the Apple ProRes 4444 codec, which is an essential starting point for creating a DCP in Final Cut Pro. Once you’ve completed the export, you’ll have a high-quality video file that’s ready for further processing and conversion into a DCP format.
Step 2: DCP Conversion with DCP-o-matic
In this section, we will be discussing the second step in creating a Digital Cinema Package (DCP) using DCP-o-matic, a free software for DCP conversion. To begin with, we assume that you have already created a high-quality ProRes 4444 4K output of your project using Final Cut Pro, as discussed in the previous step.
DCP-o-matic can be downloaded from its official website. Once you have the software installed, follow the steps below to create a DCP.
- Launch DCP-o-matic and create a new job: When you open the interface, you won’t be able to do anything until you create a job. Click on the “File” menu on the top and then click “New” to create a new job. Name your job (e.g., Sample) and choose a location to save it, such as the desktop.
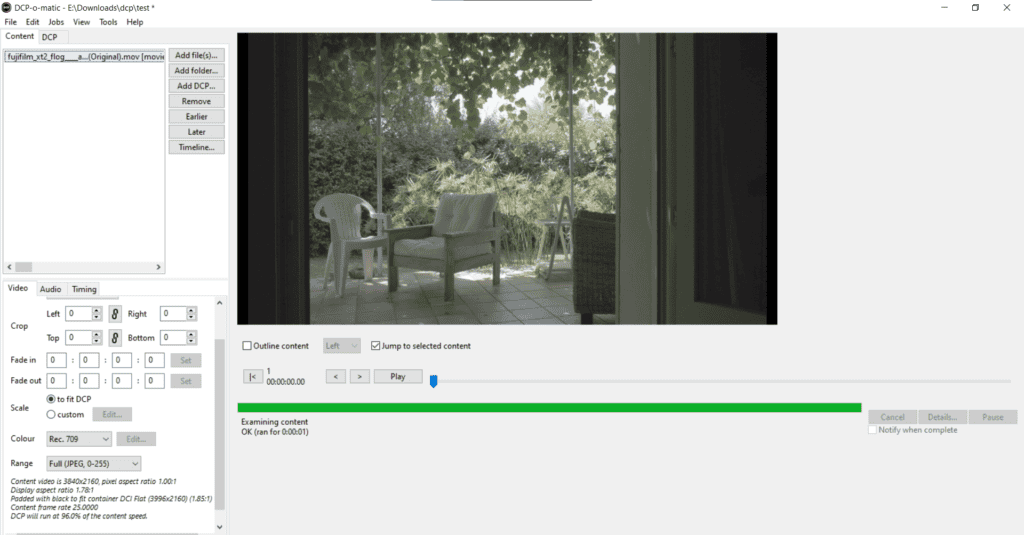
- Add the movie file: Click on the “Add file(s)” button to import the ProRes 4444 4K video file you created earlier.
- Configure the content settings: Once the movie file is loaded, you can examine your content on the right side in the viewer. This section allows you to preview your video and make adjustments to the aspect ratio, cropping, color space, and audio channels.
- Color space: Make sure to set the color space to match your source material. For most projects, this should be set to Rec. 709.
- Audio channels: Move to the Audio tab. If your video has stereo audio, you should see two audio channels (left and right) in the audio section. If you have a 5.1 surround sound mix, you will see additional channels for the center, subwoofer, and surround speakers.
- Configure the DCP settings: Next, click on the “DCP” tab on the top to adjust the DCP-specific settings.
- Name and content type: Check the “Use ISDCF name” box. Choose the appropriate content type, such as “trailer” or “feature.”
- Reel, encryption, and container: Select “Single reel” and make sure “Signed” is checked and “Encrypted” is unchecked. Set the container to “Flat.”
- Frame rate and resolution: Choose the appropriate frame rate and set the resolution to 4K.
- Audio settings: In audio, select Stereo or 5.1 from the Channels drop-down menu.
- Make the DCP: Once you have configured all the settings, click on the “Jobs” menu on the top and select “Make DCP.” A progress bar will appear, showing you the progress of the DCP creation process.
- Verify the DCP: After the DCP has been created, navigate to the folder where you saved the job (e.g., the desktop). You should see a folder with the name you gave to the DCP. Inside this folder, you will find another folder with the same name, which contains the actual DCP files (video MXF, audio MXF, and XML files). This is the folder you will need to copy to a properly formatted drive for use in a cinema projector.
- Copy the DCP to a properly formatted drive: To use the DCP in a cinema projector, you will need to copy the entire DCP folder (containing the video MXF, audio MXF, and XML files) onto a properly formatted drive. Most cinema projectors use the EXT2 or EXT3 file system. You can use a software like Paragon ExtFS for Windows or Mac to format your drive to the appropriate file system.
- Test the DCP: Before delivering your DCP to a theater, it is crucial to test it on a professional cinema projector. This will ensure that your DCP is compatible and will play correctly without any issues. Arrange for a test screening with a local theater or use a DCP validation software to verify that your DCP is compliant with the required standards.
- Deliver the DCP: Once you have tested and verified that your DCP works correctly, you can deliver it to the theater or film festival. Make sure to provide them with clear instructions regarding the aspect ratio, audio format, and any other relevant information.
Creating a Digital Cinema Package using DCP-o-matic is a relatively simple process, but it requires careful attention to detail and thorough testing to ensure a successful playback experience. By following the steps outlined in this tutorial, you can create a high-quality DCP for your film project that will be compatible with professional cinema projectors.

Ending Notes
In addition to creating a 4K DCP, you can also opt for a 2K DCP, which is a more versatile choice for ensuring compatibility with various cinema projectors. A 2K DCP provides excellent image quality and is supported by a wider range of projectors, making it a highly recommended option for filmmakers who want to maximize the chances of their film being successfully screened in different theaters and film festivals.
Making a DCP in Final Cut Pro for free is a feasible and cost-effective solution for filmmakers who want to ensure their films are compatible with cinema projectors. By leveraging the power of Final Cut Pro and DCP-o-matic and some basic knowledge of the creation process, you can prepare your film for the big screen without breaking the bank.
We’d like to thank our readers for their interest in this topic and hope that the information provided has been helpful. Happy filmmaking!
- Also Read- Making DCP In Davinci Resolve (Updated)
- Also Read- Making DCP In Premiere Pro- Updated!
- Also Read- Desqueeze Anamorphic Davinci Resolve: Step-By-Step Guide