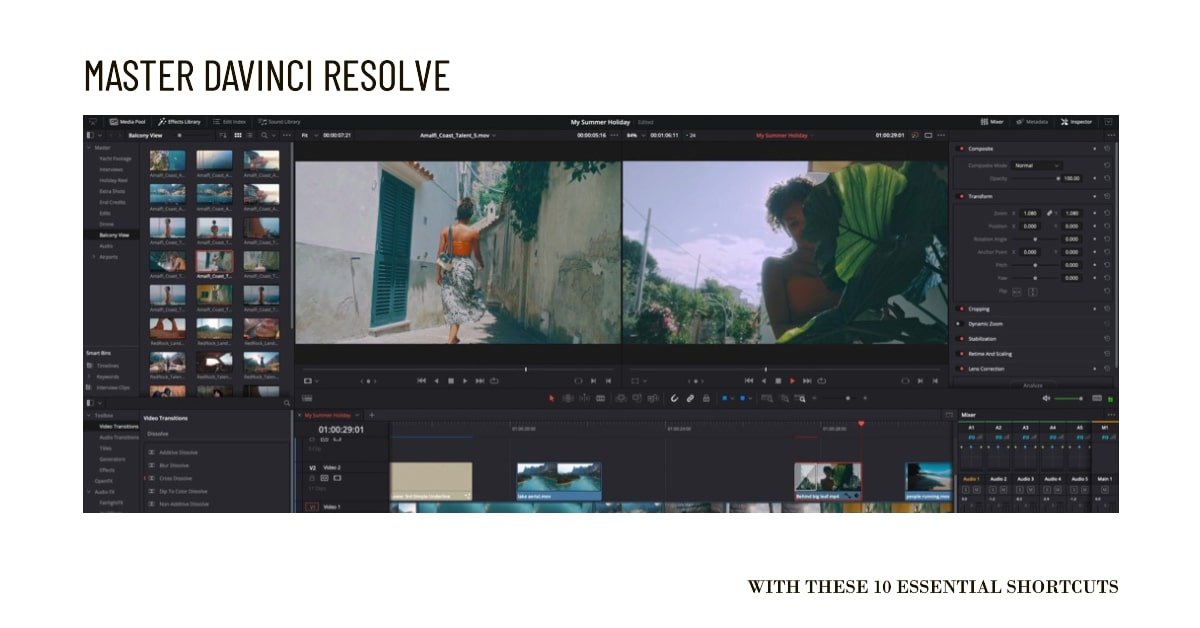
There’s a familiar adage that rings true for many, “there’s no shortcut to success.” While that may resonate in various walks of life, when it comes to DaVinci Resolve, it’s a whole different ballgame. Navigating the realm of video editing, I’ve found that the “Must-Know DaVinci Resolve Shortcuts” are game-changers in optimizing efficiency and productivity.
About two years ago, I transitioned from Premiere Pro to DaVinci Resolve. This shift, though challenging at first, unveiled the magic of these essential shortcuts. My editing dynamics involve my left hand seamlessly navigating the keyboard while my right hand is engaged with the mouse. It’s crucial for me to maintain this synergy and rhythm, ensuring that every tool I frequently use is readily accessible. Because let’s be honest, every micro-moment counts in the editing suite.
To make the most of your editing sessions, having these Must-Know DaVinci Resolve Shortcuts at your fingertips can be a lifesaver. This article encapsulates that wisdom, guiding you through the shortcuts that have been instrumental in my journey. Let’s turbocharge your workflow and empower you to focus more on the art of creating and less on the mundane. Dive in!
10 Must Know Davinci Resolve Shortcuts
1. Cutting Clips Efficiently: The Power of the ‘Ctrl + B’ Key
One of the foundational shortcuts that has transformed my daily editing routine in DaVinci Resolve is the ability to make a cut on all layers. It’s simple, yet incredibly efficient. Here’s how it works:
1. Cutting Across All Layers: Without selecting any specific clip, press the ‘Ctrl + B‘ key on your keyboard. This will instantly create a cut across every single clip located directly below the playhead. This is a game-changer when you’re dealing with multi-layered timelines and want a synchronized cut.
2. Cutting a Specific Clip: If you’re aiming to cut only a particular clip, select it first. Once selected, press the ‘Ctrl + B‘ key, and the cut will be applied exclusively to that specific clip.
The versatility of the ‘Ctrl + B‘ key empowers you to manage your clips with precision, whether you’re cutting one or multiple clips. It’s an essential shortcut that can significantly speed up your editing process.
2. Mastering the Ripple Tool: Enhancing Editing Efficiency
The art of editing often hinges on mastering the little tools that bring about big changes, and that’s precisely where our next shortcut comes into play. After discussing the razor tool, the next invaluable tool I rely upon daily is the ‘Ripple’ function. Let’s delve into its mechanics and utility:
1. Understanding Ripple: At its core, the Ripple function allows you to swiftly eliminate footage from either side of the playhead, extending to the next edit point. It’s akin to a selective sweep, ensuring you remove just what you intend to.
2. Ripple to the Left: To execute a Ripple to the left of the playhead, use the ‘Ctrl + Shift + [‘ key. Upon pressing it, everything from the left of the playhead up to the closest edit point is deleted. This is particularly handy when wanting to trim beginnings or extraneous footage swiftly.
3. Ripple to the Right: Similarly, to Ripple to the right of the playhead, use the ‘Ctrl + Shift + ]’ key. This will clear footage to the next edit point on the right side of the playhead.
A word of caution: The Ripple tool is powerful and efficient, but always ensure you’re aware of the content you’re removing. Precision is the name of the game in editing, and while the Ripple tool is a fantastic ally, it demands a watchful eye.
3. Controlling Playback Speed: The Essence of Efficient Editing

The third pivotal shortcut every DaVinci Resolve enthusiast should acquaint themselves with revolves around managing playback speed. Streamlining the video playback process can dramatically improve the efficiency of your editing workflow. Let’s dive into the specifics:
1. The Importance of Playback Speed: In the midst of cutting up a video or wading through countless frames, an optimized playback speed becomes a true asset. Imagine wanting to swiftly review or pre-visualize your edits – controlling the speed at which you review your footage can save both time and effort.
2. Traditional Playback Control: While the default playback mechanism is to press the spacebar, which plays your video at standard (1x) speed, the real magic lies in being able to adjust this speed on the fly.
3. Fast Forwarding: To speed things up and move forward at a brisker pace, USE the ‘fast forward’ function to the ‘L’ key. This allows me to quickly skim through familiar or redundant portions of the video.
54. Reverse Playback: Sometimes, we need to rewind and review. For those moments, the ‘J’ key comes to the rescue, taking your playback in reverse.
Mastering these playback speed shortcuts ensures you’re always in command of your footage, navigating effortlessly between clips and edits.
4. Seamlessly Adding Default Transitions: The ‘Ctrl + D’ Mastery
Navigating to the fourth cornerstone shortcut within DaVinci Resolve, we explore the convenience of introducing default transitions to our edits. A seamless transition can make all the difference in a video, bridging scenes effortlessly and enhancing the narrative flow. Here’s how you can do it swiftly:
1. The Art of the Default Transition: While there’s an abundance of transitions available, often, there’s that one go-to transition we find ourselves leaning towards repeatedly, be it a fade, crossfade, smooth cut, or any other.
2. Setting Up Your Preferred Transition: To earmark your favorite transition as the ‘default’, simply browse through the effects library. Click on the ‘Effects’ button on the top-left corner and browse through the ‘Video Transitions’ section. Once you’ve located your transition of choice, right-click on it and select ‘Set as standard transition’. By doing so, you’ll have the option to set it as your default transition, saving you precious time during the editing process.
3. Applying the Default Transition: With your desired transition now set as the default, every time you feel the need to infuse it into your edit, simply position the playhead at the intended edit point and hit ‘Ctrl + D’. Voilà! Your chosen transition will be smoothly applied.
5. Bridging the Gaps: The ‘Esc’ Key Shortcut in DaVinci Resolve
Navigating to our fifth essential shortcut for DaVinci Resolve users, we encounter a feature that’s a genuine time-saver, and one that I often found myself wishing existed in Premiere Pro. It’s the shortcut to obliterate all gaps in your timeline in one fell swoop. Let’s delve deeper:
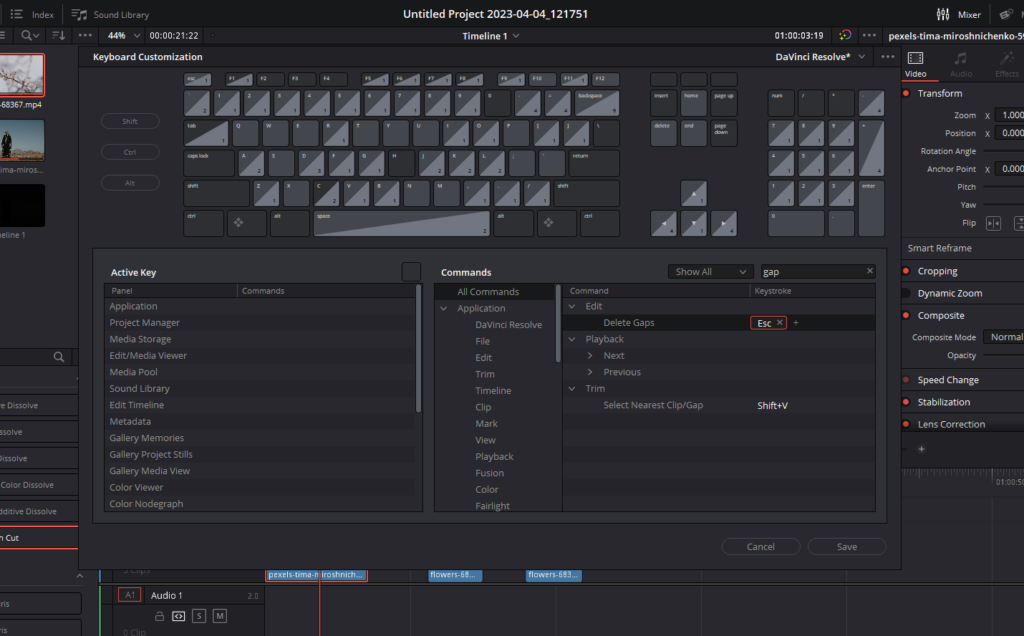
1. The Gap Dilemma: Gaps in your timeline can be unintentional pauses or disruptions that break the flow of your narrative. While they might seem trivial, when accumulated, these small spaces can become noticeable distractions in the final product. Now keep in mind by default there is no shortcut to do it. To enable it, follow the steps below:
- Click on ‘Davinci Resolve’ on the top-left corner
- In the menu, select ‘Keyboard Customization’
- In the search menu below the keyboard layout, type ‘Gap’
- From the search result, select ‘Delete Gaps’ and press the ‘Esc’ key to assign it.
2. Seamless Cleanup with ‘Esc’: I’ve mapped this gap-cleaning feature to the ‘Esc’ key. Though it’s an indispensable function, I purposefully assigned it to a key that’s within arm’s reach but not too easily accessible. The reason? It’s a powerful function, and I wanted to ensure I wouldn’t inadvertently activate it.
Once pressed, the ‘Esc’ key works its magic, swiftly identifying and eradicating all gaps present in your timeline. The result? A seamless, gap-free timeline where all clips are smoothly juxtaposed without any unintended interruptions.
6. Precision in Clip Selection: The Art of ‘Alt + Y’ in DaVinci Resolve

Venturing into the sixth essential shortcut in DaVinci Resolve, we delve deep into the realm of clip selection. It’s a tool that I constantly find myself gravitating towards, and for good reason. It’s not merely about the generic Alt + Y” to select everything; this is a step beyond, promising unparalleled precision in your edits.
1. The Power of Precise Selection: DaVinci Resolve takes clip selection to new heights, offering tools that are intuitive and incredibly precise. It’s not just about bulk selections but about the nitty-gritty details that elevate the quality of your edits.
2. Selecting Right of the Playhead: Ever wanted to select all clips, spanning all tracks, to the left of your playhead? Simply hit ‘Alt + Y, and like magic, every clip to the right is selected. It’s a feature that offers both speed and specificity.
7. Efficiency with Compound Clips: The ‘T’ Shortcut in DaVinci Resolve
Evolving our journey into DaVinci Resolve’s myriad of shortcuts, the seventh one stands out particularly for those editors who often work with compound or fusion clips. It’s all about swiftly accessing the detailed layers of your edits without the tedious process of multiple clicks. Let’s explore further:
1. The Compound Clip Conundrum: While compound and fusion clips offer a compact way to encapsulate multiple elements into a single clip, editing within these can sometimes become a cumbersome process. Typically, one would have to right-click on the clip and select ‘open in timeline’ to dive deeper into the layers. Now keep in mind by default there is no shortcut to do it. To enable it, follow the steps below:
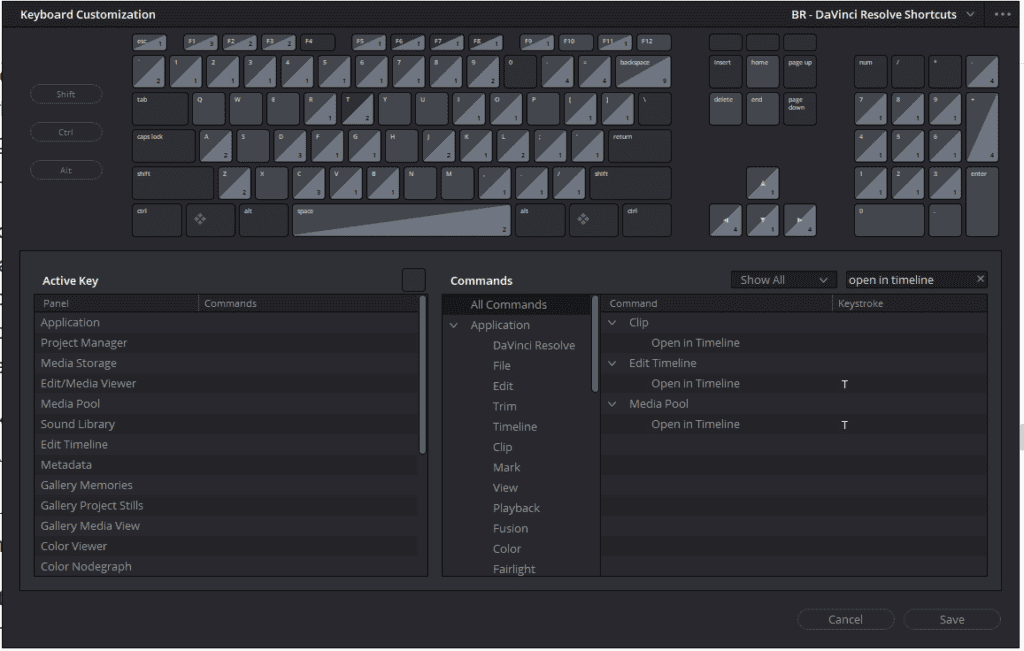
- Click on ‘Davinci Resolve’ on the top-left corner
- In the menu, select ‘Keyboard Customization’
- In the search menu below the keyboard layout, type ‘Open In Timeline’
- From the search result, select ‘Open In Timeline’ and press the ‘T’ key to assign it.
2. Enter the ‘T’ Shortcut: Instead of wading through context menus, DaVinci Resolve offers a swift alternative. By simply selecting your compound or fusion clip and pressing ‘T’ on your keyboard, you can immediately open it within the timeline. This not only saves you those extra clicks but also streamlines the editing process, ensuring that diving into compound clips feels like a seamless part of your workflow.
3. Time is of the Essence: While on the surface, this might seem like a minor convenience, think about the cumulative time saved when working on large projects or edits that involve numerous compound clips. Every second saved enhances your efficiency and allows you to focus more on the creative aspects of editing.
8. Mastering Markers: The ‘M’ Shortcut in DaVinci Resolve

Navigating through the intricate world of DaVinci Resolve’s shortcuts, our ninth pit stop emphasizes the importance of markers and how a simple shortcut can drastically amplify your efficiency. Drawing inspiration from Premiere Pro’s intuitive keybinds, let’s delve into the transformative power of the ‘M’ key.
1. The Role of Markers: In video editing, markers are indispensable tools, serving as placeholders or annotations to guide the editing process. Whether you’re leaving a note for your future self or collaborating with a team, markers keep everyone in sync, ensuring no detail gets overlooked.
2. Unleashing the ‘M’ Shortcut: In DaVinci Resolve, invoking the magic of markers is literally at the tip of your finger. A single press of the ‘M’ key adds a marker to your timeline. It’s instantaneous, simple, and keeps your workflow streamlined.
3. Doubling Down with ‘M’: While a single tap places the marker, DaVinci Resolve takes it a notch higher with a double tap. Press ‘M’ twice, and not only will the marker be placed, but its properties will also pop up, allowing you to input crucial notes or details directly. This ensures that every annotation is precise, relevant, and readily accessible.
4. Harnessing Familiarity: For those transitioning from Premiere Pro or juggling between multiple editing software, having familiar keybinds like the ‘M’ for markers helps reduce the learning curve, making the switch smoother and more intuitive.
9. Speedy Edits: Mastering Speed Controls in DaVinci Resolve

Diving deeper into the realm of DaVinci Resolve’s shortcuts, our tenth and final pit stop on this journey is all about speed controls. Especially vital for those with a penchant for dynamic edits, speed controls can elevate a sequence from ordinary to riveting. Let’s demystify this feature:
1. The Essence of Speed Controls: In the universe of video editing, speed ramping or controlling the pace of clips offers an added dimension to storytelling. Whether it’s to build tension, create smoother transitions, or emphasize specific moments, manipulating speed can be transformative.
2. Accessing Retime Controls with Ease: Wading through menus can be cumbersome, but not with the ‘Control + R’ shortcut. A quick tap opens up the retime controls, giving you immediate access to manipulate the pace. And when you’re done? Another ‘Control + R’ shuts it down, keeping your workspace clutter-free.
3. Clip Speed Adjustments: While I might not use this feature extensively, it’s undoubtedly valuable. The ‘R’ key offers you a gateway to the clip speed settings. With it, reversing clips or modulating their speed becomes straightforward. It’s worth noting that any changes made here aren’t immediately visible until you confirm them with an ‘okay’.
10. Export Project (.drp) – Ctrl + E
Coming to the 10nth on our ’10 Must Know Davinci Resolve Shortcuts’ list, The ‘Export Project’ shortcut, represented by the ‘Ctrl + E’ key combination, stands out as a game-changer in the DaVinci Resolve workflow. Here’s why:
- Swift Saving: Instead of diving deep into menu options, this shortcut offers a direct route to save your entire project as a DaVinci Resolve Project (.drp) file.
- Archiving & Sharing: Whether you’re looking to archive your project for future reference, or share it with fellow collaborators, ‘Ctrl + E’ ensures a smooth process.
- Transferring Projects: Need to work on another system? Use this shortcut to quickly prepare your project for a transfer.
- Safety First: Let’s face it, technology can be unpredictable. Regular backups using ‘Command E’ can act as a safety net, ensuring your hours of hard work are always protected.
Conclusion
Navigating the intricate world of video editing can be daunting, but the right tools and knowledge can significantly enhance efficiency and creativity. DaVinci Resolve, with its plethora of features, stands as a testament to this fact. This article aimed to shed light on the transformative power of key shortcuts and tools within the platform, ensuring a smooth and optimized editing process.
As we journey through the ever-evolving landscape of digital creation, it’s imperative to continually adapt and harness the full potential of the tools at our disposal. So, while the saying goes “there’s no shortcut to success,” perhaps in the realm of video editing, there just might be.