Hi, I’m Salik, the author of FilmmakingElements.com. I have been a filmmaker for over 10 years. I am also a certified DaVinci Resolve Trainer and I have used DaVinci Resolve for many of my projects. Today, we’ll go over the Cut Tab Vs. Edit Tab of DaVinci Resolve: 8 Surprising Differences. The distinction, at a glance, is that the Cut tab is geared toward speedy editing. It doesn’t have all of the minor features you could need if you’re working on a complicated video edit.
The Cut tab helps you go a little faster through your video editing process by reducing some clutter. On the other hand, if you need to accomplish more advanced tasks such as keyframing and animation, you may use the Inspector in the edit tab of DaVinci Resolve.
Cut Tab Vs. Edit Tab of DaVinci Resolve: 8 Surprising Differences
Here are the eight surprising differences in Cut Tab vs. Edit Tab of DaVinci Resolve:
1) Timeline in Cut Tab Vs. Edit Tab
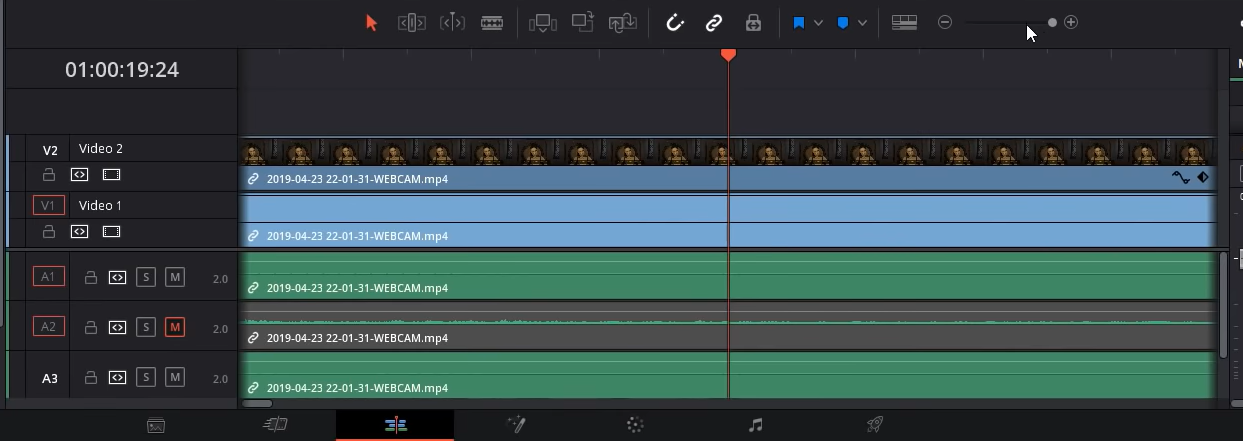
You’ll note that there is just one Timeline in DaVinci Resolve’s Edit tab when you look at the timeline. It’s possible to Zoom in and out of the Timeline or Zoom into individual frames. However, in the Cut tab of DaVinci Resolve, you have a significant advantage in that you can simultaneously view three timelines.
- Below the preview window, you’ll see the whole timeline. It’s worth noting that regardless of how many clips you have in your timeline, it will always display you the entire length of the timeline from beginning to end.
- Then, towards the bottom, you’ll find the main timeline, which will be utilized to make most cuts because it’s depicted on a second-by-second basis. So you can look at 6-7 seconds of video at any given moment, which is the appropriate length of time if you just want to make edits or trims to your clip.
- Now, if you make a slice with the ctrl+B shortcut, you can split a clip into two in the timeline, just like you can on the Edit tab. Then, you can enter trim edit mode by left-clicking on the edge of one of my clips and moving it back and forth. And this is when you will see the third timeline pop up in the top right below the preview window. Note that it’s about the number of frames you are adjusting simultaneously.
Also Read: How To Color Grade Blackmagic RAW (.braw) In Davinci Resolve+ Free LUTs
2) Adjusting the Clips
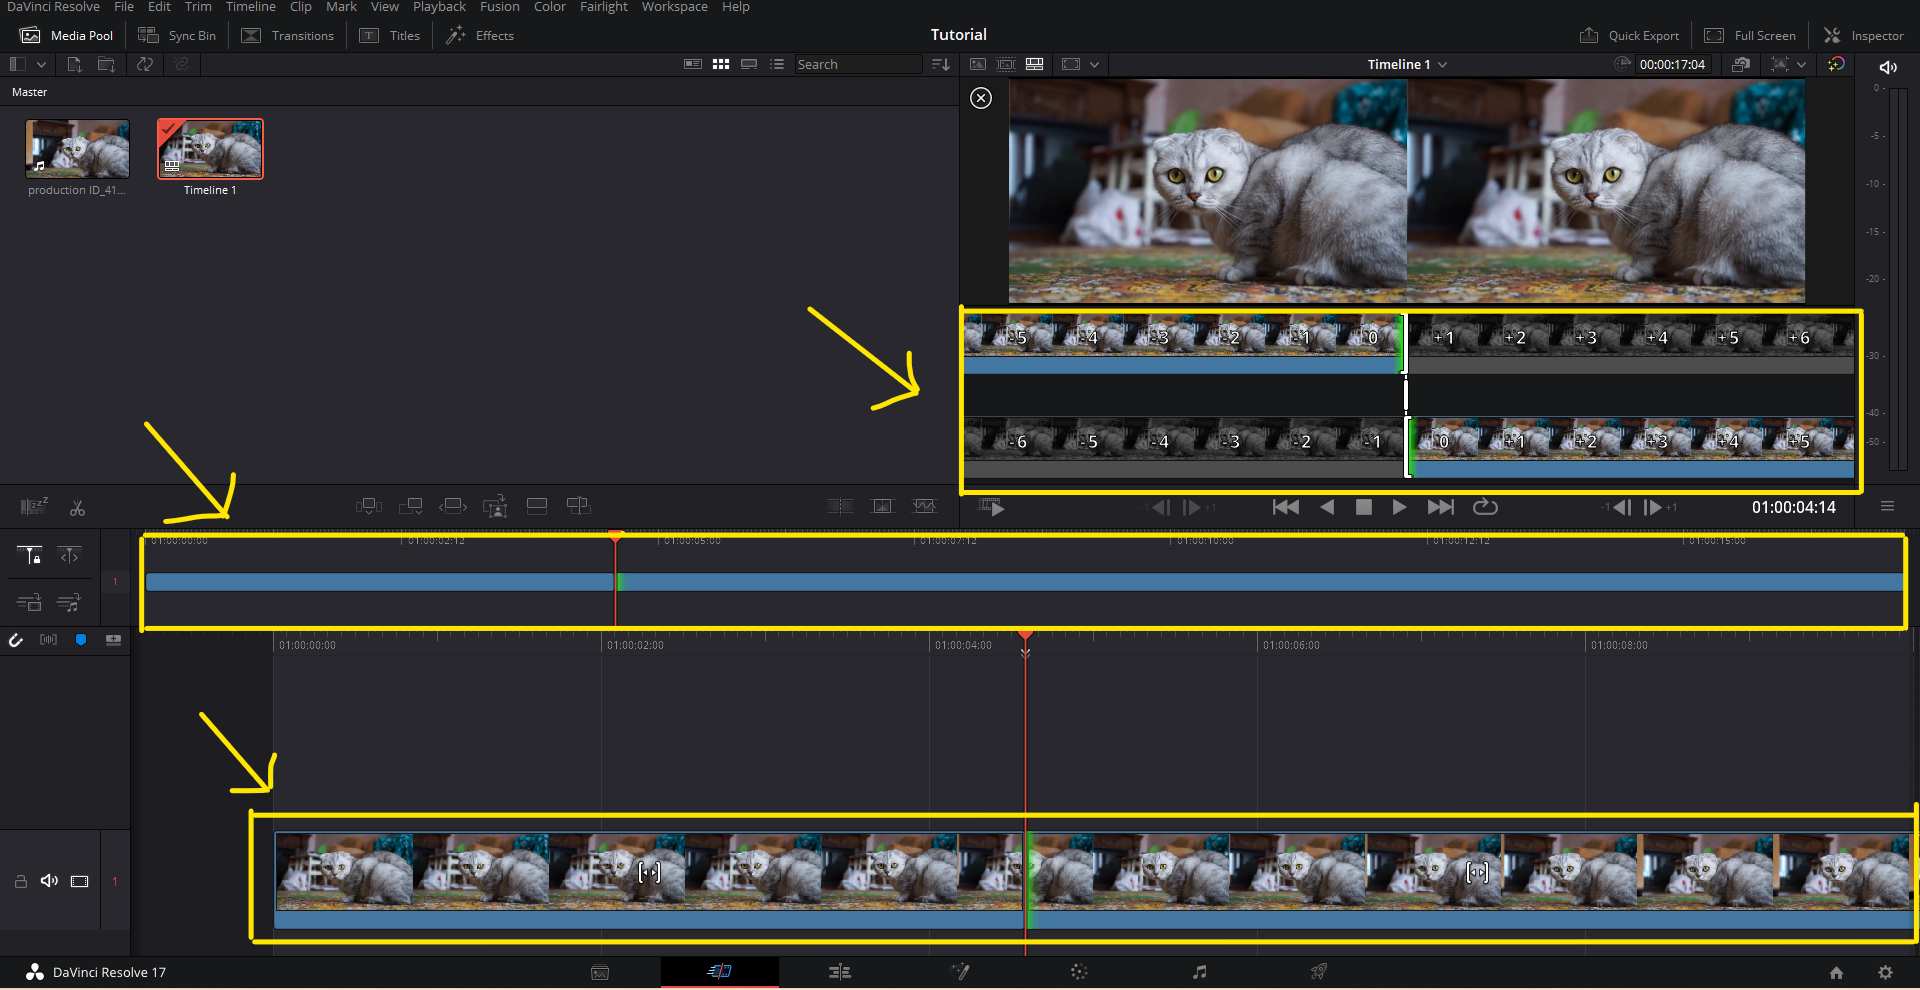
The second distinction is that if you left-click on the boundary between two clips, the end frame of the left side clip and the beginning frame of the right side clip will appear side by side in the two preview windows. So, it splits the preview into two parts, and you can left-click and drag and change both of them simultaneously, obtaining a preview of the desired ending and starting frames for both clips.
It’s simpler to set your Timeline position where you want it by previewing both sides of the clip simultaneously. And you can always make frame-by-frame adjustments in the third Timeline, so it only takes a few seconds to adjust and trim your clips.
3) Number of Menu Options in Cut Tab Vs. Edit Tab
The third distinction is that there is less clutter surrounding the screen. When comparing the Cut tab vs. Edit tab, you’ll note that the Cut tab has fewer windows active by default. The Edit tab, on the other hand, includes windows such as the Edit Index, the Audio Mixer in the bottom right, and the Inspector in the top right, as well as access to the Sound and Effects Library.
The Effects Library is located on the Cut tab, although it has already been divided into transitions, titles, and effects. As a result of dividing that one tab into three, the other tabs have no room on the Cut tab. Part of the philosophy is that the Cut tab should be more usable on systems that only have one monitor by reducing the amount of clutter. Some people may find working with the Cut tab on laptops easier.
4) Trim-Edit Mode
The fourth difference is that when you’re editing in Cut Mode, you’re essentially always in Trim-Edit Mode. So, if you Hover over any clip or the boundary between clips, you’ll get the same options as if you pick the Trim Tool from the Edit Tab. You can offset which bits of the source material will be used in the clip without modifying its length in the middle of the clip.
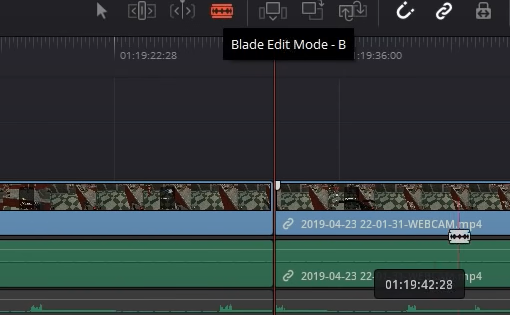
If we switch to the Edit tab, we’ll discover that the bottom Timeline has additional functionality, such as the Blade Tool. In the Cut tab, you can still execute Blade-Edit-Mode slices by pressing CTRL+B, but choosing the Blade Tool is not an option. In order to utilize these trim actions when editing in Edit Mode, you usually pick the Trim Tool. When you’re in Cut Mode, you’re pretty much constantly in it. So, if you’re going to utilize the Cut tab in DaVinci Resolve, get used to the Ctrl+B hotkey so you can still create the cuts you’d do with the Blade Tool.
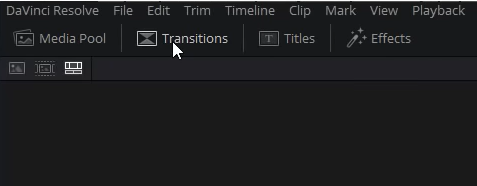
5) Effect Library in Cut Tab Vs. Edit Tab
Difference number five, which I believe I covered briefly earlier. Transitions, Titles, and Effects are the three tabs at the upper left of the Effects Library in the Cut Tab. When we switch to the Edit tab, we can see that the effects library includes all of these choices as well, although it’s a little more jumbled up. To discover exactly what you’re searching for, you’ll have to browse down through the menus.
And that’s usually not a problem, but I would say that it’s a little easier to find it using the Cut tab because if you want a title, you click titles, and you can scroll down. It saves you one or two clicks beyond what you’d normally have to perform with the Edit Tab.
Also Read: Keyboard Customization In Davinci Resolve- Full Guide
6) Inspector Vs. Tools option
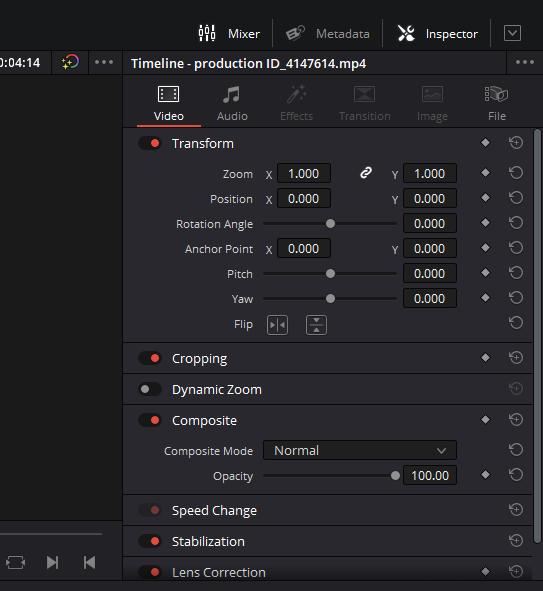
In the Lastest version of DaVinci Resolve, they have introduced the inspector option in the cut tab as well, but in the previous version, i.e, DaVinci Resolve 16, there was no inspector in the Cut tab. The Tools option in the Cut tab was being used in place of the inspector. The Inspector is a window on the upper right of the Edit tab that allows you to edit almost every setting regarding your video clip. The tool option underneath the Preview window provided choices similar to those found in the Edit tab’s Inspector. By managing the clip’s pace and being able to apply on-camera stabilization with a single click, you can modify some of the parameters regarding your video clip, such as the Zoom, slow or fast speed.
You had some clip options, but not nearly as many as you had on the Edit tab’s Inspector. And it didn’t give you every feature that DaVinci Resolve had, but it gave you the essential tools you need to do things in a more streamlined fashion.
7) Media Pool in Cut Tab Vs. Edit Tab
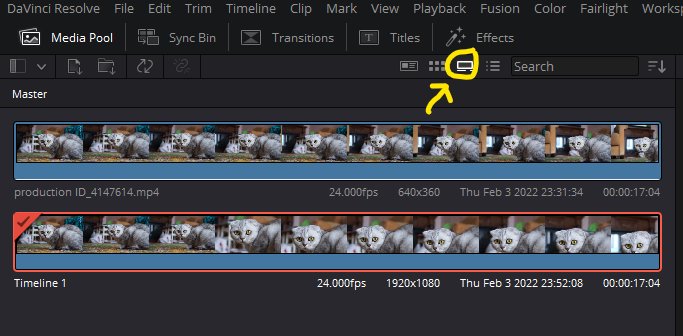
You may see a complete preview of the clips in your project by hovering your mouse over the rectangle-like “Strip View” button on the top menu of the Cut tab, as seen in the picture. It also includes audio waveforms for the timelines you’re working on with your source clips. You can put out-points directly from the media pool, without having to double-click them and drag them over to the preview window on the right. So you can go over there.
- Hit “i” to set an in point and find where the audio wave point ends. Let’s pretend that was the end of when someone’s talking.
- Hit “o,” and that will set the out point.
- And then, you can drag the clip straight into the Timeline.
So, just previewing almost all the information about your media clips straight from within the media pool reduces the number of steps you may need to take. Then, under the Edit tab’s media pool, you’ll see thumbnails for your media clips, and you can still scrub through them by hovering over them. It’s a lot tougher to discover precisely where you want to click without double-clicking it and bringing it up in your preview window without the audio waveforms and viewing a full timeline of thumbnails. As a result, the Cut tab provides a better view of the media pool.
8) Timeline Cursor in Cut Tab Vs. Edit Tab
The number 10 difference is the bottom Timeline in the Cut tab. The Timeline moves the cursor on the bottom cut mode timeline, whereas the cursor moves the Timeline on the edit mode. When we press Play while on the Cut tab, you’ll see that the bottom timeline cursor is always in the middle, and it seamlessly glides across the screen from left to right.
As a result, I would say that it is easier to go to precisely where you want to be to make your cut or trim and then do what you need to do on the Cut tab rather than the Edit tab since you never have to worry about the position of your cursor or the Timeline. So, instead of worrying about where the cursor is, get it to the point where you need to make the cut, then press CTRL+B and drag the Timeline over again, then press Control B to create another cut.
However, if you use the Edit tab to navigate around in the Timeline, you must be aware of the timeline cursor. You should also consider how zoomed in you are since if you’re too zoomed in, you won’t be able to see where you need to cut the Timeline, which may be quite unsettling.

Also Read: Everything About Using LUTs In Davinci Resolve
You’ll need to be concerned about zooming in and out and setting your timeline cursor where you want it because you only have one Timeline. When you just have one monitor, manually dragging from left to right might get a little irritating. You don’t have to bother about zooming or the position of your timeline pointer on the Cut tab; moreover, you may travel around the project using the top Timeline.
So, wherever you need to go in your project’s Timeline, drag it up to the top Timeline, and your cursor will be exactly positioned in the bottom Timeline wherever you go. Moving about in your project timeline is thus easier, in my opinion, because you have less to worry about. That concludes this article on Cut Tab Vs. Edit Tab of DaVinci Resolve: 8 Surprising Differences.
So, I hope you were able to find the answer to all of your questions regarding DaVinci Resolve, like Cut Tab Vs. Edit Tab of DaVinci Resolve: 8 Surprising Differences. If you have any more doubt regarding DaVinci Resolve, make sure to check out our other articles. If you have any suggestions feel free to contact us.