
Hi, I’m Salik, the author of FilmmakingElements.com. I have been a filmmaker for over 10 years. I am also a certified DaVinci Resolve Trainer and I have used DaVinci Resolve for many of my projects. We will take a deep dive into How To Animate Image In Davinci Resolve. This highly versatile software is popular for its comprehensive editing capabilities, and today, we will learn how to leverage its features to bring your still images to life.
Step 1: Choosing the Right Image
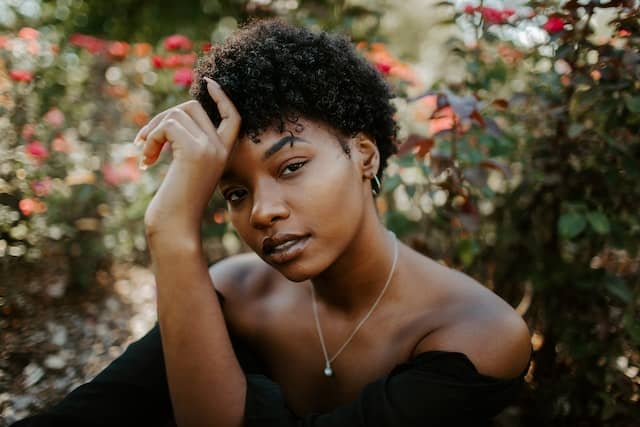
When starting your animation process in DaVinci Resolve, the initial step involves selecting an image. Here, the principle of ‘bigger is better’ comes into play. In other words, you’ll want to opt for an image with a resolution significantly larger than that of your base timeline.
For instance, if your timeline has a resolution of 1920 by 1080 pixels, you should aim for a still image with a much higher resolution.
Why the High-Resolution Requirement?
You might wonder why this large resolution is necessary. The answer lies in the animation process itself. As you animate an image by altering properties like stretch over time, the image may deviate from its original rectangular shape, morphing into other shapes or it might just move around on the screen.
As the image shape shifts or moves, it may reveal black space during the course of your animation. To avoid this visual discrepancy, you may have to zoom in on your photo to conceal those black spaces. However, this zooming-in reduces the display resolution, as you’re only focusing on a smaller section of the photo.
Therefore, the higher the original photo’s resolution or megapixels, the better it will look in the end, despite any zooming in or animating. So, as a rule of thumb, always opt for a high-resolution image when preparing to animate in DaVinci Resolve.
Step 2: Adjusting and Preparing Your Image for Animation in DaVinci Resolve
In our ongoing exploration of image animation in DaVinci Resolve, we now delve into the crucial steps of adjusting the frame and preparing the image for the animation process. These steps are universal and applicable to any image you choose to animate, serving as the foundation for creating a dynamic and captivating visual narrative.
Framing and Adjusting the Image
Upon selecting a high-resolution image, your next task is to adjust it to suit your project’s resolution. Often, your image ratio may not exactly fit the standard video ratio (usually 16:9). Here’s how to rectify this:
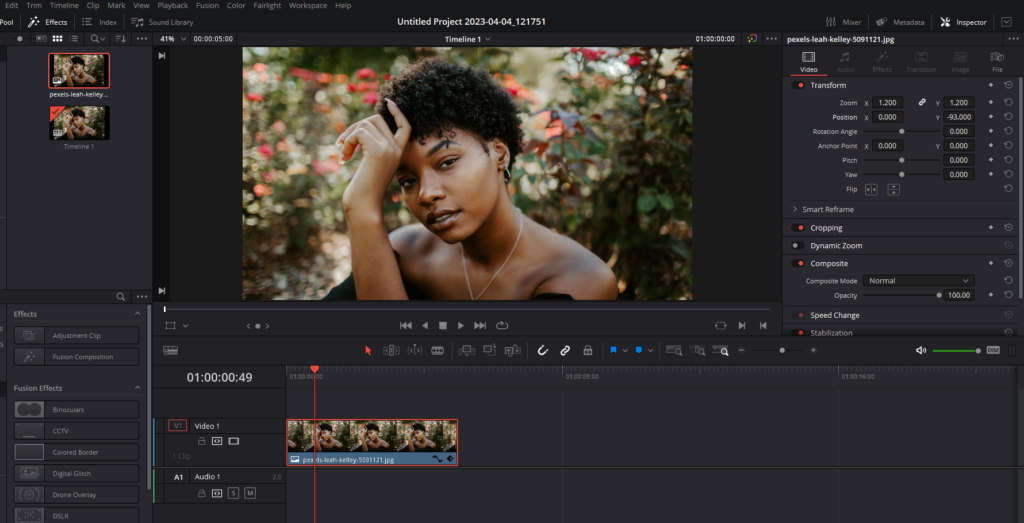
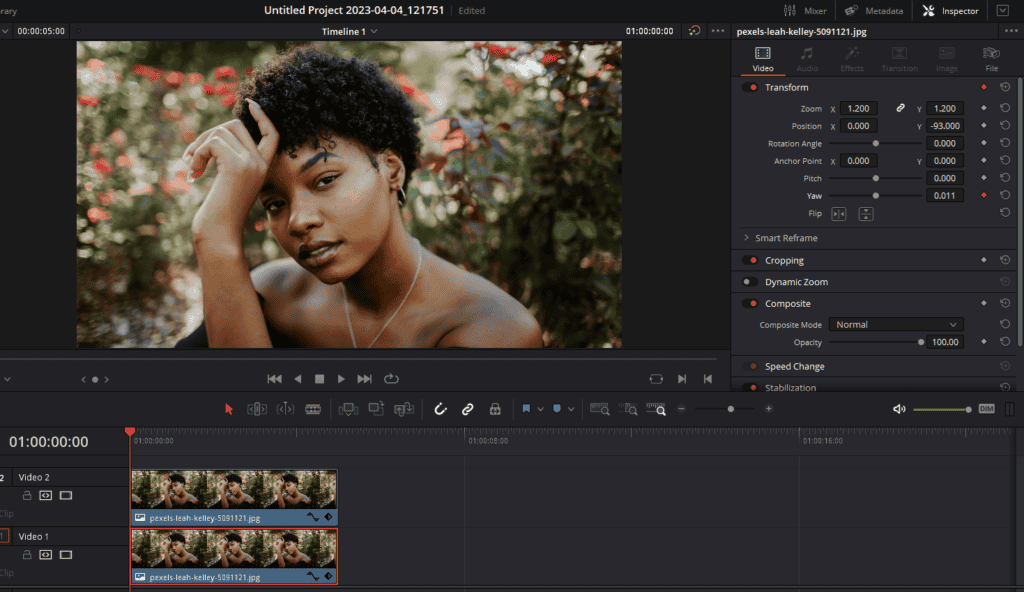
- Select the image on the timeline in the Edit tab of Davinci Resolve and go to the ‘Inspector’ panel, located on the top right of the DaVinci Resolve interface.
- In the ‘Transform’ section, adjust the ‘Zoom’ slider until your image fits the screen. This is essentially zooming in on your image.
- To position the image correctly, use the ‘Position’ sliders. The ‘X’ slider moves the image horizontally, while the ‘Y’ slider moves it vertically. Adjust these until your subject is visible and well-positioned within the frame.
These adjustments ensure that your image matches the project’s screen ratio and that the subject remains in focus.
Layering the Image
Layering is a key animation technique that allows you to manipulate different elements of an image independently. Here’s how to layer your image:
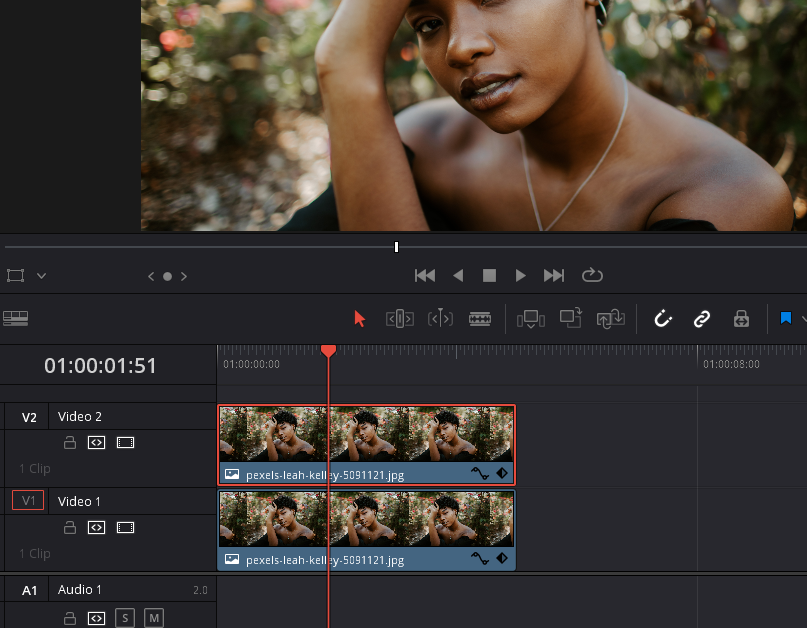
- With your image selected on the timeline, press ‘Ctrl+C’ to copy it.
- Move the playhead slightly forward in the timeline and press ‘Ctrl+V’ to paste a copy of the image.
- Click and hold the left mouse button on the new clip, then drag it up to create a second video track. You have now duplicated your image onto a new layer.
This duplicated layer gives you the flexibility to animate different elements of your image separately, enhancing the overall animation effect.
Remember, meticulous preparation and careful adjustments will result in smooth, high-quality animations that can truly bring your project to life.
Step 3: Separating and Layering Image Elements for Animation in DaVinci Resolve
This stage is integral to achieve a more dynamic and realistic animation, as it enables you to manipulate different elements of the image individually.
Separating the Subject from the Background
Firstly, you need to separate your subject from the background, making each a distinct layer that can be manipulated independently. To do this:
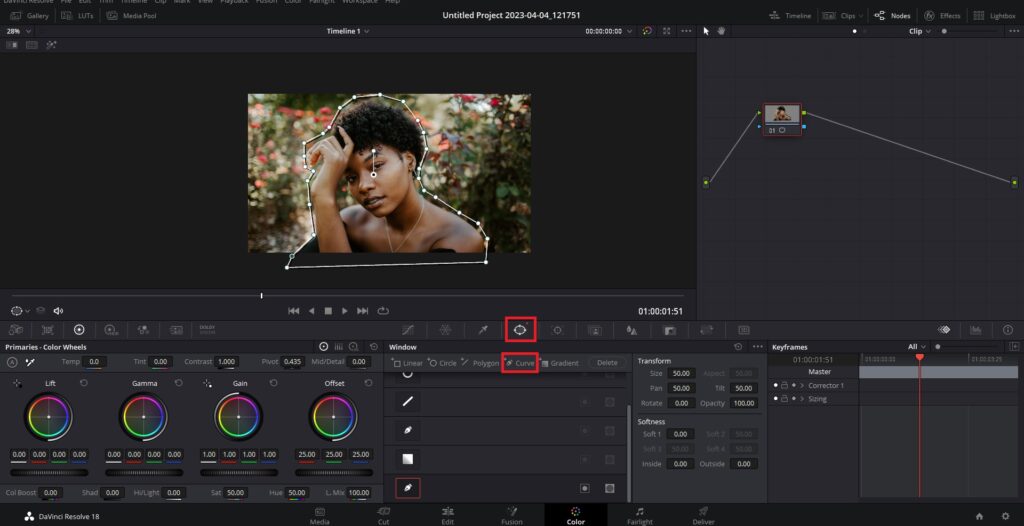
- Select the image on video track two and navigate to the ‘Color’ tab in DaVinci Resolve.
- Use the ‘Window’ feature available in the tools section below the viewer (circle with four dots) and select the ‘Curve’ option to draw a frame around your subject. The Window enables you to create a mask, even for complex shapes, by left-clicking to add points around your subject.
- Try to maintain a small buffer around the subject to avoid precision errors. This boundary will be blurred later to create a seamless transition between the two video tracks.
- After drawing around your subject, close the shape by clicking on the initial point.
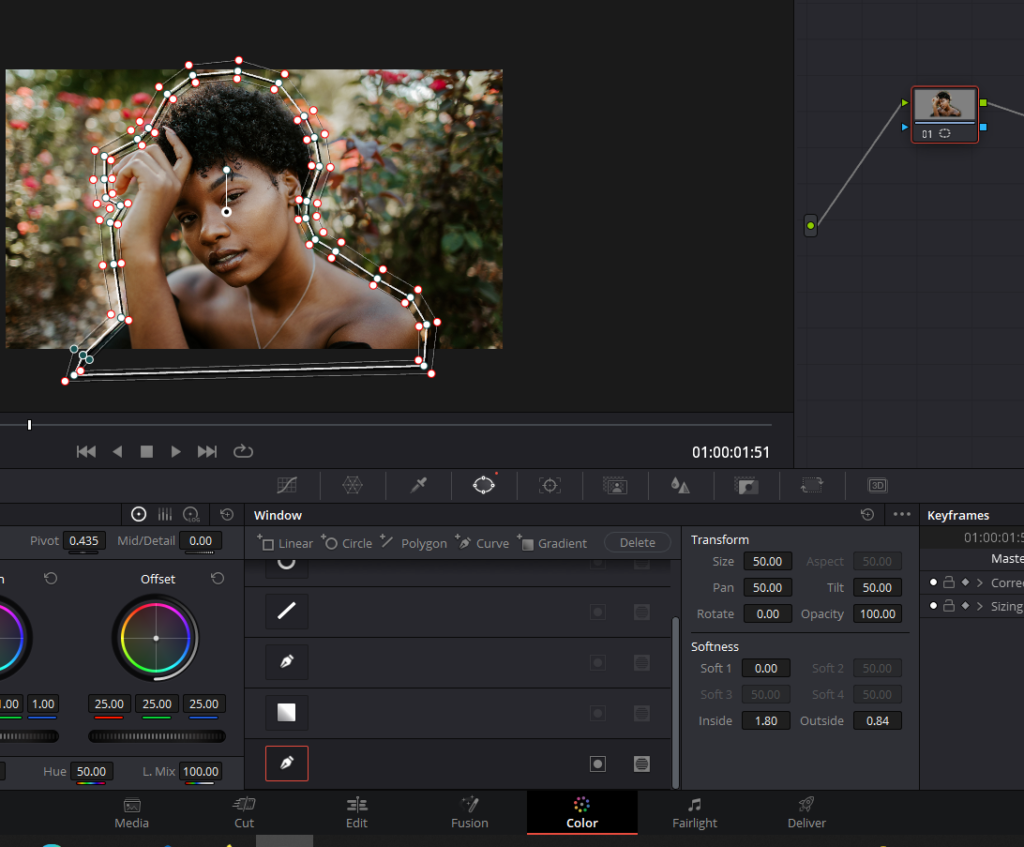
Adding Softness and Creating an Alpha Output
Next, enhance the blend between your layers by adding a bit of softness to the inside and outside of your Window mask. The softness controls are there in the Window pane itself. This makes any changes between the video tracks less noticeable. Here’s how:
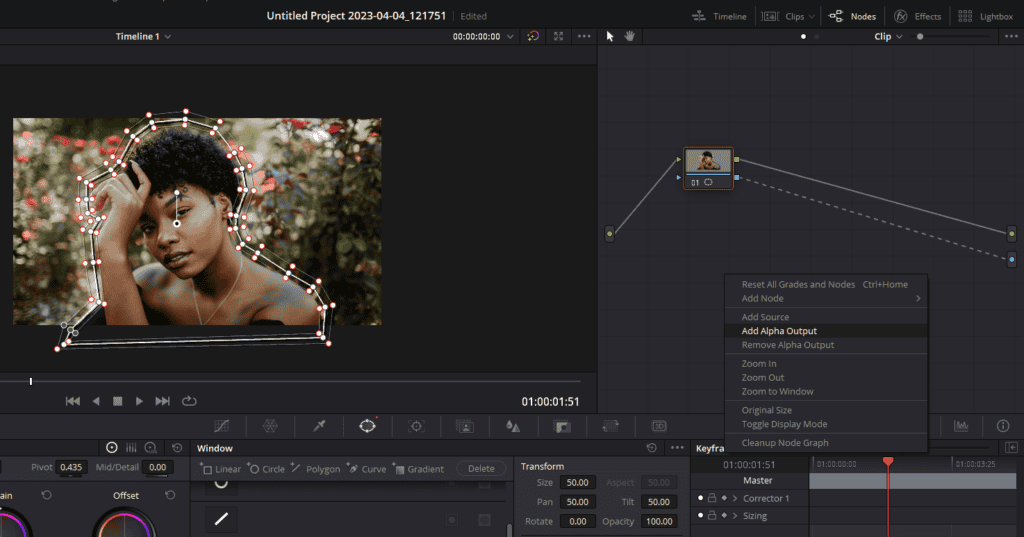
- In the ‘Nodes’ panel, typically found in the top right corner.
- Right-click and choose ‘Add Alpha Output’.
- Connect the alpha channel of your node (blue square on the right side of your node) to this alpha output (blue circle at the end of the Nodes panel).
Covering and Positioning the Layer
Finally, you’ll need to ensure that the subject in video track two covers the subject in video track one. To do this:
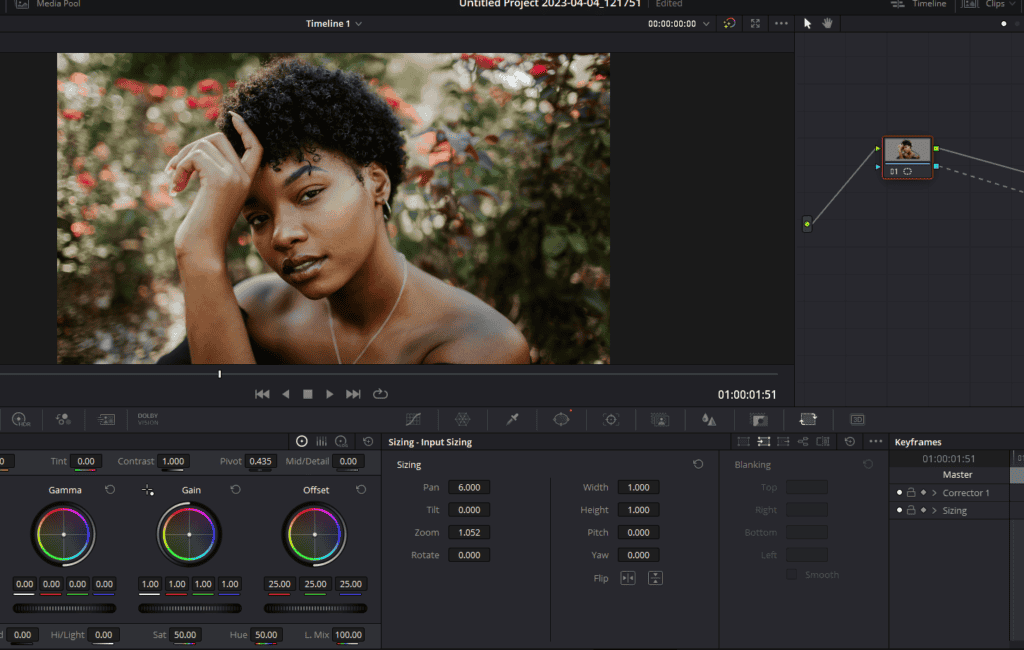
- Navigate to the ‘Sizing’ tab. The sizing tab (icon looks like a rectangle with two squares) can also be found in the same toolbar in which the Window tab is, below the viewer.
- Adjust the ‘Zoom’ to increase the size of the subject until it fully covers the original subject in video track one.
- Adjust the position if necessary, ensuring that the softer edges blend the two layers together seamlessly.
Remember, as you animate your image, it’s crucial that the subject from the upper layer always covers the one beneath. This gives the illusion that the layers are a single entity, making any movements appear natural and realistic.
Step 4: Animating the Background Layer
This step empowers you to infuse more dynamism into your images, creating a moving background while keeping the subject static or vice versa.
Manipulating the Background Layer
With your subject and background separated, you can now animate your background layer without disturbing the subject. Here’s how you can create a simple ‘yaw’ animation:
- On the ‘Edit’ page, select the image in video track one (the background) and navigate to frame zero.
- Adjust the ‘Yaw’ in the ‘Inspector’ panel on the right side of the viewer to create a slight slant to the left.
- Click the keyframe button on the right of it which looks like a diamond to start an animation.
- Move to the last frame of your clip and adjust the ‘Yaw’ value again, tilting the background to the right. You have successfully animated your image in Davinci Resolve.
Remember to ensure that the subject in video track two always covers the background subject in video track one throughout the animation.
Adjusting the Top Layer Position
While manipulating the background, the position of the subject in video track two may need adjustment. Navigate back to the ‘Color’ tab and adjust the position of the clip on video track two to ensure it’s always covering the background if needed. You can adjust the ‘Pan’ and ‘Size’ values as per your requirements.
Adding Zoom Animation (Optional)
Optionally, you can animate the zoom on video track two. However, be cautious that an excessive increase in size might cut your subject out of the frame. Here’s how you can do it:
- In the edit page of Davinci Resolve, at the first frame, set a ‘Zoom’ value (for example, 1.24) in the inspector panel on the right and click the keyframe diamond on the right of it.
- Over the duration of your clip, the subject will gradually increase in size.
However, if you prefer a static subject, simply remove the initial keyframe to keep video track two static.
Other Animations
Similarly, you can play around with other settings in the Inspector panel such as “Pitch,” and “Rotation Angle” to animate your image.
Step 5: Enhancing Your Image Animation with Light Rays
You can enhance your image animation further using various effects in Davinci Resolve. One such effect is the addition and animation of light rays, which can enhance your image animation and create a sense of dynamism and depth. Here, we’ll delve deeper into how to incorporate light rays in DaVinci Resolve.
Implementing Light Rays
Adding light rays to your scene is straightforward. Begin by navigating to the ‘Effects’ on the ‘Edit’ tab in the top left corner. Scroll through until you locate ‘OpenFX,’ then make your way to ‘Resolve FX Light.’
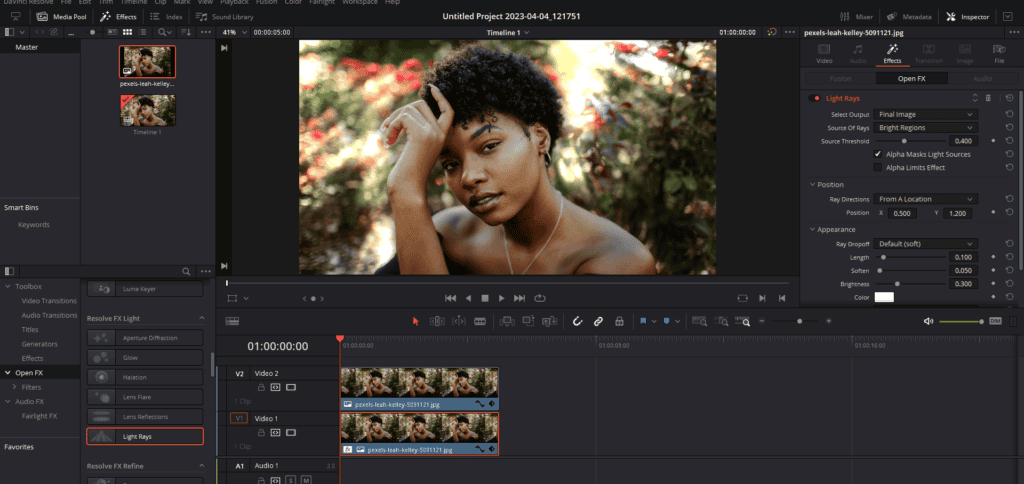
Among the options presented, choose ‘Light Rays’ and apply it to your background image, located on the bottom video track. This immediately brightens your scene, introducing rays of light from brighter areas above a source threshold by default.
To further control the Light Rays, click on the background-clip and head to the Inspector panel on the right. In the Inspector panel, click on Effects and here you will find the settings to control the Light Rays effect.
The Art of Animating Light Rays
A still light ray can add depth to a scene, but an animated one takes it up a notch. To animate the position of the light rays, start at frame one and use the ‘Position’ setting in the Light Ray settings to position the effect wherever you feel like.
Insert a keyframe at this point to record the position by pressing on the diamond-looking icon on the right of the ‘Position’ setting.
Next, go to the final frame and adjust the ‘X Position Value’ to create movement. When you play the sequence, you’ll notice the light rays seem to shift position across the scene, providing a dynamic, time-lapse-like feel.
However, if you find the movement of the light rays too dramatic, you can always temper the effect by adjusting the position values for a more subtle effect.
The final step in mastering light rays involves adjusting their intensity and color. By controlling the ‘Brightness,’ you can balance the impact of the rays within your scene, avoiding over-bright areas that could distract the viewer.
And if you’re feeling adventurous, you could experiment with changing the color of the lighting to match the mood or tone of your scene. White is a go-to color for many, but don’t be afraid to play with hues to achieve the effect you’re after.
Step 6: Adding Dimension with Subject Animation
In this section, we’ll explore how you can animate the main subject of your image to harmonize with the movement of your animated background, creating an overall cohesive scene.
Assessing the Need for Subject Animation
In the process of animating your image in Davinci Resolve, you might encounter a situation where the background of your image is filled with vibrant movement while your main subject remains static. This visual disconnect could leave your scene feeling slightly disjointed. At this point, it’s worthwhile to consider animating your subject as well to create a balanced, dynamic composition.
Implementing Subject Animation
If you decide to add some motion to your subject, follow these steps:
- Navigate to the start of your timeline (frame one).
- Adjust the position of your subject within the frame using the Zoom, Position, and Rotation Angle in the Inspector panel, creating a slight offset from its original placement. This will be the starting point of your subject’s movement.
- Mark this starting point with a keyframe.
Then, to define the end position of your subject:
- Move to the final frame of your timeline.
- If there’s a pre-existing keyframe, this might just be the perfect end position for your subject’s motion. If not, adjust the position as needed. This will be the end point of your subject’s movement.
- Set a keyframe to mark this end position.
Evaluating the Final Result
Once you’ve introduced movement to your main subject and balanced it with the background’s animation:
- Play the animation to review the overall effect.
- Look for smoothness in motion and harmony between the subject and the background.
- Make necessary adjustments until you’re satisfied with the result.
Last Words
Thank you for taking the time to read our article “How To Animate Image In DaVinci Resolve: Step-By-Step Guide”. We hope it provided valuable insights into how you can bring life to static images and enhance your video editing skills.
Whether you are a seasoned professional or a novice exploring the field, understanding the techniques and tools available can transform the way you approach your projects. As you continue your journey in the world of video editing, remember to explore, experiment, and push the boundaries of what is possible.