Anamorphic flares have become synonymous with the cinematic look that filmmakers and content creators often strive for.
These streaks of light, formed when light passes through an anamorphic lens, give an ethereal, dream-like quality to a scene, taking visuals to a whole new level. If you’ve been eager to introduce anamorphic flares into your projects, look no further!
In this article, we will explore two methods for creating stunning anamorphic flares in DaVinci Resolve, a powerful and versatile post-production tool. Whether you’re a seasoned colorist or just starting out, these easy-to-follow techniques will have you weaving magic into your footage in no time.
So, let’s dive in and learn how to elevate your video production skills with anamorphic flares!
Method 1: Creating Anamorphic Flares in DaVinci Resolve
This method is straightforward and can be achieved using DaVinci Resolve’s built-in Glow effect.
Step 1: Importing and Preparing Your Footage
- Launch DaVinci Resolve and create a new project.
- Import the footage you want to enhance by clicking on the “File” menu from the menu on top and selecting “Import” and then “Media” or by simply dragging and dropping the file into the media pool.
- Create a new timeline by clicking on “File” > “New Timeline,” then name your timeline and adjust any other settings as needed.
- Drag your footage from the media pool onto the timeline.
Step 2: Adding the Glow Effect to Your Footage
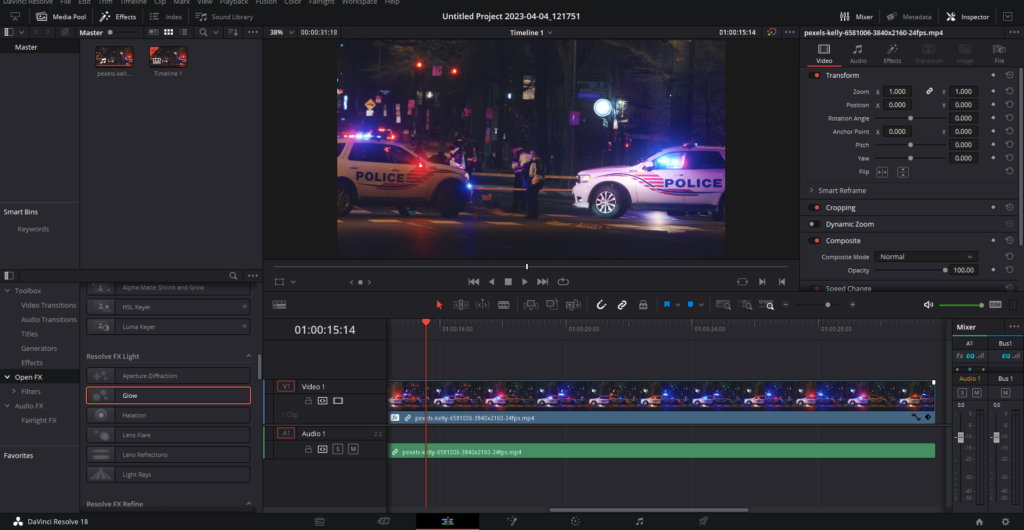
- With your footage placed on the timeline, open the Effects Library by clicking on the “Effects” button in the top left corner of the interface.
- Under “Open FX,” scroll down to the “Resolve FX Light” section, which is roughly halfway down the list.
- Locate the “Glow” effect and drag it onto your footage in the timeline. The light sources in your footage will immediately begin to glow.
Step 3: Accessing the Glow Effect Settings
- Click on your footage in the timeline to highlight it.
- Open the Inspector panel in the top right-hand corner of the interface by clicking on the “Inspector” button.
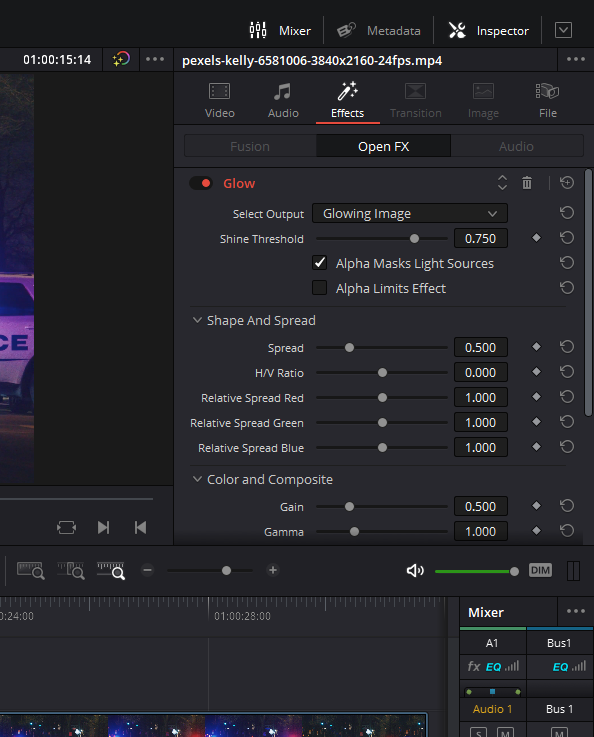
- Click on the “Effects” tab in the Inspector panel to reveal the settings for the glow effect.
- If the settings are not displayed, click on the word “glow” to expand the options.
Step 4: Applying the Anamorphic Effect
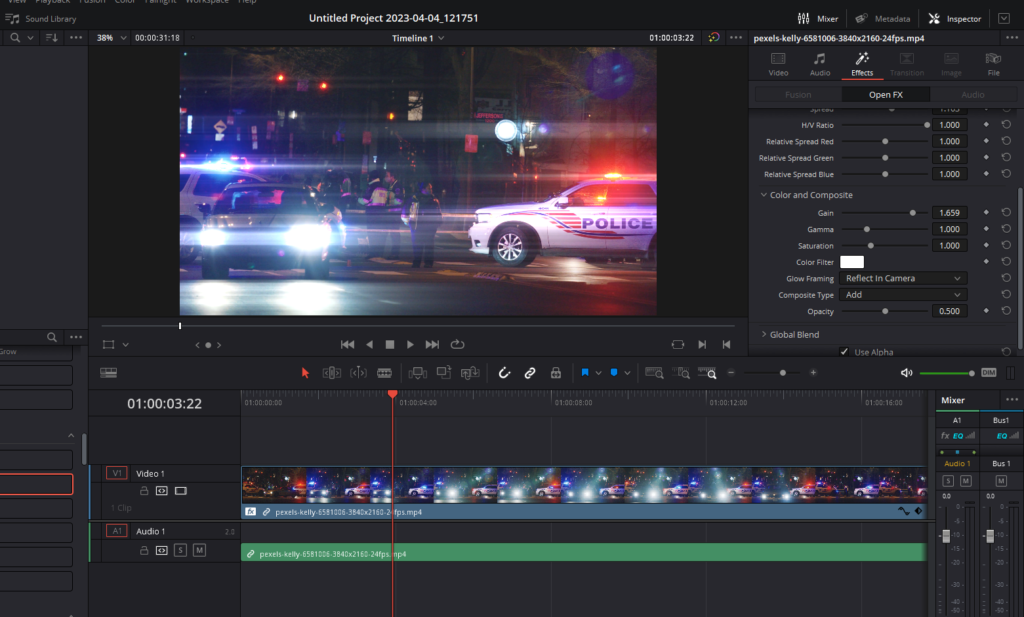
- In the “Gain” setting, move the slider all the way to the right to set the brightness to its maximum value. This temporary adjustment will make it easier to see the changes you’re making as you work on the effect.
- Locate the “H/V Ratio” (horizontal vertical ratio) setting. Drag the slider to the right to create horizontal streaks that resemble an anamorphic effect. The further you move the slider to the right, the more pronounced the horizontal streaks will be.
- Adjust the “Spread” setting by moving the slider to the right. This controls how wide the flare effect appears on the screen. You can set the spread as wide as you want, even allowing it to span the entire width of the screen.
- Modify the “Shine Threshold” setting by moving the slider to the left or right. The lower the threshold, the brighter the light sources will be, resulting in a more blooming effect and less contrast in the footage. Conversely, increasing the threshold will reduce the effect’s intensity.
- With the anamorphic effect looking as desired, return to the “Gain” setting and reduce the brightness to a more suitable level by moving the slider to the left.
Step 5: Refining the Effect with Additional Settings
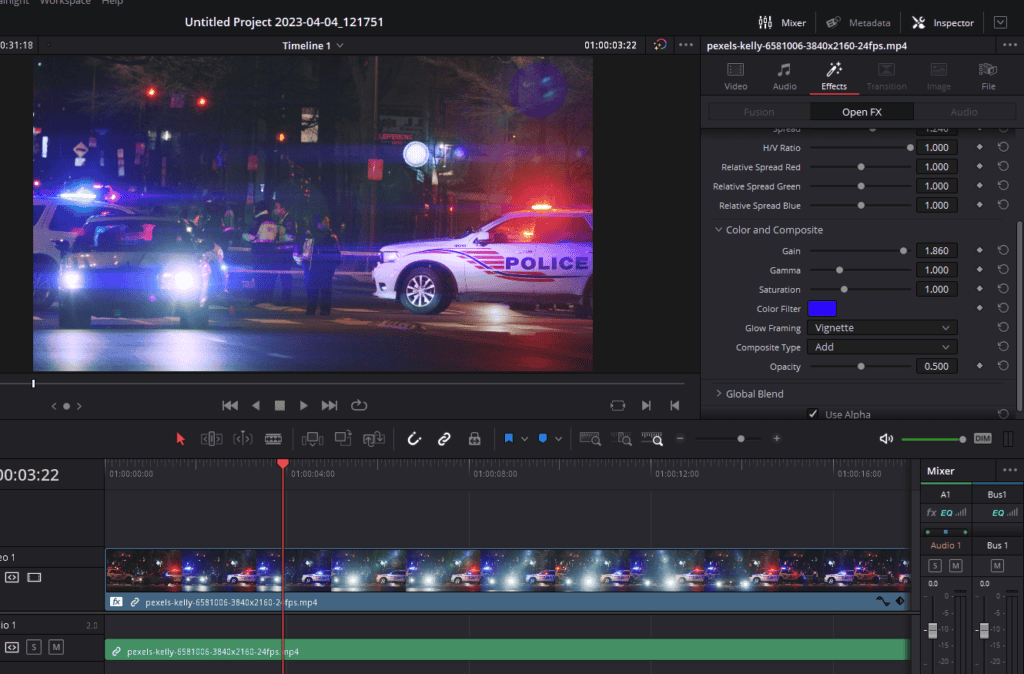
- In the “Glow Framing” drop-down, change the setting from “Reflect in Camera” to “Vignette.” This adjustment will cause the edges of the light sources to become darker, adding depth to the effect.
- Access the “Color Filter” area by clicking on the white box, which will open the color picker.
- Choose a color that complements the light sources in your footage. For example, you can select a neon pink or purple shade to match reds, pinks, and blues in your scene.
- Play through the video. The result should be a visually appealing flare that enhances the overall look of your footage.
Step 6: Previewing the Effect
- To see the impact of the anamorphic effect on your footage, play the clip in the timeline.
- You can also toggle the effect on and off to compare the before and after by clicking the small checkbox next to the word “Glow” in the Inspector panel.
Step 7: Copying the Effect to Other Clips
- If you have multiple clips in your timeline that you want to apply the same anamorphic effect to, simply click on the original clip with the effect applied.
- Press “Ctrl+C” on your keyboard to copy the effect.
- Click on the target clip in the timeline to which you want to apply the effect.
- Press “Alt+V” to open the “Paste Attributes” dialog box.
- Untick all options by clicking on the “Video Attributes” checkbox, and then tick the “Plugins” checkbox.
- Click “Apply” to transfer the glow effect to the second clip.
Step 8: Customizing the Effect for Each Clip
- With the effect applied to the second clip, you can fine-tune the settings as needed. Click on the clip in the timeline to select it.
- Access the Inspector panel and navigate to the “Effects” tab to adjust the glow settings. You can modify the brightness, HV ratio, spread, shine threshold, glow framing, and colorize options to achieve the desired anamorphic flare effect for each individual clip.
Method 2: Creating Anamorphic Flares in DaVinci Resolve
Anamorphic flares are an artistic and popular visual effect used in various movie genres, such as sci-fi and horror films. These flares add depth and visual interest to your video, making it stand out. We will walk you through creating custom anamorphic flares using a DaVinci Resolve plugin.
Before diving into the process, it’s essential to have lighting sources pointed directly at the camera lens to help the effects stand out on your video.
Step 1. Setting Up the Lens Reflections Effect

- Open a clip in DaVinci Resolve that is suitable for the anamorphic flare effect.
- Go to the color tab of Davinci Resolve. Create a new node (Alt + S) and click on the right-hand side of the interface, where it says Effects.
- Type “lens” in the search bar and select “lens reflections” from the list. Drag the effect onto the new node.
- Go to the “Preset” dropdown menu and choose “streaks.”
Step 2. Customizing the Flare
- Adjust the “anamorphism” setting to the maximum value.
- In the “Reflecting Element 1,” option, select a color for the first flare. This is a matter of personal taste, but you can start with a teal color, for example.
- Confirm your color choice by clicking “okay.”
Step 3. Refining the Flare’s Position and Appearance
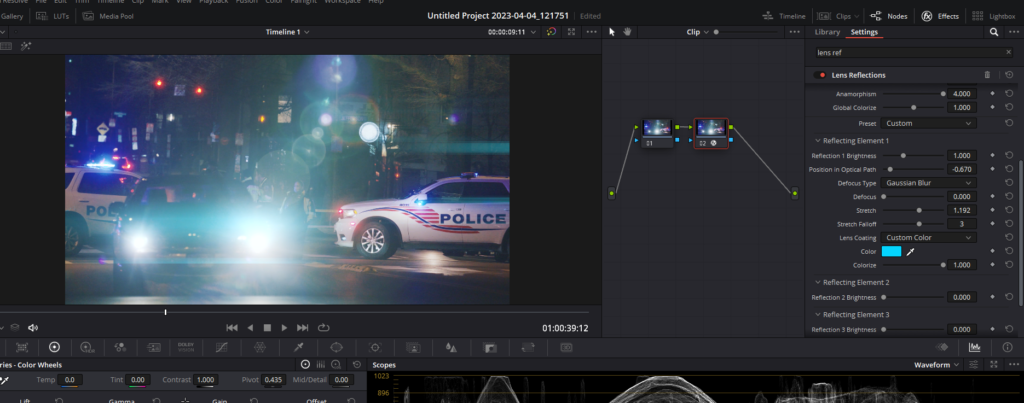
- Locate the “Position in optical path” setting and adjust it to change how the flare affects the footage.
- Increase the brightness of the flare to make it more visible.
- Play the clip back to see how the flare looks and make any necessary adjustments.
Step 4. Adding Secondary Flares
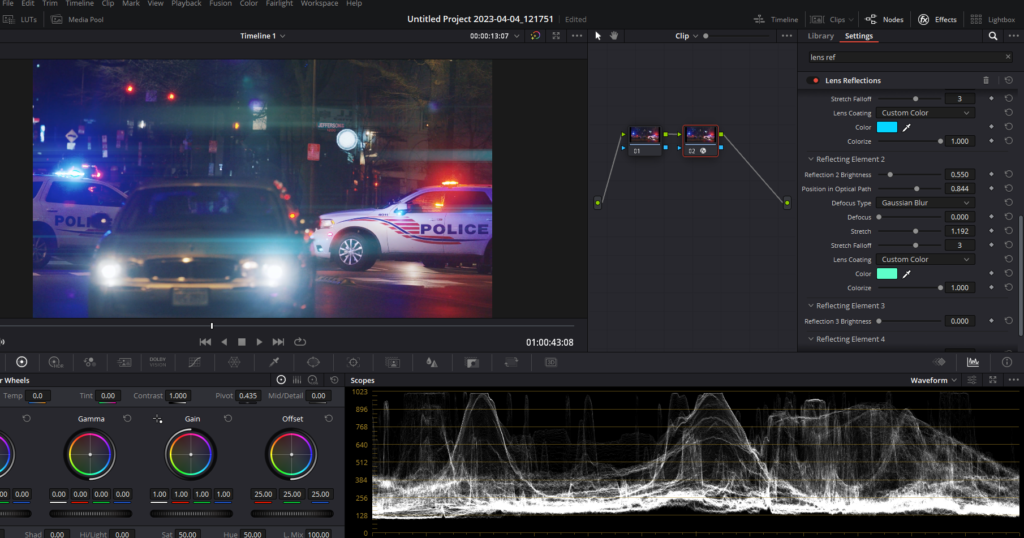
- In “reflecting element 2,” increase the brightness to reveal additional settings for the new element.
- Select a color for the secondary flare. It can be a slightly different shade of teal or even a magenta hue.
- Adjust the “stretch” setting to customize the secondary flare’s size.
- Modify the “position in optical path” to move the secondary flare closer to the original flare.
- If the secondary flare is too bright, decrease the brightness and play the footage back to review the effect.
Step 5. Creating Additional Reflecting Elements
- Repeat the process for “reflecting element 3,” adjusting the color, position in the optical path, and stretch settings.
- Play with the optical path for each flare to achieve your desired effect. Turn up the brightness and then pull back on it to create a subtle look.
- If desired, continue adding more reflecting elements and adjusting their settings to create unique and visually interesting effects.
Tips for Perfecting Anamorphic Flares
To create realistic and stunning anamorphic flares, consider studying movies that feature these effects. Take screen grabs of scenes with flares and try to recreate them using the tools and flexibility available in DaVinci Resolve. Experiment with different colors, stretches, and positions in the optical path to achieve the perfect look for your project.
Last Words
In conclusion, anamorphic flares are a powerful tool for filmmakers and content creators looking to elevate their work with a cinematic touch. With practice and experimentation, you can create unique and visually striking anamorphic flares that add depth, dimension, and flair to your projects. So go ahead, dive into the world of anamorphic flares in DaVinci Resolve, and watch your creative visions come to life.