
In this article, we will be looking at How to use qualifiers in Davinci Resolve to Get the Perfect Keys.
The qualifiers in Davinci Resolve are part of the secondary grading tools.
Any aspect of the grading process in which just a portion of an image is modified is referred to as secondary grading. The possibilities for secondary grading are many, but the most common methods include keying and masking.
A section of a picture is targeted via keying or qualifying based on a hue, saturation, or luminance range. The qualifier is the fundamental tool for key retrieval in Resolve.
I will show you how I get perfect quality keys to keep my image looking the best it possibly can. There is a little bit in here for beginners, and there’s a little bit on color management as well.
How To Use Qualifiers in Davinci Resolve For Absolute Beginners
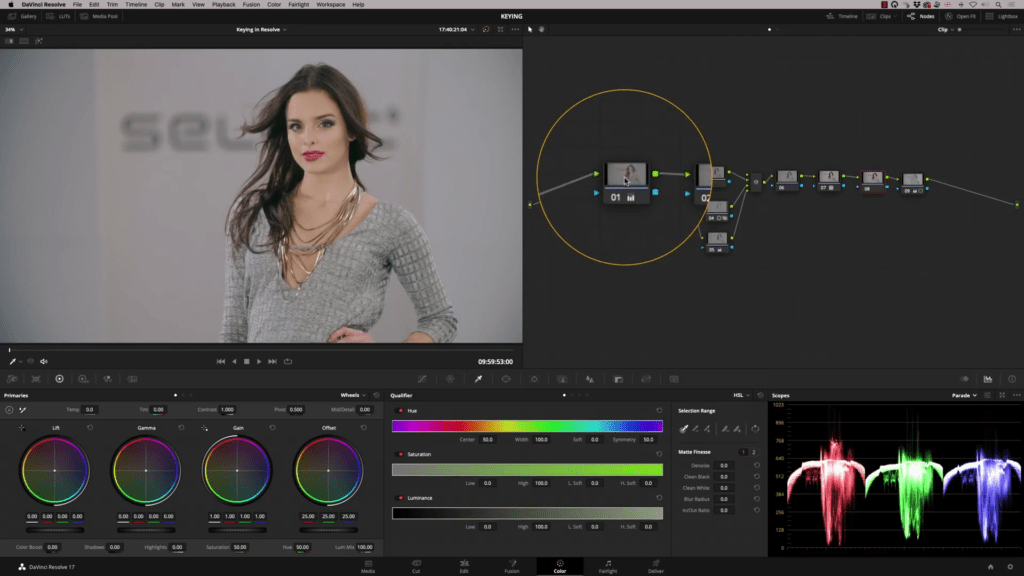
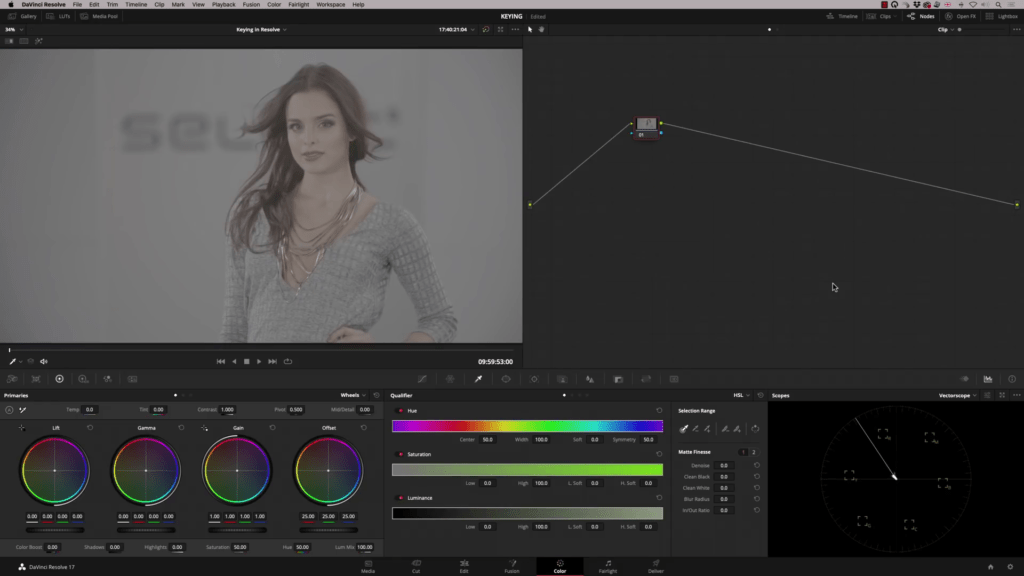
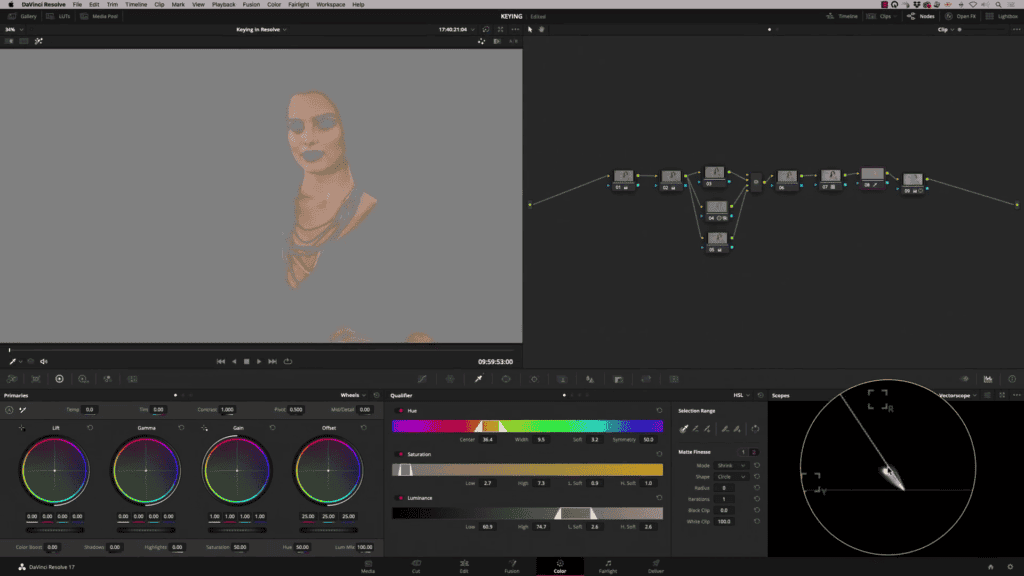
To access the qualifier, you need to click on the dropper-looking icon. There we go, so just quickly to explain for absolute beginners, the qualifier tool allows us to isolate a part of the image to change just that part.


I’m going to grab the selection tool, I’m going to grab her mouth there, and if I put this tool on the highlight tool, we can see what we’ve just selected, and you see we’ve chosen just her mouth.

Now any adjustment I make affects just that part of the image,
let me take the highlight off and show you if I go to my hue tool, you can see it changing there all right.
That’s just a quick explanation of what the qualifier is so.
My usual workflow in Davinci Resolve
Good qualifier uses are key skin tones to get them looking perfect; it’s common to isolate things like products; if you’re doing a commercial, you want to separate the product to make it stand out.

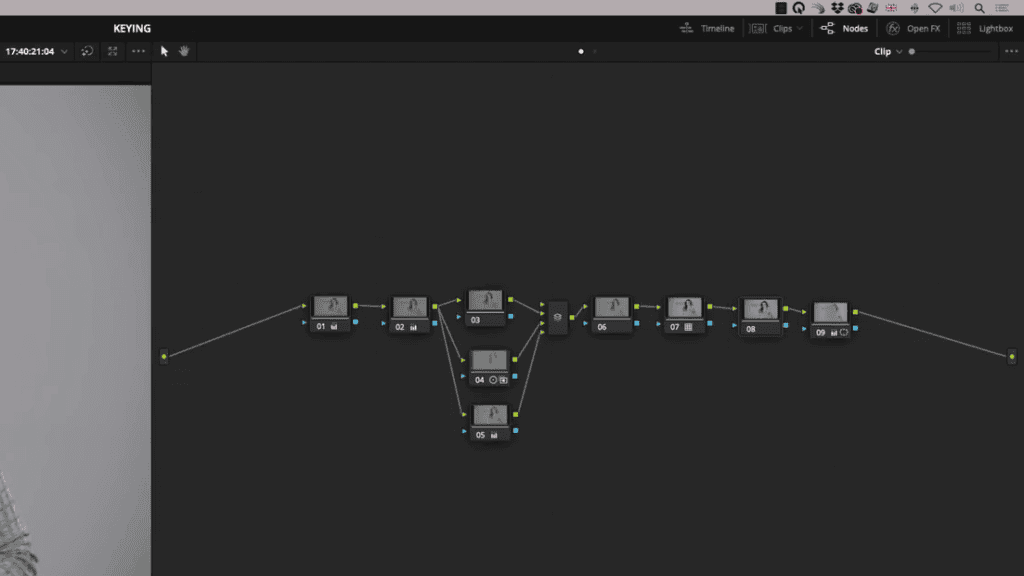
I’ve got a bit of exposure work going on and maybe a little bit of saturation and temperature control in the node tree. I’ve got a bit more of the look going on.
An empty node is what is usually used for color space transform.
In this instance, a lut came from a set, so I just applied the lut because it came up good. I’ve then got a spare node after that, and the vignette on end is an inverse vignette because it’s brightening the edges, not darkening the edges as a traditional vignette would.
If you don’t understand this and you are an absolute complete beginner, what you could do very quickly is let me just reset. You can start with one node and add gain and lift down. Let’s bring some gamma in.
I just pushed and pulled the image because it’s log, so it’s very flat, add a bit of saturation, and you’re good to go.
So there’s a sort of starting point you would then add another serial to get to the next point, where we’re going to do the qualification.
- Also Read- Using Magic Mask To Remove Background In Davinci Resolve
- Also Read- Film Halation Emulation In Davinci Resolve (3 Methods)
- Also Read- How To Save Videos As MP4 In Davinci Resolve
How To Use Qualifier and key skin in Davinci Resolve
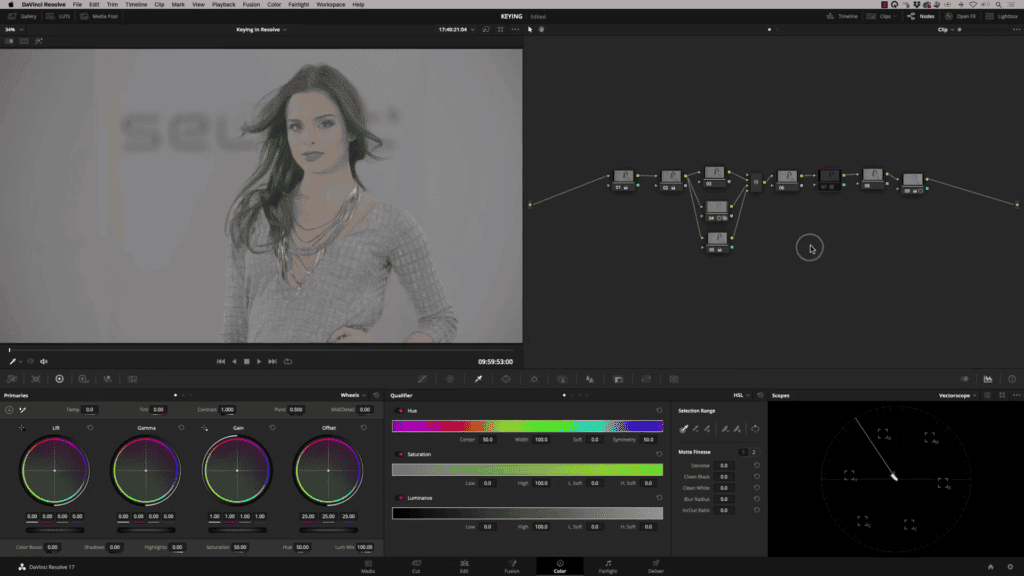
I’m going to bring up my original node, so let’s look at getting a good quality key on the skin. Now I like to get my skin in a good place without using a qualifier. I prefer to work on the skin in these first two nodes and make sure that our skin tone looks good. To do that, we check that on our vectorscope, and we bring up the skin line, which you can do by selecting the show skin tone indicator.
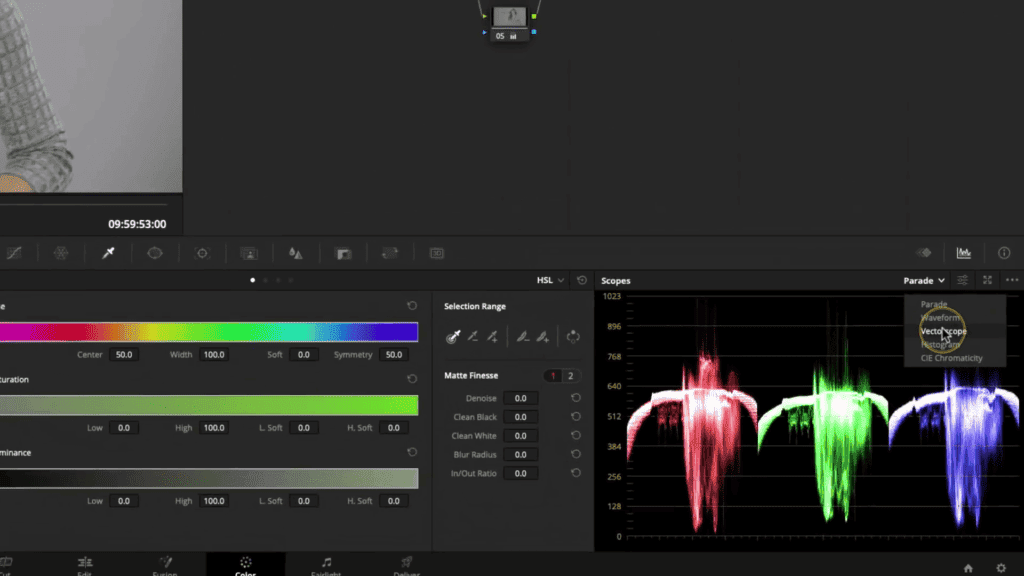
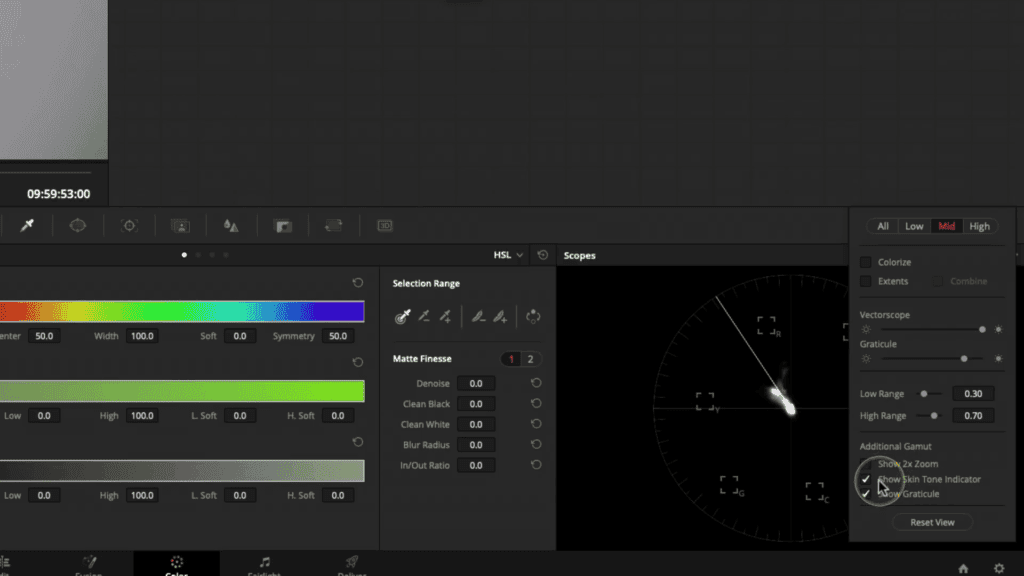
All right, and that is a perfect guide as to where skin tone should be sitting. Let’s take a look at getting the very best key we possibly can.
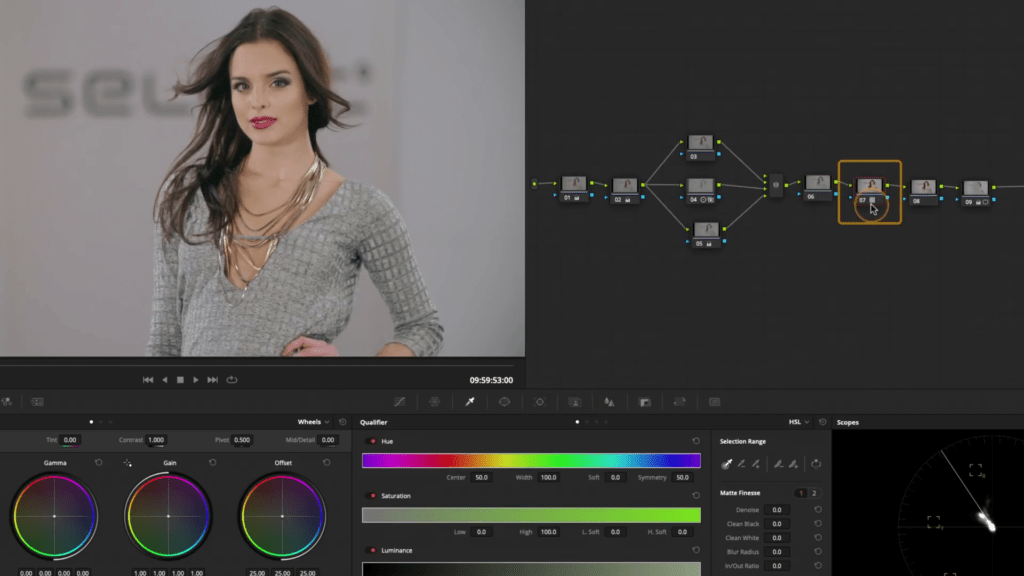
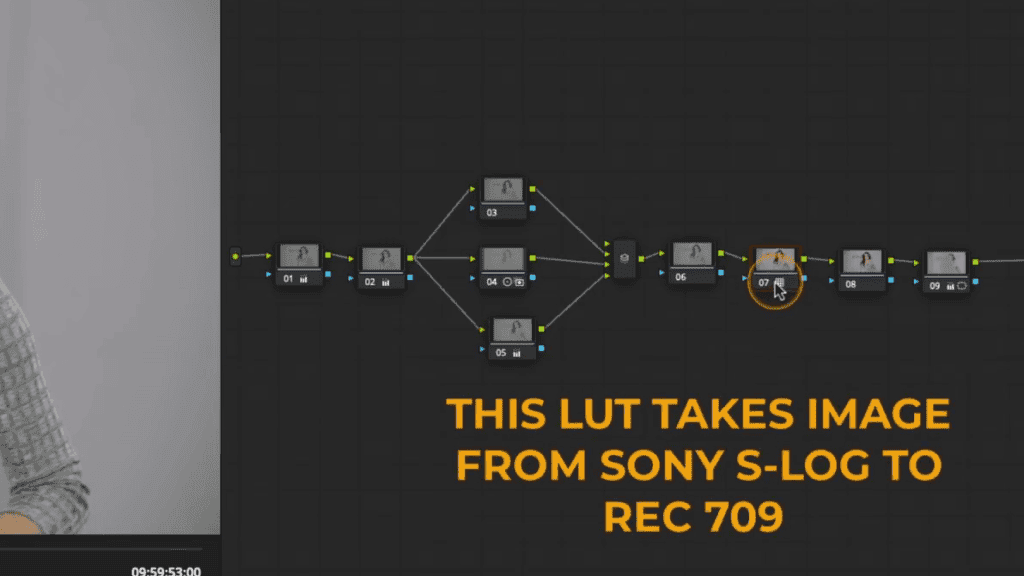
The first thing I need to do is decide where I’m going to put the qualification in my node tree. The primary node affecting everything is this node seven; this is my lut. In your case, it could be color space transform.

I will disable that single node and show you what is happening to the image before it hits this lut. Anything up to node seven, all these nodes are in log color space.
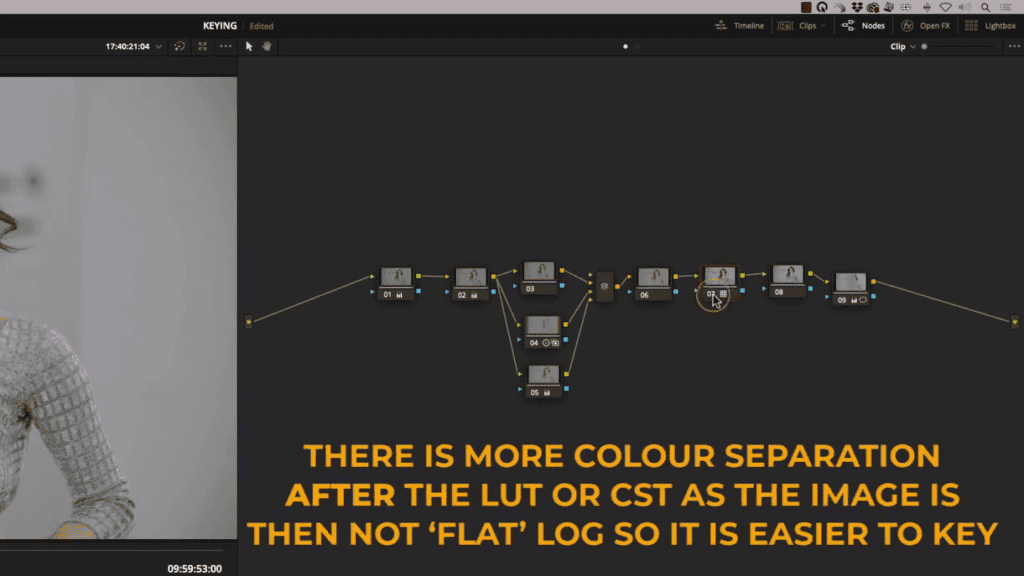
After node 7, they are being transformed into rec 709, so that’s why you get this image looking like this. Anything after that would be in rec 709.
To get a good quality key off this image, I need to be working after the rec 709. otherwise, I’m working this very flat color space, and it’s a little harder to pull keys.
Now often, I can get a perfect key in log color space, but in this example, I’m going to switch that lut back on so that I’m not trying to get my key from the flat S-log image.
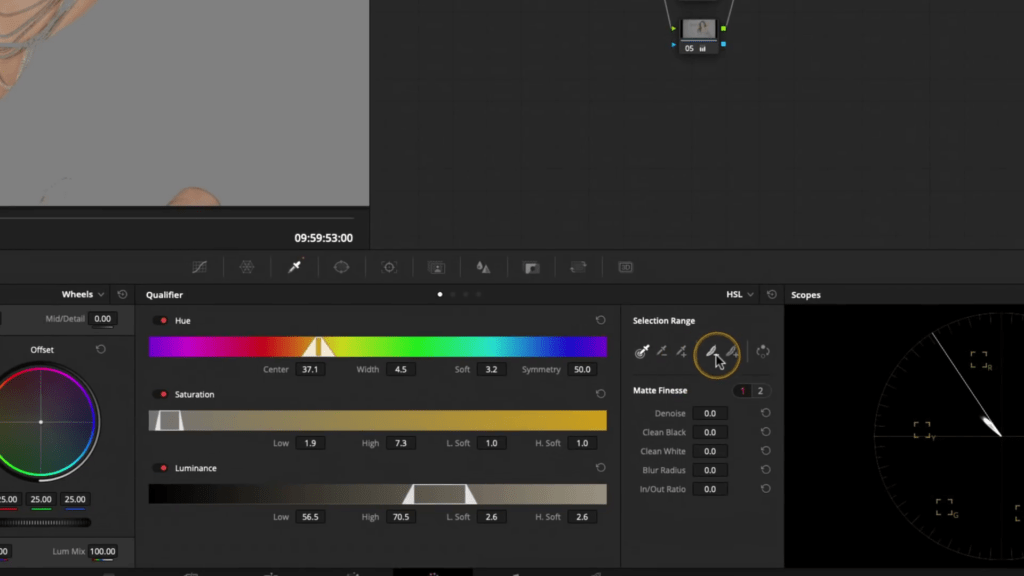
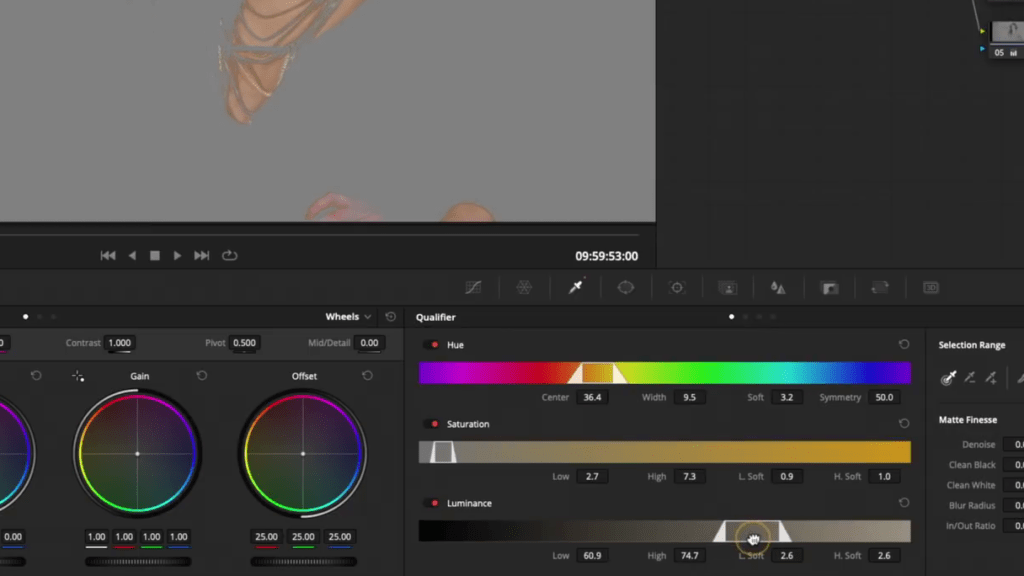
Let’s have a look in detail at the tools available. When you go into the qualifier, you have four different types of qualifications.
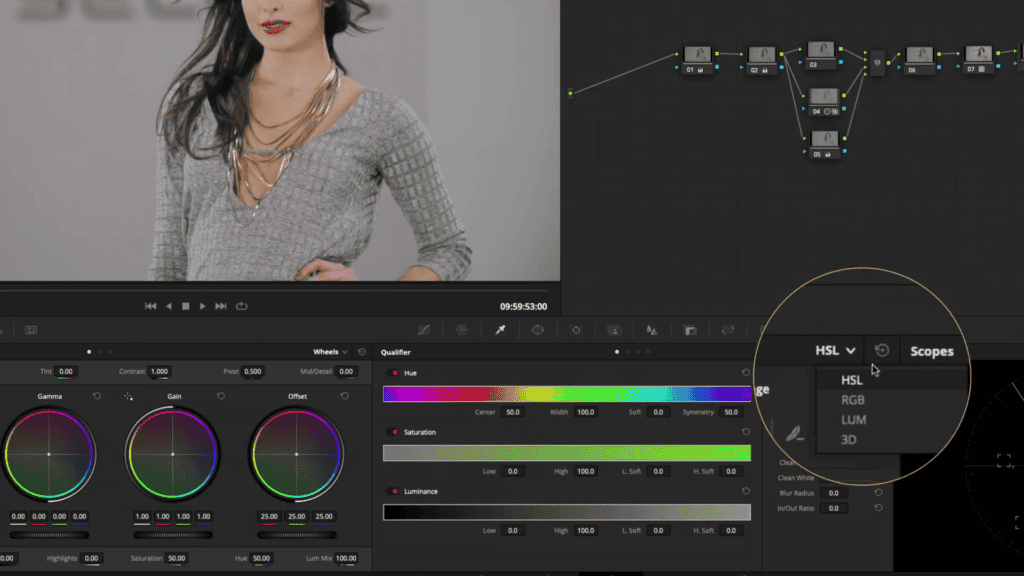
You’ve got hsl which is what this article is about. so hsl is hue, saturation, and luminance.
The hue is the actual color itself, the color range. Saturation is the intensity, the amount of saturation of that color, and luminance is the brightness of that range you’ve selected. We can get our perfect key with a combination of all the tools available. You also have tools that allow you to select using the actual image itself. You also get some tools to finesse the matte that you’ve created.
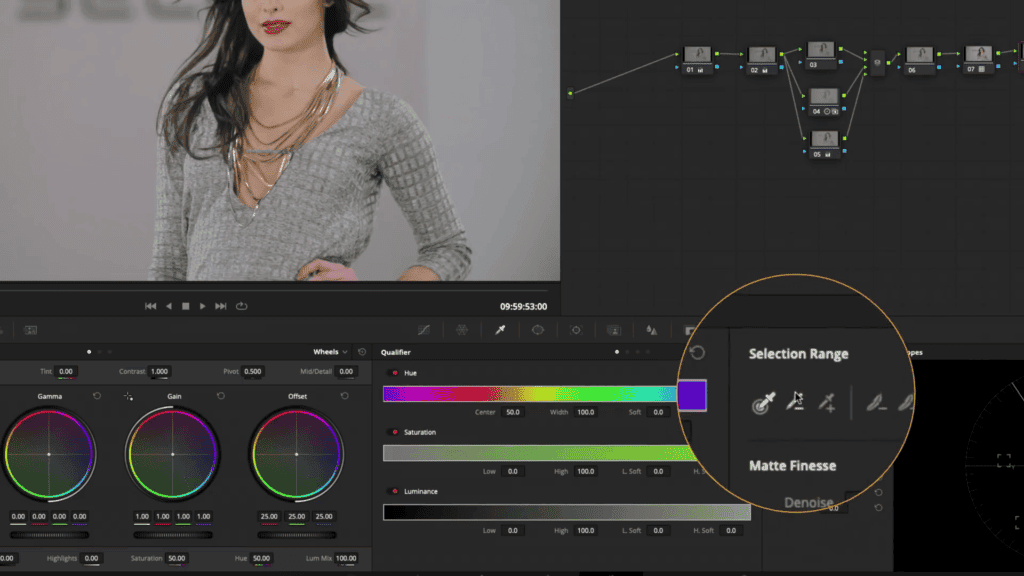
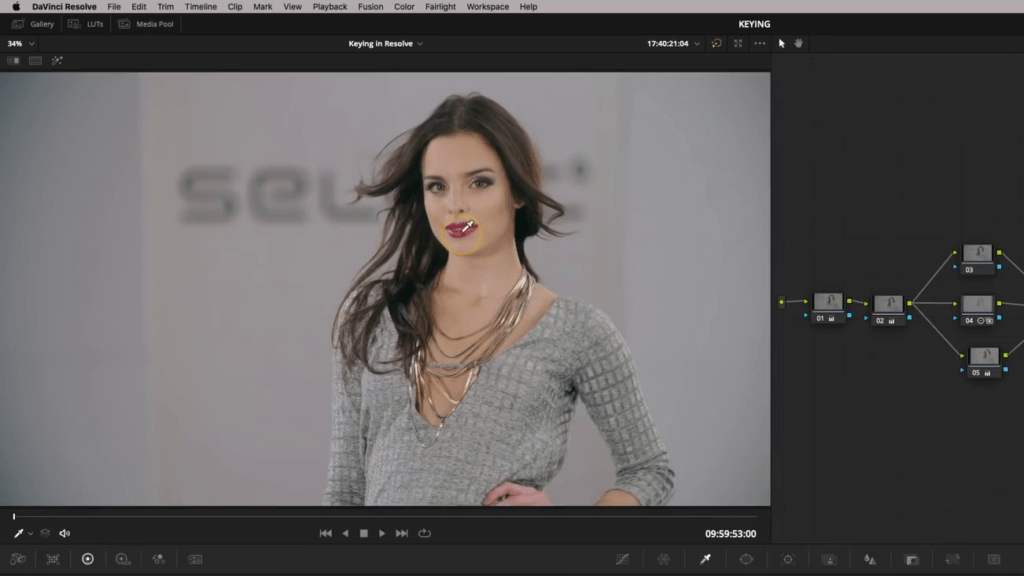
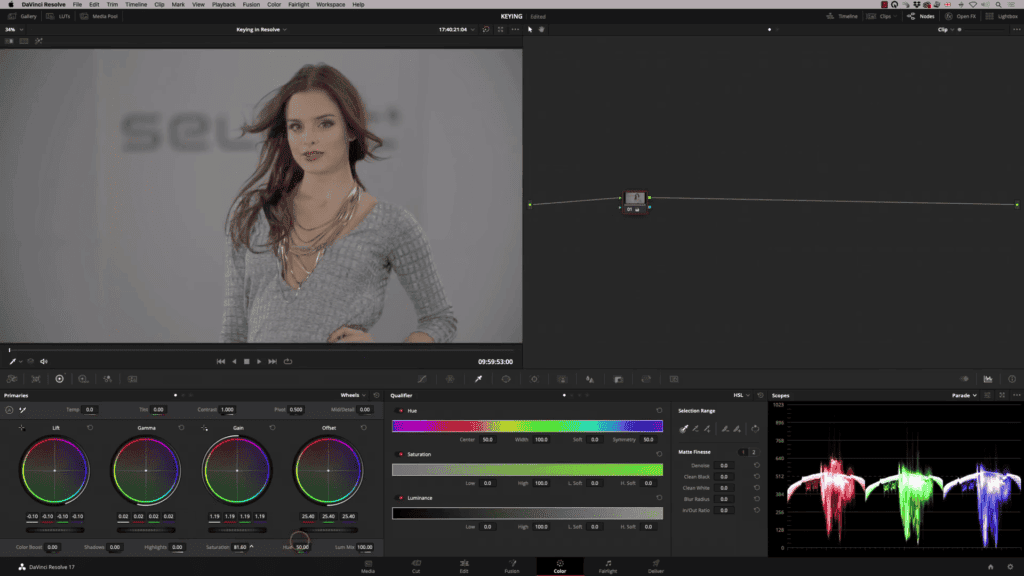
The matte is the result of your selection; it isolates the image, allowing us to control the skin. How do we get this perfect key that we’re after? I’m going to use my selection tool, and I’m just going to sample the image on the skin tone there.


The parameters have now been updated, and to see what has been selected, I will press my highlight tool. So shift+h and there we can see what’s been grabbed. Now we’ve got a perfect key straight away.
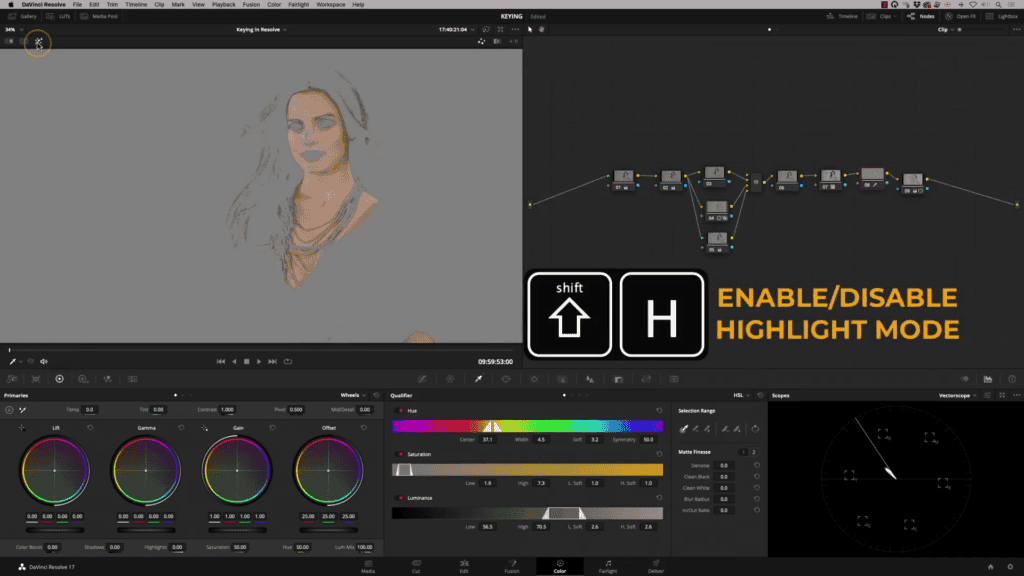
What I’m going to do is, use my plus or minus tool to add extra range or, more subtle, is to use feathering tools, so if I add feathering, it’s just going to soften my selection. It’s just added extra bits in it and added softness; you can see that on the outline, the triangle is the amount of softness you’ve got.
We’ve got a perfect key going on there, but it’s not quite right yet, and we could keep using these tools to plus or minus ranges.
How I use qualifiers to get perfect selections

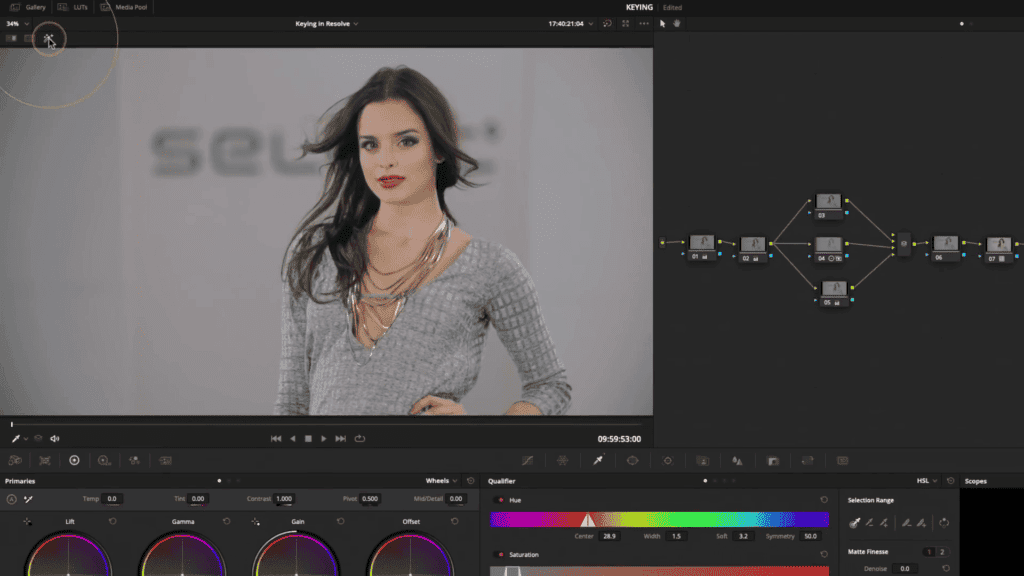
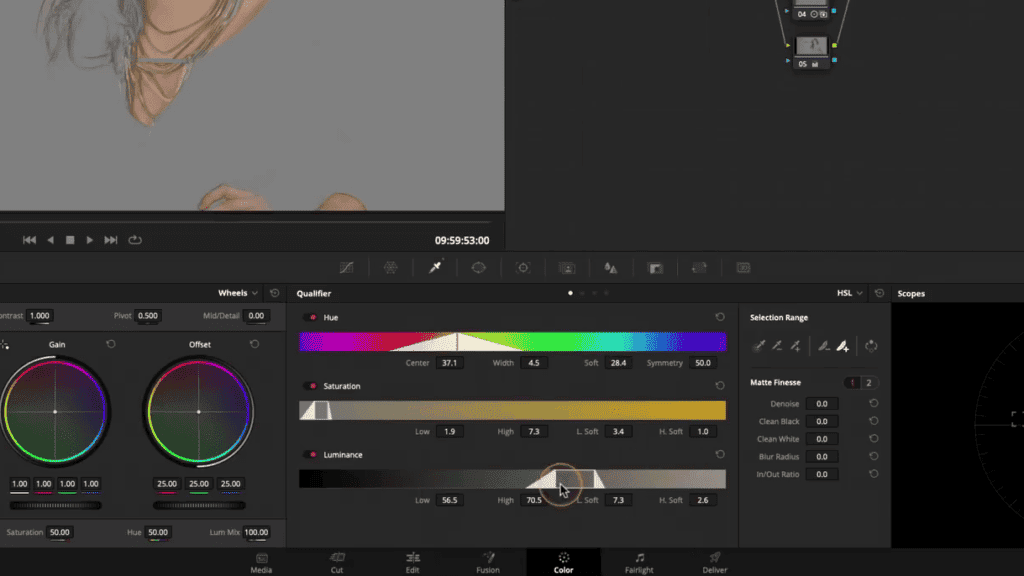
I prefer to adjust the actual HSL values themselves instead of using these tools, so let’s go ahead and reset this. I’m going to use my selection tool to make my initial selection, but then I’m not going to use any of these tools. I’m going to come straight to the hsl selection tools. I start with hue, and let’s look at our width; let’s expand this out a little bit.
I’m just going to adjust the center point to check that we’re at the best point, and now what I’m going to do is go to my saturation. Now, this is really where it starts happening.
By adjusting saturation low and saturation low soft, I should be able to get rid of quite a bit of this, so let’s have a look, and there you go.
We’ll bring that down; let’s add some low soft and check, which is good there.
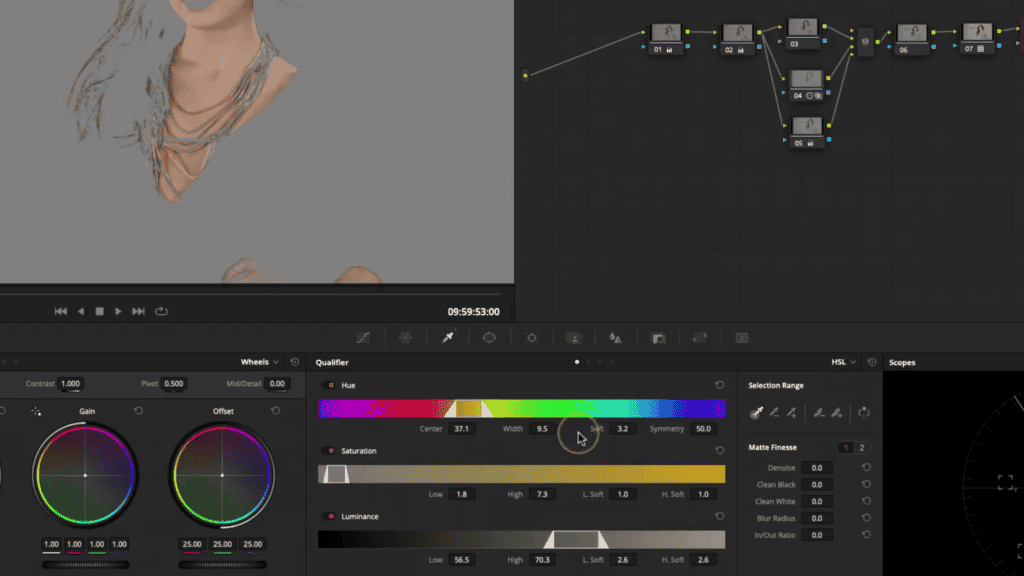
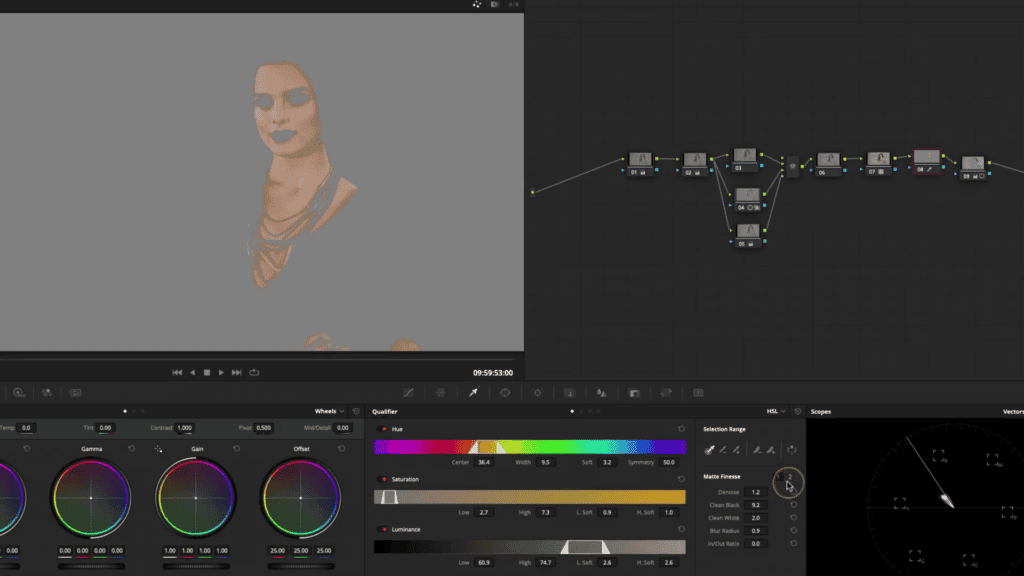
Then I’m just going to check my luminance values; I’m going to move this actual graph over and look if I put that there; we are close now. I’ve got rid of most of the hair selection.
We’ve got her lips isolated, and her eyes isolated the eyebrows. This is an excellent key.
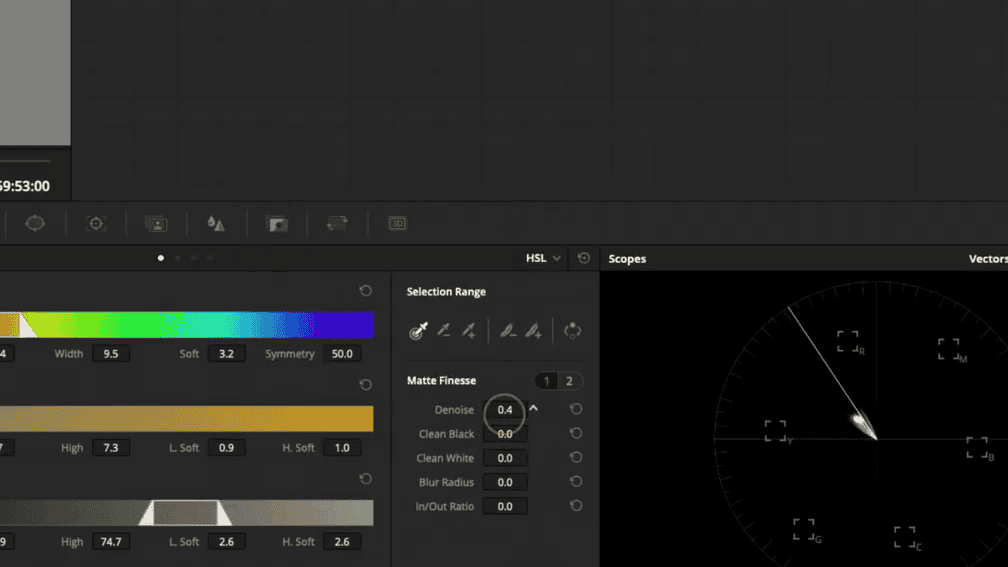
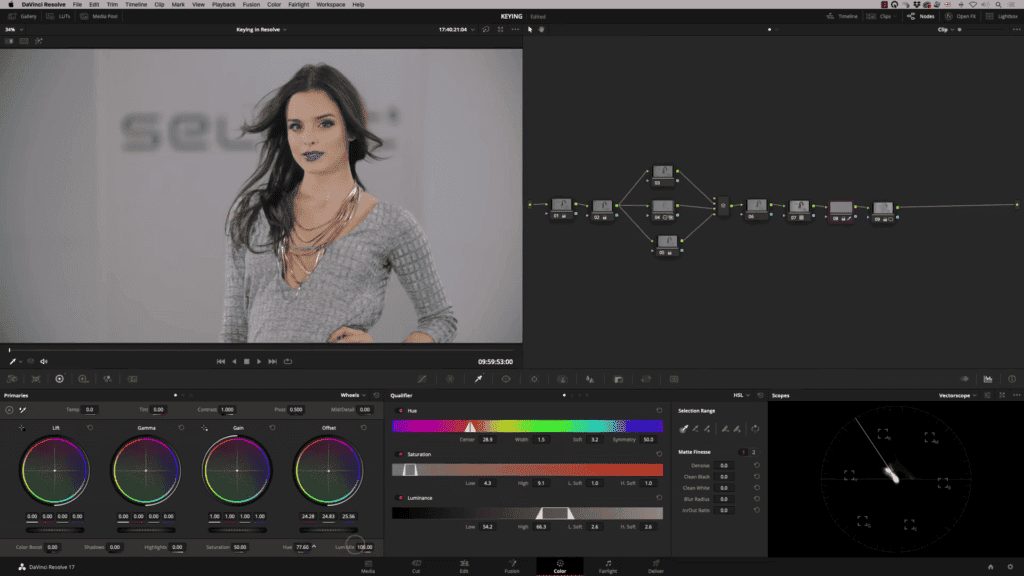
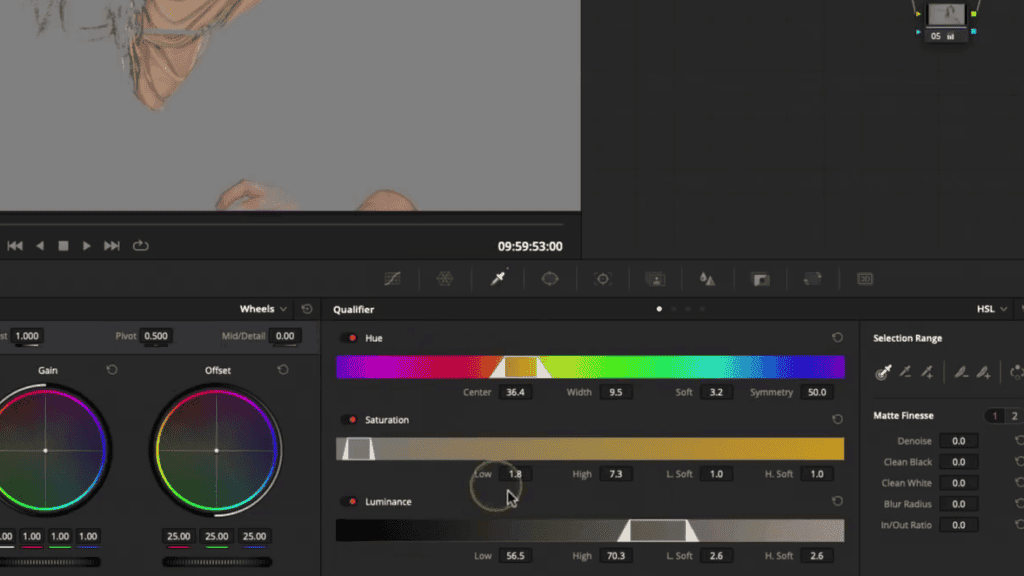
To fine-tune this, I’m going to go to my matte finesse tools; I’m going to add a little bit of denoise but not too much. What will help get rid of artifacts is the clean black and clean white.
So clean black is adjusting anything that’s not our selection, and clean white is cleaning up our selection.
After adjusting the clean black and clean white, we’ve got a great key now on there.
Clean white, I probably don’t even need to adjust. I usually put a little bit of blur radius on; this blurs the edges. This is particularly useful if you’re working with 8-bit footage, where your keys can be a little bit noisy.
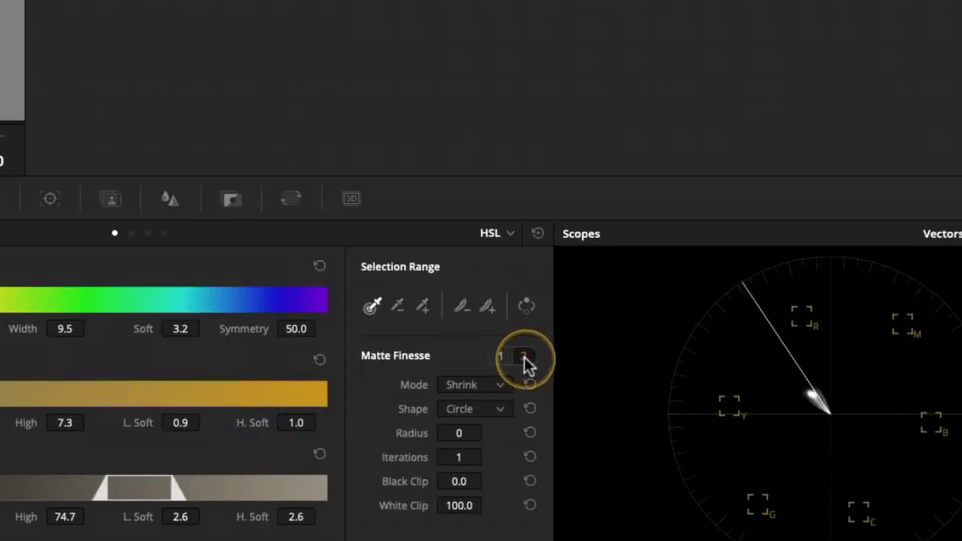
Shrink and grow your matte to show you what’s going on in menu two. We can shrink it and select grow, and you can adjust those parameters, but I’m going to leave that where it was.
I think you’ll agree we’ve got an excellent key there. Now because we’ve got the highlight tool on, we can see where the skin tone is sitting precisely on our vectorscope. There’s the skin tone line, and we’re sitting just a little bit below it. I could use any of my primary tools; I could maybe use gamma and push that color a little towards the line over a little bit.
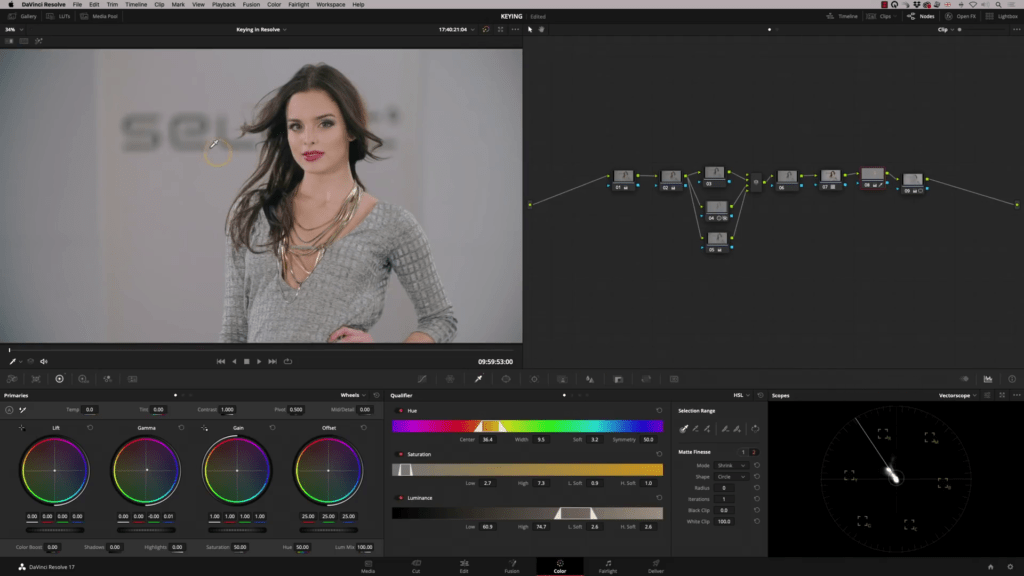
Just like that, and there we go, we’re on the line now, let’s take the highlight tool off, and there we go we’ve got perfect skin tone, really lovely key. I might even just put a little bit more saturation.
That’s how to get a perfect key, so I hope that’s giving you some good information and helping you get better keys.
Happy Color Grading!