Hey guys, here in this article, I want to take a look at the printer lights in Davinci Resolve. These are also known as the offset controls and they are pretty much my go-to control when I’m balancing the footage in DaVinci Resolve. Yes, they are very basic control and they have been around since the days of optical printing, but I find them really good for balancing when I’m grading. If you use the color wheels, you may introduce an extra color by accident. But when you are using the printer lights or the offset controls, you are working per channel of the RGB signal and you make very few changes.
Prior to the digital age, printer points were mechanical alterations that impacted the color balance and brightness of film, and the technical process was controlled by a color timer. The devices used a series of dichroic filters to divide the light into red, green, and blue, with each color passing through its own set of ‘light gates.’ These were metal vanes that opened and closed in exact degrees, allowing the exact amount of light to pass through in order to recreate the exact value for each light point. The three hues were then consolidated again and sent on the film as full-spectrum light.
Printer lights in Davinci Resolve are still highly popular and widely used corrections in digital grading, not only for setting the fundamental balance but also for generating aesthetics. One of the factors for its appeal is that printer points change the full tonal range in the image by moving the signal in its totality. In this manner, we can maintain the integrity and the photographic exposure of the original image while achieving a highly clean and cinematic finish.
Printer lights are incredibly accurate adjustments that can be quantified, and they are easier to measure than wheel values, which is one of the reasons for their popularity.
When using printer lights, the relation between the shadows, mid-tones, and highlights stays constant, and the contrast never varies, whereas We violate the natural connection between the shadows, mid-tones, and highlights by utilizing settings that split tonal ranges, such as lift, gamma, and gain.
From Printer Lights to Digital: The Evolution of Film Color Grading
Film has undergone profound transformations over the past century, not just narratively, but also technically. One such technical advancement has been in the realm of color grading. The transition from analog printer lights to sophisticated digital software encapsulates this evolution beautifully.
The Era of Printer Lights:
In the celluloid days, color timers were the unsung heroes. Their main tools were printer lights, which are primary-colored lights (red, green, and blue). These could be individually adjusted, usually on a scale from 0 to 50. The intensity adjustments directly influenced the film’s color balance and mood.
For example:
- Increasing red might lend a scene a warm, sunlit ambiance.
- Amping up blue could create a colder, perhaps more melancholic atmosphere.
This was more art than science, demanding an innate understanding of color interplay and its cinematic implications.
Digital Color Grading:
With the digital revolution, color grading underwent a significant metamorphosis. Modern software still respects the foundational principles of printer lights, allowing colorists to tweak red, green, and blue channels. But, the capabilities have vastly expanded.
Modern Tools Include:
- Curves for intricate adjustments.
- Secondary color correction for targeting specific color ranges.
- Advanced masks for localized changes.
The outcome? An expansive canvas for filmmakers, allowing them to venture from hyper-realism to the dreamy realms of fantasy.
Printer lights in DaVinci Resolve
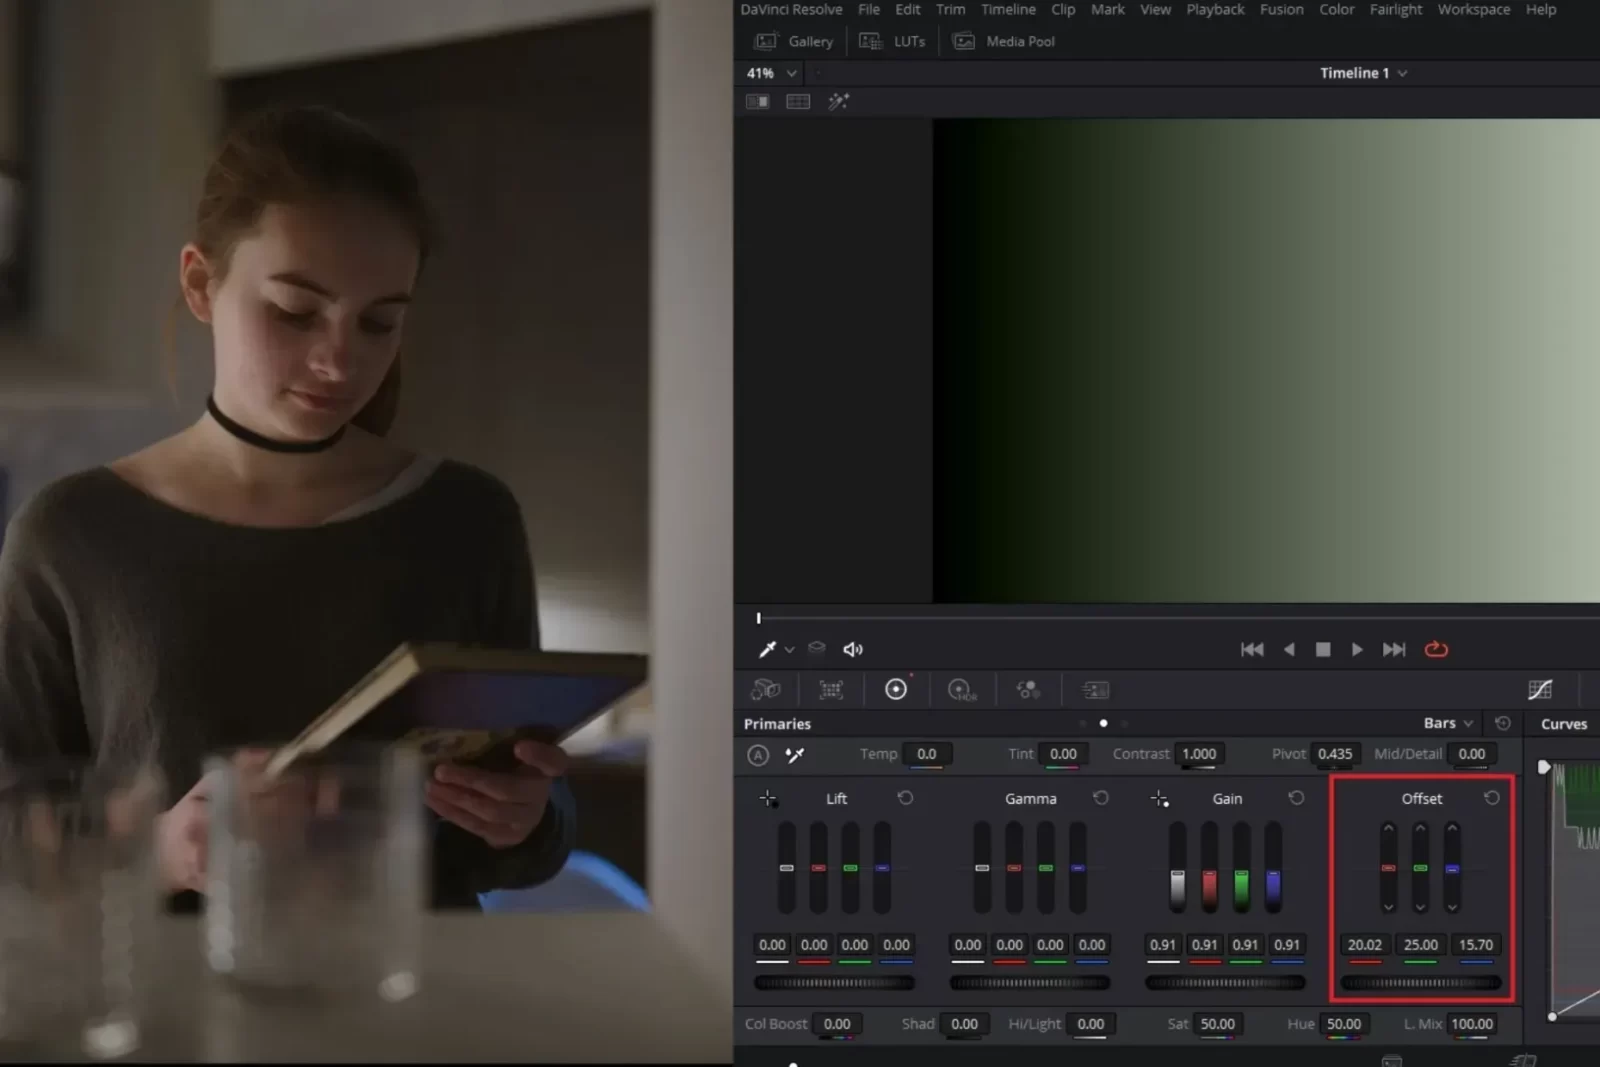
Printer lights are the same as DaVinci Resolve’s Offset Controls, which can be found under the ‘primaries bar’ menu. By default, each color channel’s exposure is set to 25 as a starting point, which corresponds to the scale’s middle in most conventional printer settings.
The color balance can be changed by moving the sliders of the different color channels up and down. A range of hues can be created by mixing red, green, and blue with their opposites, cyan, magenta, and yellow, in varying degrees of intensity.

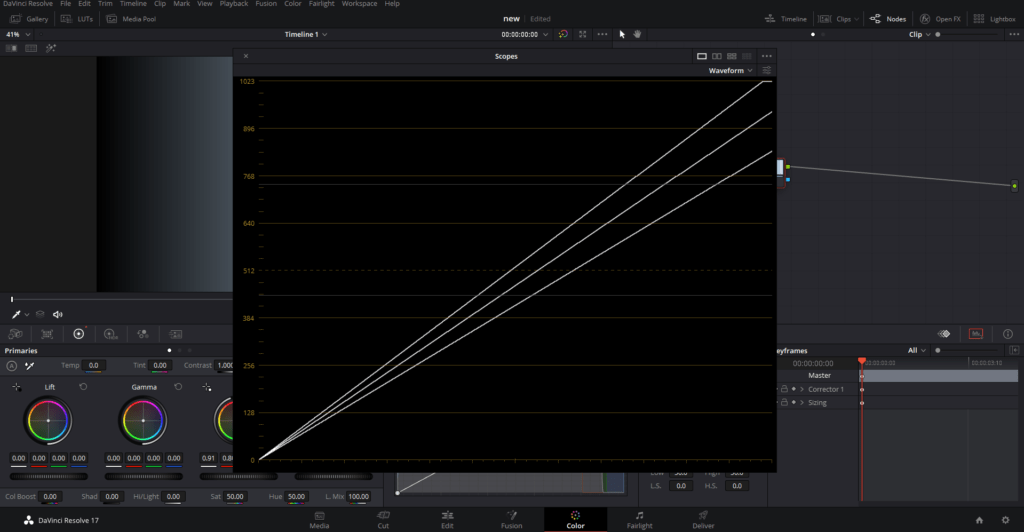
When operating with the color channels, we must additionally consider the brightness. The brightness of the image varies when all three color channels are ganged together. When all the color channels are ganged together, the brightness changes by around 1/12th of a complete camera stop, and when they are moved together twelve times, the brightness changes by a full camera stop.

Changing the brightness of the individual channels has a similar effect, although at a different level. Modifications in the red channel have a greater impact on brightness than the other two, while green has a tiny advantage over blue.
However, it’s impossible to say how the eye would interpret these variances because our highest awareness is in the green spectrum, and our eyes are more sensitive to brightness changes than color changes.
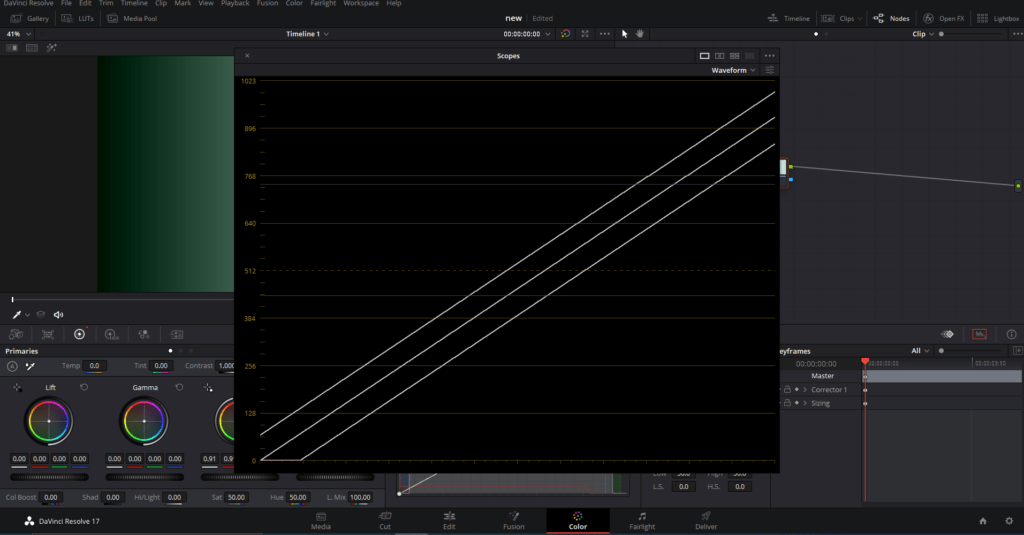
Brightness and color can be combined in interesting ways, as shown in the example below, where we produce dark yellow by eliminating blue and green. Other fascinating combinations include removing blue and green to obtain red, red, and green to obtain blue, and red and blue to obtain green.

In the second example, we combine red and green to get yellow, but the brightness is increased this time. Combining red and blue to make magenta, and green and blue to make cyan, are two further instances.

Corrections performed through a LUT’s curve
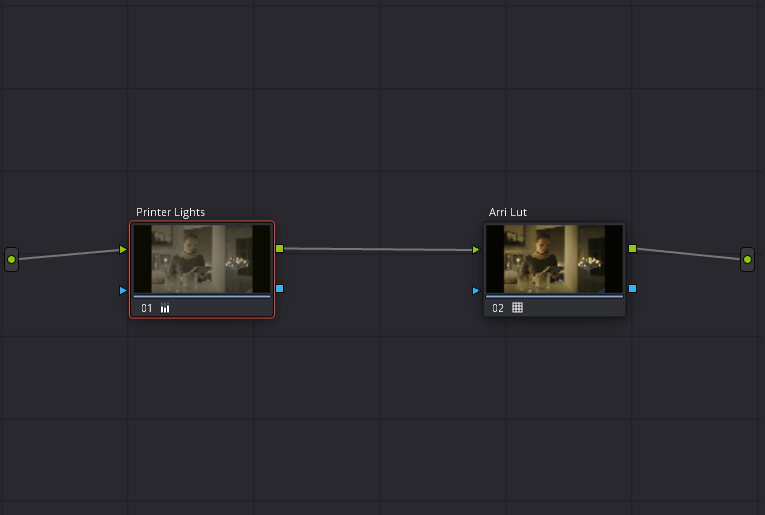
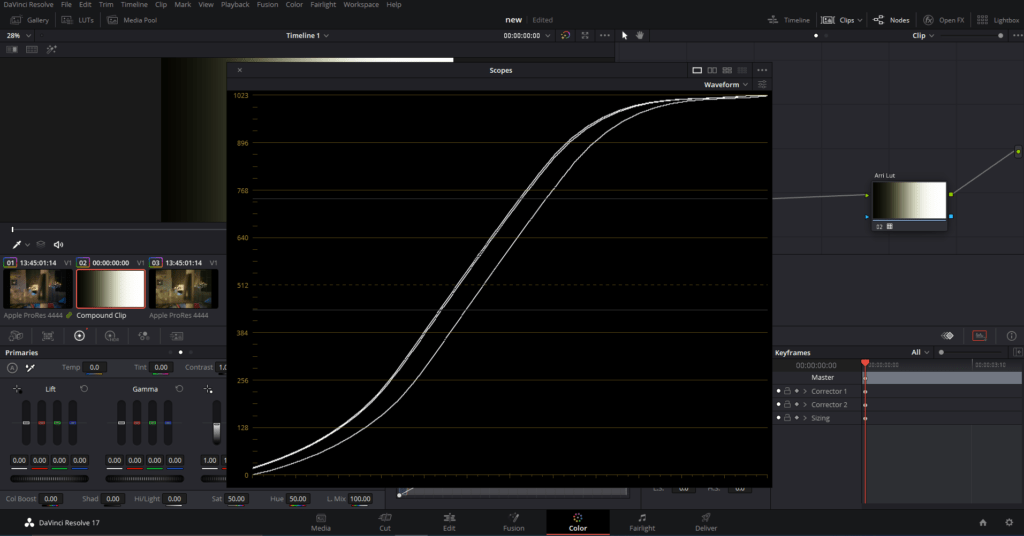
The Offset Controls or printer lights in DaVinci resolve are calibrated to only work on a small range of log encoded signals, and the corrections’ effects are designed to be viewed through a LUT curve. The image will extend and compress based on the form of the curve, making the offset adjustments behave more like traditional exposure controls.
To keep the node structure clean, we can apply our adjustments before the LUT, but the result will be the same if they are done after the LUT because corrections will take effect before the LUT.
- Also Read- How to Change Aspect Ratio in Davinci Resolve 17 ( Best Explained)
- Also Read- Setting Up An Affordable Color Grading Suite at Home. (Explained)
- Also Read- Move Premiere Pro Timeline to Davinci Resolve (XML Workflow)
After normalizing the image, we can opt to perform the offset corrections in video gamma space i.e after the LUT, but the controls will behave differently than they were meant for, and the output will be different. When adding a point of red to the exposure after the LUT, it will result in elevated red shadows, which isn’t how exposure should function.
When we add a point of color, we perceive a larger change in the mid-tones because an “add” in log-world (adding a printer point before the LUT) behaves as a multiply in linear math.
We will see more alterations in the straight-line portion of the curve than in the ends when looking at the corrections through the curve of the LUT. It means we may add color to the image without having to worry about the blacks and highlights as much as the mid-tones. Exactly how different film stocks used to behave when color timing was done chemically.
Based on the color variables in the LUT, the image’s color balance can also be changed. Even though we merely adjust the brightness, certain LUTs are intended to push cooler tones into the shadows and yellow into the highlights.
When operating under the LUT, the more vigorous the curve is, the more changes occur. Even when the exposure changes and color shifts occur, the contrast remains constant.
We can see the offset corrections through any curve but using the exact same LUT that the DOP exposed for onset is the only way to retain the relationship between the tone ranges and stay faithful to the way the original image was captured. We should grade under and monitor the adjustments through if the DOP filmed on Alexa with the Alexa LUT in the camera.
Balancing with Printer Lights
It is occasionally required to balance an image to eliminate a color cast when using diverse light sources and color temperatures. Typically, the color cast is visible across the image and can thus be efficiently erased with simple offset changes.
In some cases, only adjusting one of the color channels would suffice, but in the example below, we’ll need to alter two channels to bring the image towards balance. To minimize blue, we can add simply yellow by lowering the blue channel’s numerical value, then add red by raising the red channel’s numerical value.
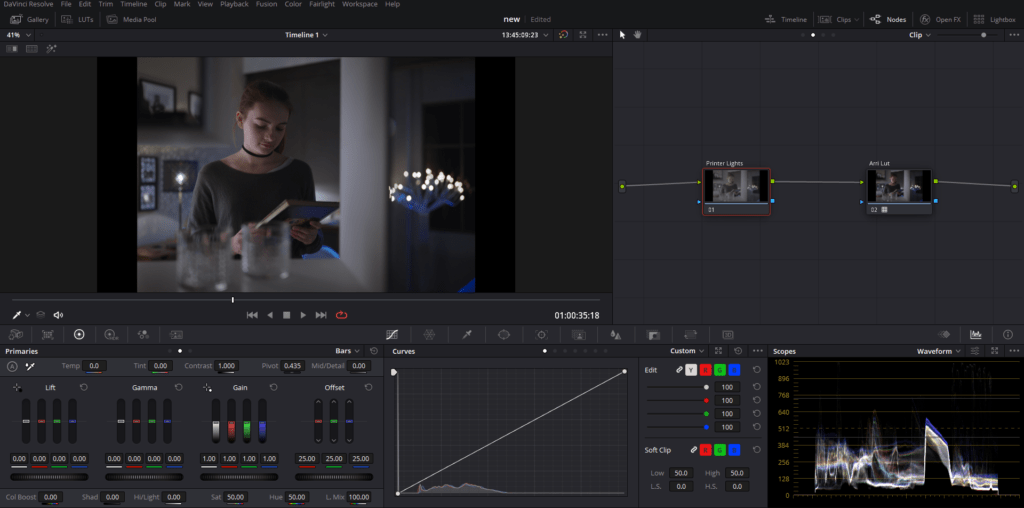
We don’t change the exposure significantly from how it was originally exposed by rotating the red and blue channels around the green channel in the center.

Aside from color temperature, shots might also have a tint problem. While color temperatures are in the orange/blue range, tint is in the green and magenta range. If the color cast is magenta, we can add green to balance it out, and vice versa.
To deal with these scenarios, Davinci Resolve offers a Tint Control, but it is calibrated to work in video gamma space. As a result, if the cast is too strong, the range on log-encoded images may be a little limited. Offset fixes may thus be a better option in such cases as well.

Remember that white balancing usually entails altering the colors such that the image appears more natural – not necessarily “right” on a scope. There is no law that says we need to neutralize the white balance if a blue color cast works for us. Sometimes we willfully disregard the balance for creative purposes.
This image is supposed to be blue, and it’s very natural. The same way that a sunset needs to stay nice and warm. It is up to us to modify the white balance, if at all. Whether the image is balanced or not, it is critical to apply the LUT before deciding how to approach it.

Enabling Printer Lights in Davinci Resolve
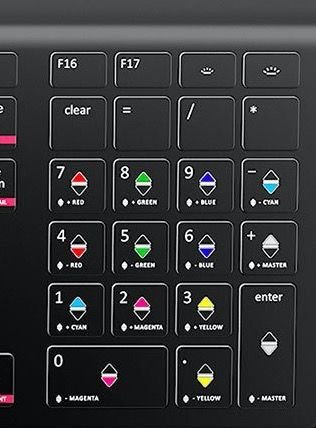
The Hotkeys feature in Resolve is activated via the “Color” pull-down menu, and when enabled, it allows you to do RGB color balance using the numeric keypad’s 4-9 keys.
Red is controlled by the 7 and 4 keys, Green by the 8 and 5 keys, and Blue by the 9 and 6 keys. It is the same as using the Offset controls, and the results will be seen on the Offset color wheel as well as in the printer lights display.

For an expert colorist, this means they can zoom through a sequence and do a primary grade in record time just by using the numeric pad on their keyboard and using printer lights. This is more valuable than completing the task in a short period of time. The more time you spend gazing at a single frame, the more your eyes adjust, and each correction serves as a baseline for the next.

By enabling the hotkeys in the Color drop-down menu, the offset controls can be found on the number keypad part of the keyboard. They can also be acquired in half and quarter amounts. To interact with the offset controls in DaVinci Resolve in a more advanced manner, map the keys to a Keypad.
It’s a really good way of getting into balancing your shots very quickly. It’ll take a little bit of time to get used to it. But it gives you super clean results and I think it’s a really nice way of getting started with balancing in Davinci resolve. Of course, you would never set a look using the offset controls. But once you’ve got your shots to a nice clean starting point, you can simply swap over to your color wheels, and then you can dive right in and get your look.