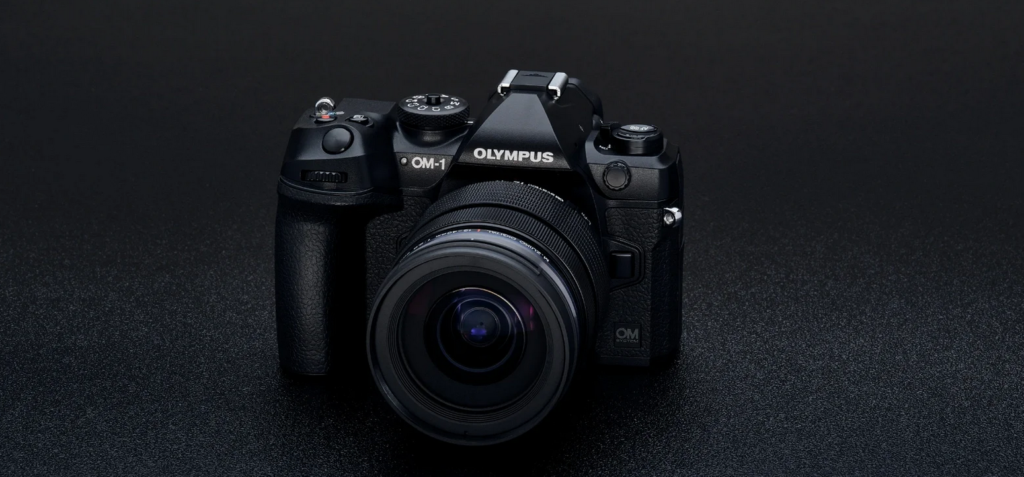
The OM SYSTEM OM-1 is a highly regarded mirrorless camera, celebrated for its superior image quality, rapid autofocus system, and user-friendly operation. It’s an ideal choice for capturing everyday moments and is equally adept at both photography and videography. However, even with its impressive performance, users might occasionally face challenges, such as autofocus not working properly. This article is here to assist if you’re experiencing this issue with your OM SYSTEM OM-1.
We will explore the various reasons why the autofocus might malfunction and offer practical solutions to resolve these problems. By identifying the root causes and applying the recommended fixes, you can restore the full functionality of your OM SYSTEM OM-1’s autofocus system and continue enjoying a smooth photography or videography experience. Let’s delve into troubleshooting the autofocus issues of the OM SYSTEM OM-1.
1. Incorrect Focus Mode
One of the most common reasons why the autofocus of the OM SYSTEM OM-1 may not work is that the camera is set to the wrong focus mode. The OM-1 has three focus modes: Single AF (S-AF), Continuous AF (C-AF), and Manual Focus (MF). Each mode is suitable for different shooting scenarios and subjects. For example, S-AF is ideal for stationary subjects, C-AF is best for moving subjects, and MF is useful for precise control over the focus point.
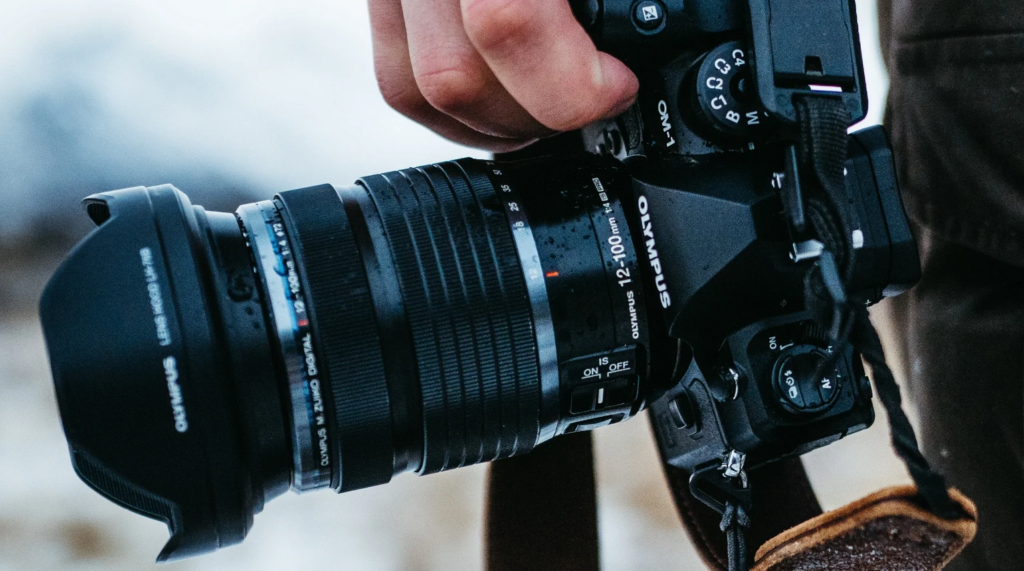
To check the focus mode, look at the top LCD panel of the camera. You should see a symbol indicating the current mode: S, C, or M. If the symbol does not match the subject or situation you are shooting, you need to change the focus mode. To do this, press the Fn1 button on the back of the camera and use the front or rear dial to select the desired mode. Alternatively, you can use the Super Control Panel (SCP) on the touch screen to change the focus mode by tapping the focus mode icon and choosing the option you want.
Changing the focus mode may solve the autofocus problem, but you also need to make sure that the focus area and point are correctly selected. The focus area is the region of the frame where the camera will look for focus, and the focus point is the specific spot within the area where the camera will lock the focus. The OM-1 has several focus area options, such as All Points, Single Point, Group 5 Point, Group 9 Point, and Group 25 Point. You can change the focus area by pressing the Fn2 button and using the arrow keys or the touch screen to select the option you want.
The focus point can be moved by using the arrow keys or the touch screen. You can also use the joystick to move the focus point, or press the joystick to center the focus point. You should try to place the focus point on the most important part of your subject, such as the eyes for portraits, or the main subject for landscapes. You can also use the AF Targeting Pad feature to move the focus point by sliding your finger on the touch screen while looking through the viewfinder.
2. Manual Focus Mode Activated
Another possible cause of the OM SYSTEM OM-1 autofocus not working is that the camera is in manual focus mode. Manual focus mode allows you to adjust the focus manually by using the focus ring on the lens. This mode can be useful for situations where you want to have full control over the focus, such as macro photography, astrophotography, or creative effects.
To check if the camera is in manual focus mode, look at the top LCD panel of the camera. You should see a symbol indicating the current focus mode: S, C, or M. If the symbol is M, it means that the camera is in manual focus mode. You can also look at the lens and see if the focus mode switch is set to MF.
To exit manual focus mode, you can either change the focus mode switch on the lens to AF, or press the Fn1 button on the back of the camera and use the front or rear dial to select S-AF or C-AF mode. Alternatively, you can use the Super Control Panel (SCP) on the touch screen to change the focus mode by tapping the focus mode icon and choosing the option you want.
If you want to use manual focus mode, but still have the option to use autofocus when needed, you can enable the AF-ON in MF mode feature. This feature allows you to use the AF-ON button on the back of the camera to activate autofocus temporarily while in manual focus mode. To enable this feature, you need to set the focus mode to MF in the menu system, while leaving the lens set to AF. Then, you need to go to MENU > AF page 1 > AF-ON in MF mode > yes. Now, you can use the focus ring to manually focus, and press the AF-ON button to autofocus when you want.
3. Autofocus Lock Engaged
Sometimes, the OM SYSTEM OM-1 autofocus may not work because the autofocus lock is engaged. The autofocus lock is a feature that allows you to lock the focus on a specific subject or distance, and then recompose the shot without losing the focus. This can be useful for situations where you want to place the subject off-center, or where the autofocus may struggle to find the correct focus point.
To use the autofocus lock, you need to press the AEL/AFL button on the back of the camera. This button has two functions: exposure lock and focus lock. The exposure lock prevents the camera from changing the exposure settings when you recompose the shot, while the focus lock prevents the camera from changing the focus point when you recompose the shot. You can assign either function to the button, or both, depending on your preference.
To check the function of the AEL/AFL button, look at the top LCD panel of the camera. You should see a symbol indicating the current function: AEL, AFL, or AEL/AFL. If the symbol is AFL or AEL/AFL, it means that the button can lock the focus. You can also look at the viewfinder or the touch screen, and see if there is a green dot or a green square indicating the focus lock status.
To change the function of the AEL/AFL button, you need to go to MENU > C page 1 > AEL/AFL > S-AF or C-AF, and select the option you want. You can choose between AEL, AFL, AEL/AFL, or OFF. You can also customize the behavior of the button, such as whether it locks the focus with a single press or a press and hold, or whether it locks the focus for the entire frame or for a specific point.
4. Low Light or Low Contrast Scenes
Sometimes, the OM SYSTEM OM-1 autofocus may not work well in low light or low contrast scenes. This is because the camera relies on the contrast between light and dark areas to detect and adjust the focus. When the light is dim or the scene is flat, the camera may have difficulty finding the focus point, or may hunt back and forth without locking the focus.
To improve the autofocus performance in low light or low contrast scenes, you can try the following tips:
- Use a lens with a fast aperture, such as f/1.8 or f/2.8. A fast aperture allows more light to enter the lens, which helps the camera to focus faster and more accurately.
- Use the C-AF mode with phase detection. The C-AF mode uses the phase detection system, which is more sensitive and reliable than the contrast detection system in low light conditions. You can also use the C-AF + TR mode, which tracks the subject and adjusts the focus continuously.
- Use the AF assist lamp. The AF assist lamp is a small light on the front of the camera that illuminates the subject when the shutter button is half-pressed. This helps the camera to find the focus point in dark situations. You can turn on the AF assist lamp by going to MENU > AF page 2 > AF Illuminator > ON.
5. Lens Compatibility Issues
Sometimes, the OM SYSTEM OM-1 autofocus may not work properly because of lens compatibility issues. The OM-1 uses the micro four thirds mount, which is compatible with a wide range of lenses from different brands and manufacturers. However, not all lenses are fully compatible with the OM-1’s autofocus system, especially older or third-party lenses.
To check the lens compatibility, you can refer to the compatibility tables provided by OM Digital Solutions. These tables show which lenses are compatible with which camera models, and what features and functions are supported. You can also look for the OM-D logo on the lens, which indicates that the lens is designed for the OM-D series cameras, including the OM-1.
If you are using a lens that is not fully compatible with the OM-1, you may experience some issues with the autofocus performance, such as slow or inaccurate focusing, hunting or pulsing, or failure to lock the focus. You may also encounter some errors or warnings on the camera screen, such as “Lens not attached” or “Lens not recognized”.
To solve the lens compatibility issues, you can try the following tips:
- Use an adapter. If you are using a lens that is not designed for the micro four thirds mount, such as a four thirds lens or a lens from another brand, you may need to use an adapter to attach the lens to the camera. However, not all adapters are compatible with the OM-1’s autofocus system, and some may only support manual focus. You should look for an adapter that supports autofocus and other features, such as the MMF-3 Four Thirds Adapter or the MC-20 Teleconverter.
- Use manual focus. If the autofocus still does not work, you can switch to manual focus mode and adjust the focus manually by using the focus ring on the lens. You can also use the magnify and peaking features to assist you with manual focus. The magnify feature enlarges the image on the viewfinder or the touch screen, while the peaking feature highlights the edges of the in-focus areas with a color of your choice.
6. Dirty or Damaged Lens Contacts
Sometimes, the OM SYSTEM OM-1 autofocus may not work correctly because of dirty or damaged lens contacts. The lens contacts are the metal pins on the back of the lens and the camera mount that allow the lens and the camera to communicate with each other. If the lens contacts are dirty, dusty, corroded, or bent, the communication may be interrupted or distorted, which can affect the autofocus performance.
To check the lens contacts, you can detach the lens from the camera and inspect the pins on both the lens and the camera. You should look for any signs of dirt, dust, grease, rust, or damage. You can also try attaching a different lens to the camera, or the same lens to a different camera, to see if the problem persists. This can help you determine if the issue is with the lens or the camera.
To clean the lens contacts, you can use a soft, dry, lint-free cloth or a cotton swab to gently wipe the pins. You should avoid using any liquids or solvents, as they may damage the contacts or the electronics. You should also be careful not to touch the contacts with your fingers, as the oils from your skin may cause corrosion. You can also use a blower or a brush to remove any dust or debris from the contacts.
To repair the lens contacts, you may need to contact the manufacturer or a professional service center. If the contacts are bent, broken, or missing, you may not be able to fix them by yourself. You should also avoid forcing the lens onto the camera, as this may cause further damage. You should always store and handle the lens and the camera with care, and use a lens cap and a body cap to protect the contacts when not in use.
7. Camera Firmware Outdated
Sometimes, the OM SYSTEM OM-1 autofocus may not work optimally because the camera firmware is outdated. The camera firmware is the software that controls the camera functions and features, including the autofocus system. OM Digital Solutions regularly releases firmware updates for the OM-1 to improve the performance, stability, and compatibility of the camera.
To check the camera firmware version, you can go to MENU > Wrench page 1 > Firmware. You should see the current firmware version for the camera body and the lens. You can also visit the OM Digital Solutions website to see the latest firmware version available for the OM-1, and the details of the improvements and fixes included in the update.
To update the camera firmware, you can use the OM Workspace software on your computer, or the OM SYSTEM app on your smartphone. You need to connect the camera to the computer or the smartphone via USB cable or Wi-Fi, and follow the instructions on the screen. You should make sure that the camera battery is fully charged, and that the memory card is inserted in the camera before starting the update. You should also avoid turning off the camera or disconnecting the cable during the update, as this may cause damage to the camera.
- Also Read: Top 3 Canon EOS R10 Alternatives
- Also Read: Davinci Resolve Color Shift DCTL: Free Download