
Welcome back to FilmmakingElements.com, in this article I share my Davinci Resolve Split Tone DCTL, which will be free to download.
Ah, the world of video editing! It’s a realm where every subtle tweak can transform an ordinary clip into a cinematic masterpiece. If you’re like me, always on the hunt for the next big thing in video grading, then you’re in for a treat. Enter DaVinci Resolve’s Split Tone DCTL.
So, what exactly is split toning? Think of it as adding a dash of magic to your videos. It’s a technique that allows us to color the highlights and shadows of a clip separately. Imagine being able to cast a warm, golden hue on a sunset while keeping the shadows cool and blue. It’s not just about making videos “pretty”—it’s about evoking emotions, setting moods, and telling stories more effectively.
Now, why do I consider it a game-changer? Split toning offers a level of control that’s unparalleled. It’s like having a paintbrush where we can artistically color our visuals, frame by frame. With DaVinci Resolve’s Split Tone DCTL, this power is right at our fingertips, simplified and streamlined.
Stick with me, and by the end of this article, you’ll see just how this tool can elevate your video editing game.
Exploring the Split Tone DCTL: A Simple Overview
Diving into code can often feel like trying to decipher an ancient language, especially if you’re more of a visual person like me. But fret not! I promise to keep this overview light and breezy, focusing on the magic the code works rather than getting lost in the nitty-gritty.
At its core, the Split Tone DCTL is like a chef’s special recipe. Just as a chef combines ingredients in precise ways to whip up a delicious dish, this code mixes different color parameters to achieve that perfect visual flavor for our videos. It works in every color space and
Here’s a simple breakdown:
- Contrast Adjustments: The code begins by tweaking the contrast. Think of this as adjusting the difference between the light and dark parts of your video, making them pop just right.
- Highlight and Shadow Splits: This is where the real fun begins. The code has functions that separately modify the colors of the bright and dark areas, allowing us to create that dreamy split tone effect.
- Customizable Sliders: Ever wished you could have more control? The code comes with built-in sliders that let you decide how strong or subtle you want the effect to be, or which colors to emphasize.
In essence, the Split Tone DCTL is like a mini color lab. Even without understanding every line of code, what’s crucial is knowing that it’s designed to give us maximum creativity with minimum fuss.
How to Import and Use This DCTL
Integrating my Split Tone DCTL into your DaVinci Resolve workflow might seem like a technical challenge, but with a clear understanding and a systematic approach, it becomes a breeze. Let’s dive deeper into the intricacies of this process:
- Before You Begin:
- Download and Extract: Ensure you’ve downloaded the Split Tone DCTL from the provided link.
- Importing the DCTL into DaVinci Resolve:
- Open DaVinci Resolve: Launch the software and either open an existing project or create a new one.
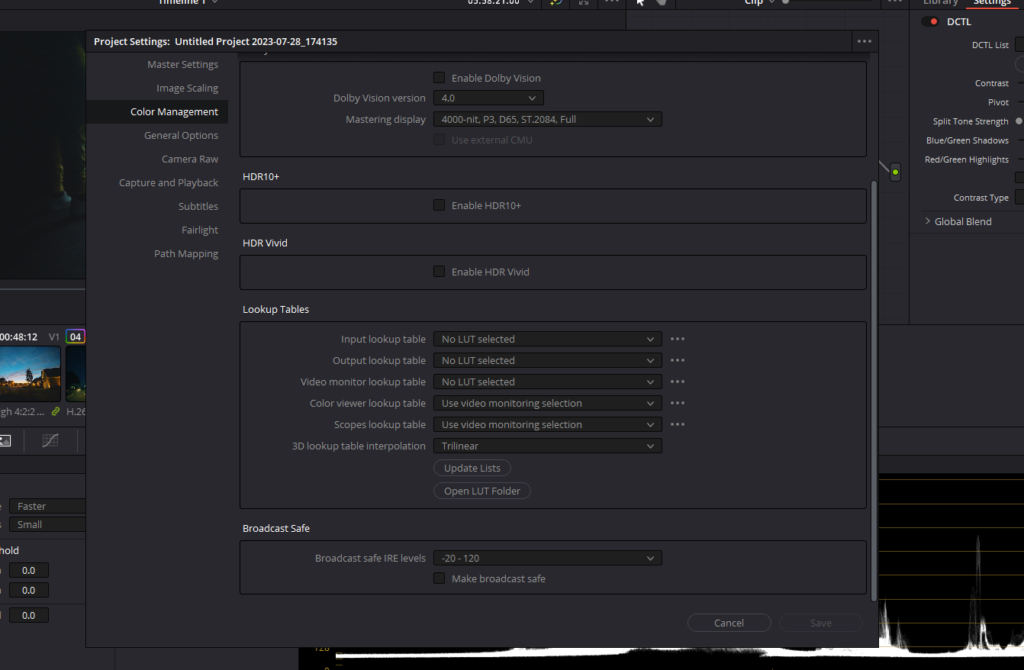
- Accessing Project Settings: In the lower right corner, you’ll find a gear icon. Click on it to open the ‘Project Settings’ menu.
- Dive into Color Management: Inside Project Settings, locate and click on the ‘Color Management’ tab on the left panel.
- Opening the LUT Folder: Scroll down to the ‘Lookup Tables’ section. Here, you’ll see an ‘Open LUT Folder’ button. Clicking this will direct you to the directory where DaVinci Resolve accesses its LUTs and DCTLs.
- Importing the DCTL: Copy the Split Tone .dctl file and paste it into the DCTL folder which is already there in the directory..
- Utilizing the DCTL in Your Projects:
- Access from LUTs Section: After successfully importing, restart Davinci Resolve and head over to the color page.
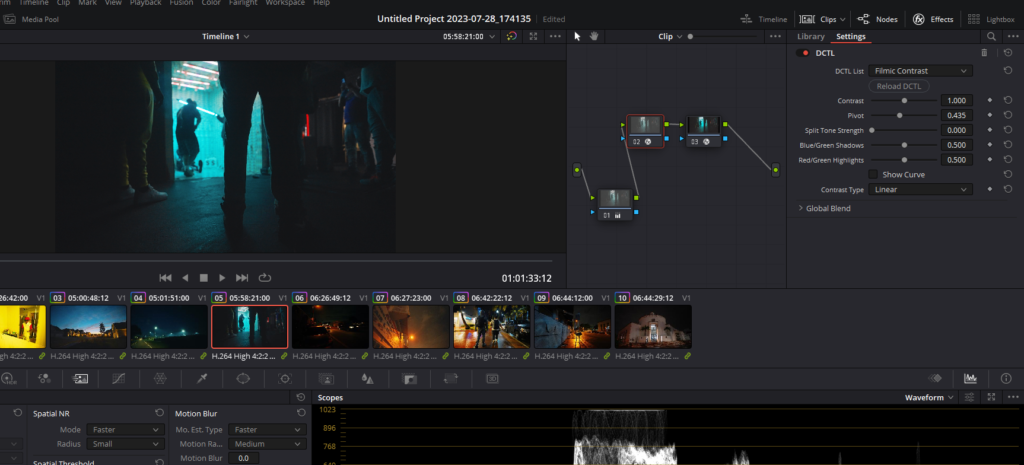
- Apply to Desired Node: In the node tree, select the node you wish to apply the DCTL to. Click on the ‘Effects’ button on the top-right corner and scroll till you find ‘DCTL’. Simply drag and drop the DCTL onto this node.
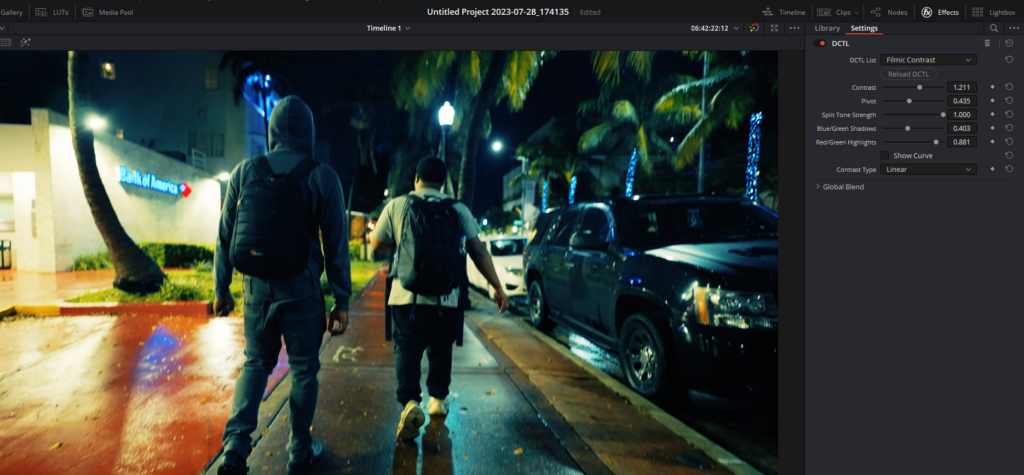
- Detailed Adjustments: Select the Split Tone DCTL from the drop-down list. The power of DCTL lies in its parameters. On the right panel, you’ll see various sliders corresponding to the DCTL parameters we’ve discussed below.
Download the Davinci Resolve Split Tone DCTL From Here
Implementing Split Tone DCTL in Your Projects
Alright, fellow video enthusiasts, this is the moment we’ve been building up to! You’ve heard me rave about the magic of Split Tone DCTL, and now it’s time to wield that magic for ourselves. I’m going to walk you through a straightforward guide to applying this effect in DaVinci Resolve. Trust me, by the end, your projects will have that cinematic flair we all crave.
Step 1: Setting the Stage
Before diving in, ensure you’ve got DaVinci Resolve up and running, and your desired video clip is imported into the timeline. This will be our canvas.
Step 2: Accessing the DCTLs
Navigate to the Color page in DaVinci Resolve. Select the node you wish to apply the DCTL to. Click on the ‘Effects’ button on the top-right corner and scroll till you find ‘DCTL’. Simply drag and drop the DCTL onto this node.
Step 3: Applying the Effect
From the drop-down menu, select the Split Tone DCTL. Voilà! You’ve just added the effect. But we’re not done yet; the real magic lies in customization.
Step 4: Customizing Your Look with Split Tone DCTL’s Features
Now that we’ve applied the Split Tone DCTL, it’s time to dive into the heart of customization. The beauty of this tool lies in the myriad of features it offers, letting you fine-tune your visuals with precision:
- Contrast and Pivot: These sliders play with the light and dark areas of your clip. Adjust the contrast to make your video’s colors pop, and use the pivot to balance where the contrast centers.
- Contrast Type: Choose between Linear and S-Curve. While Linear gives a straightforward contrast adjustment, S-Curve adds a cinematic touch by emphasizing the mid-tones.
- Split Tone Strength: This determines the intensity of the split toning. Slide it up for a more pronounced effect or keep it low for subtle nuances.
- Blue/Green Shadows and Red/Green Highlights: These are your color control sliders. Define the colors for your shadows and highlights. Want cooler shadows? Slide towards blue. For warmer highlights? Slide towards red.
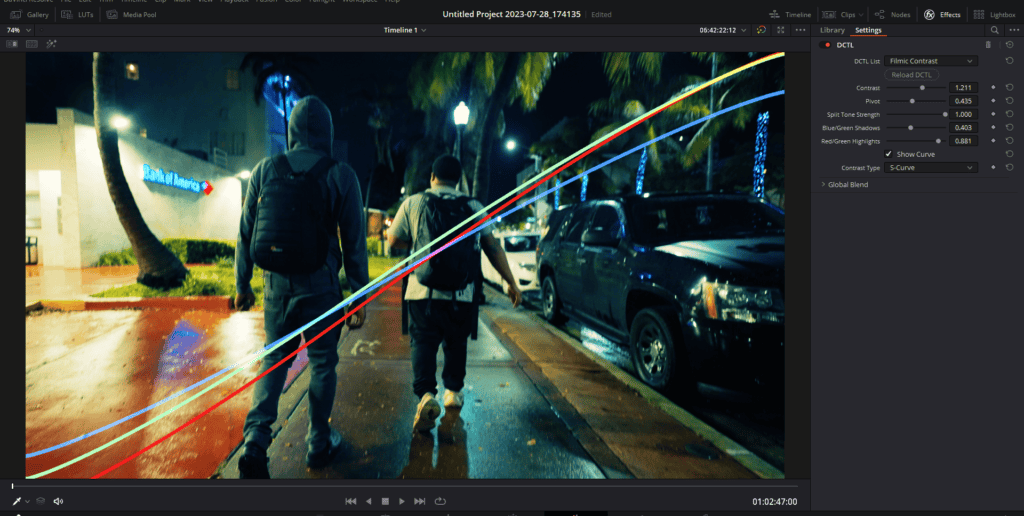
- Show Curve Option: This feature lets you visually see the curve of your color grading. It’s especially handy for those who like a visual reference while editing.
Feel free to play around with these features. The more you experiment, the better you’ll understand how each adjustment affects your video. Remember, there’s no right or wrong here; it’s all about achieving the vision you have in mind!
Step 5: Preview and Adjust
Hit the play button and watch your video. Love what you see? Great! Feel it needs a bit more tweaking? Go back to the sliders and adjust until you achieve the perfect look.
- Also Read: Davinci Resolve Color Density DCTL: Free Download
- Also Read: Is DaVinci Resolve Safe to Download?
- Also Read: Top 5 Nikon Z50 Alternatives