Hi, I’m Salik, the author of FilmmakingElements.com. I have been a filmmaker for over 10 years. I am also a certified DaVinci Resolve Trainer and I have used DaVinci Resolve for many of my projects. In this blog post, we’ll be exploring various techniques for creating visually engaging video collages in DaVinci Resolve. By mastering these three methods, you can add depth and variety to your video editing projects, making them stand out from the rest. Let’s dive in!
Method 1: Create Compelling Video Collages In Davinci Resolve
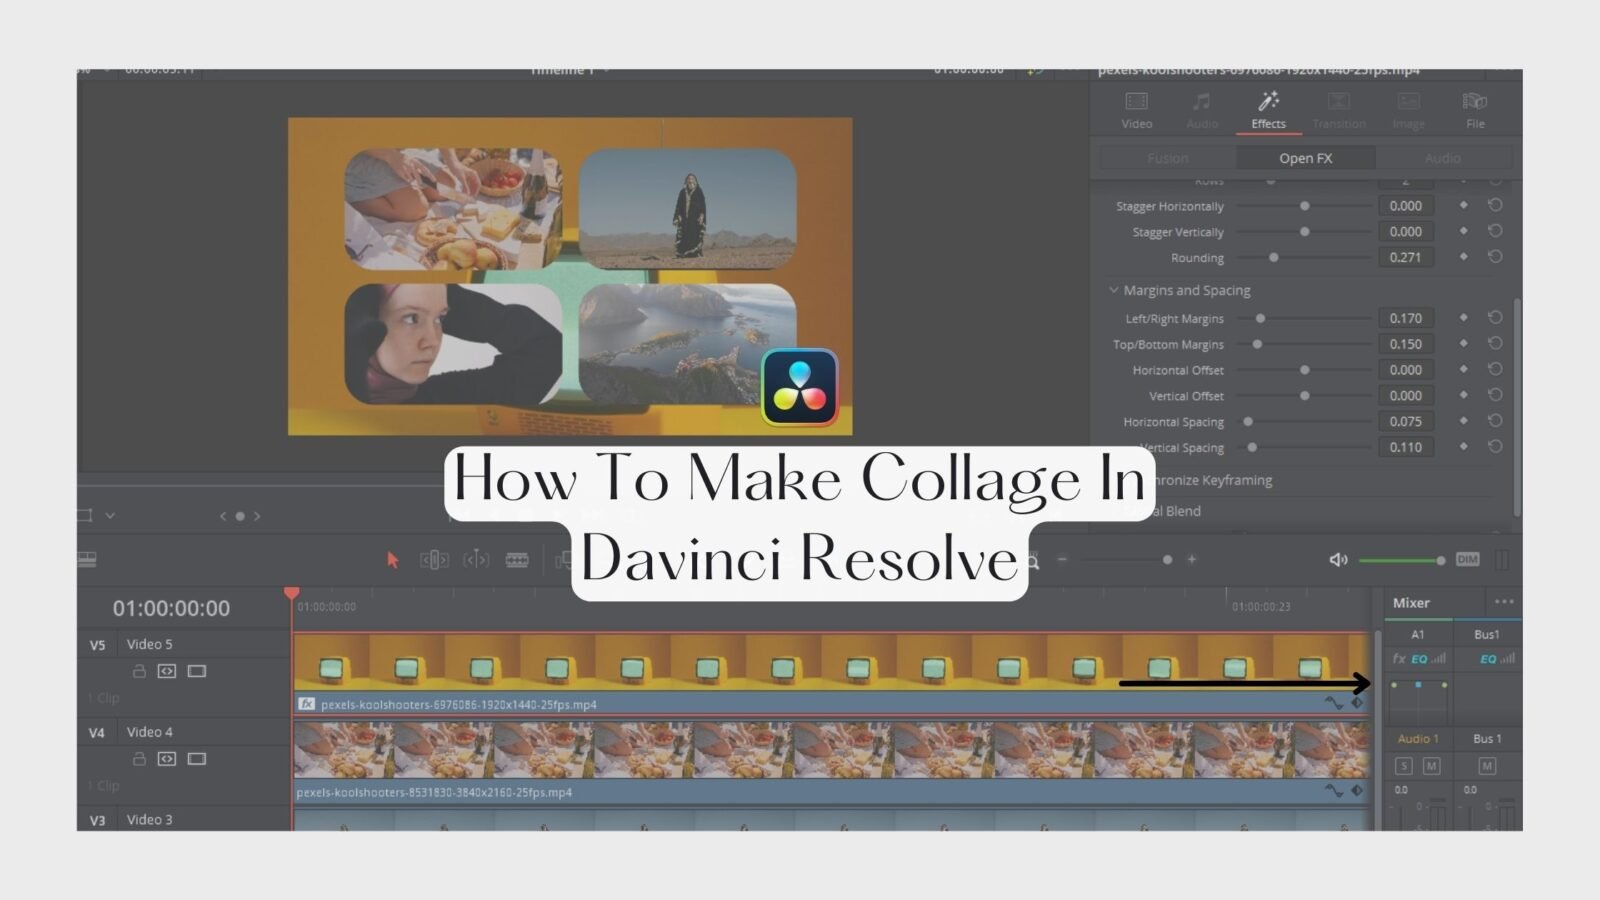
Video collages are a great way to showcase multiple clips simultaneously and create visually engaging content. In this comprehensive guide, we’ll delve into the process of creating a video collage in DaVinci Resolve, covering everything from organizing clips to customizing layouts and adding effects.
Organizing Clips for a Video Collage

The first step in creating a video collage is to gather and organize the clips you want to include. For example, you have a group of five clips: you will be using a clip as the background and other four clips to overlay on top. The organization of these clips is crucial for the collage effect.
- Import your clips: Start by importing the clips you want to use in your project into DaVinci Resolve. You can do this by clicking on File> Import> Media from the menu on top or by simply dragging and dropping the clips into the Media Pool.
- Create a timeline: Once your clips are imported, create a new timeline by right-clicking in the Media Pool and selecting “Create New Timeline.” Name your timeline and click “Create.”
- Arrange your clips: Drag your clips onto the timeline, placing the background clip on a higher video track and the four clips on lower video tracks. This is important because the video collage effect will use the clip on the top most video track as a background and the other clips as overlays.
Applying the Video Collage Effect
Once your clips are organized, it’s time to apply the video collage effect. This effect will create a series of rectangular masks on the background clip, revealing the other clips below.
- Select the top clip: Make sure the clip on the top (background clip) is selected on the timeline by clicking on it.
- Open the Effects Library: If you don’t see the Effects Library, click on “Effects” in the top left corner of the DaVinci Resolve interface to open it.
- Search for the Video Collage effect: In the Effects Library, make sure the “OpenFX” tab is selected, and then search for “Video Collage.” Drag the Video Collage effect onto the top clip on the timeline.
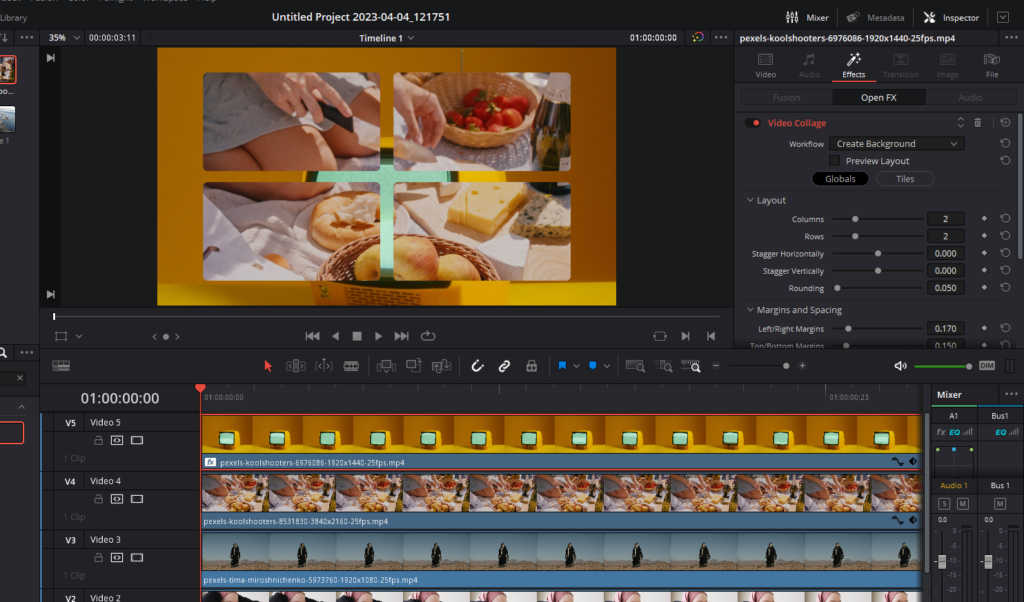
- Adjust the effect settings: With the top clip still selected, head over to the Inspector panel on the right side of the interface. Click on the “Effects” tab to access the controls for the video collage effect.
Customizing the Layout
Now that the video collage effect has been applied to the background clip, it’s time to customize the layout by resizing and positioning the other clips within the rectangular masks.
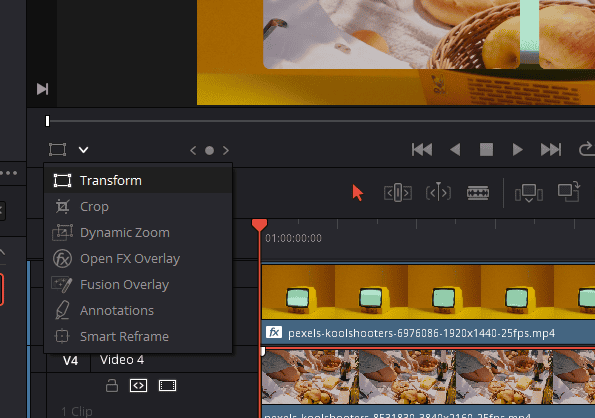
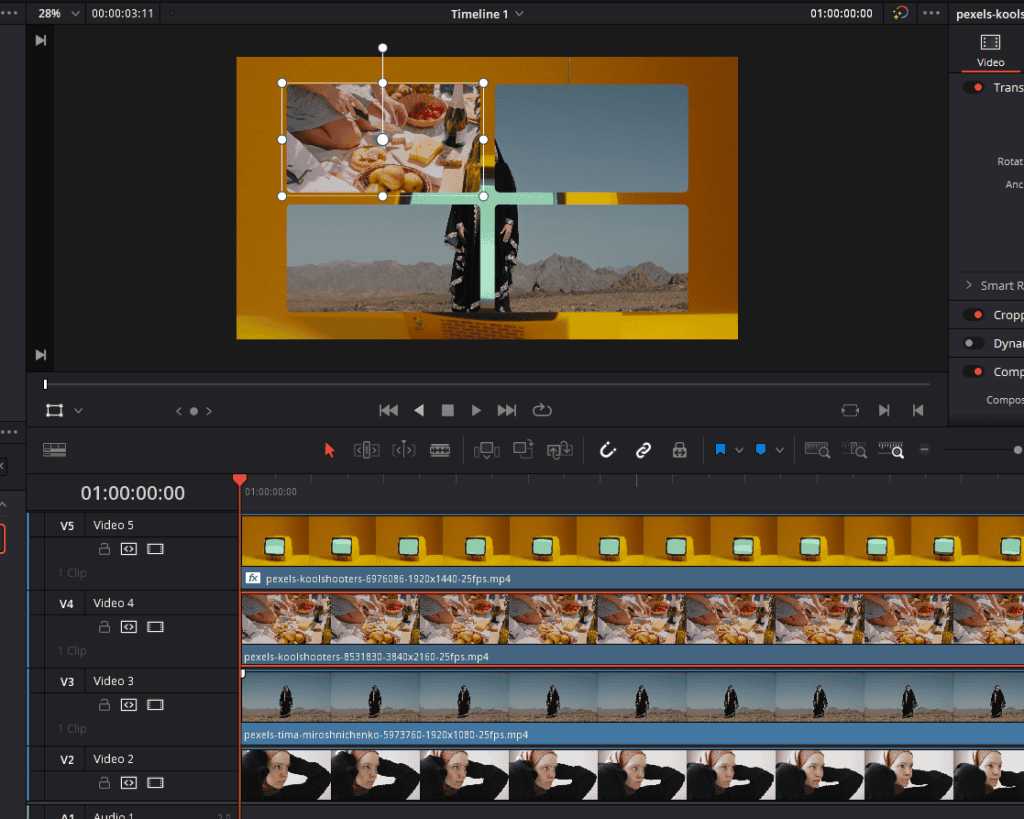
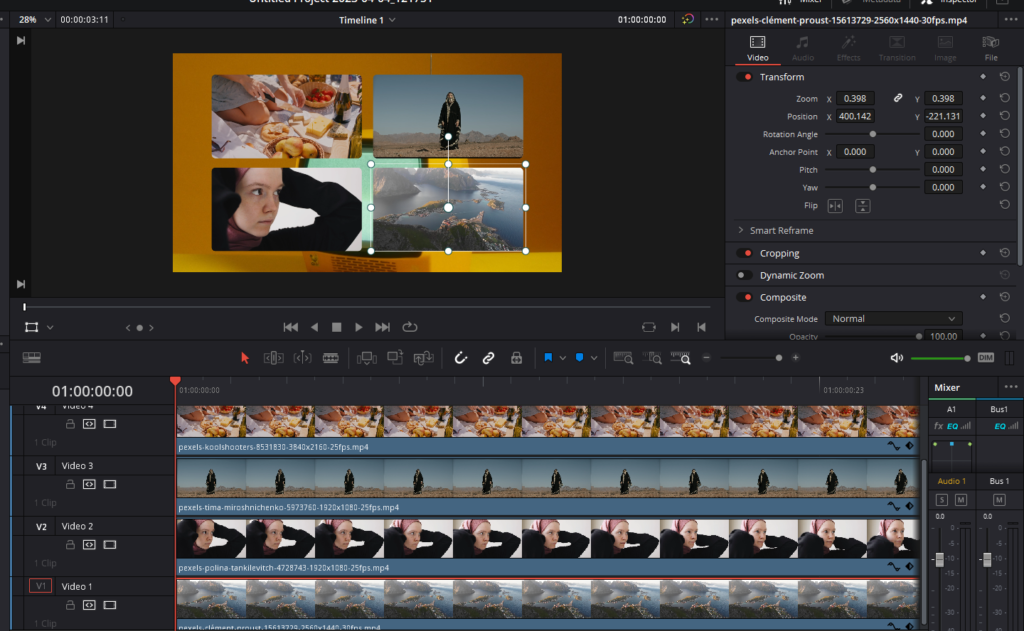
- Resize and position other clips: Select each clip (except the background clip) on the timeline one at a time, making sure the Transform controls are turned on by clicking the small rectangle icon in the bottom left corner of the Viewer. Resize and reposition each clip within the corresponding rectangular mask on the top clip.
- Fine-tune the layout settings: With the background clip selected, head back to the Inspector panel and go to Effects and explore the various layout settings available under the video collage effect. These settings allow you to:
- Add or subtract rows and columns: Increase or decrease the number of rows and columns in your collage, depending on how many clips you want to include.
- Stagger rows and columns: Adjust the staggering of rows and columns vertically and horizontally to create a more dynamic layout.
- Adjust roundness: Modify the roundness using the Rounding slider of the rectangles or circles to create unique shapes for your collage.
- Customize margins and spacing: In the Inspector panel, you can also find settings to adjust the margins and spacing of your video collage. These settings allow you to:
- Modify horizontal and vertical margins: Bring the clips closer together or farther apart by adjusting the horizontal and vertical margins. This can help you achieve the desired balance between the clips in your collage.
- Adjust horizontal and vertical offset: Change the overall positioning of the clips in the collage by altering the horizontal and vertical offset values.
- Customize horizontal and vertical spacing: Fine-tune the spacing between the clips in your collage by tweaking the horizontal and vertical spacing values.
Styling and Animating Tiles
Once you have customized the layout of your video collage, it’s time to style and animate the individual tiles for added visual interest.
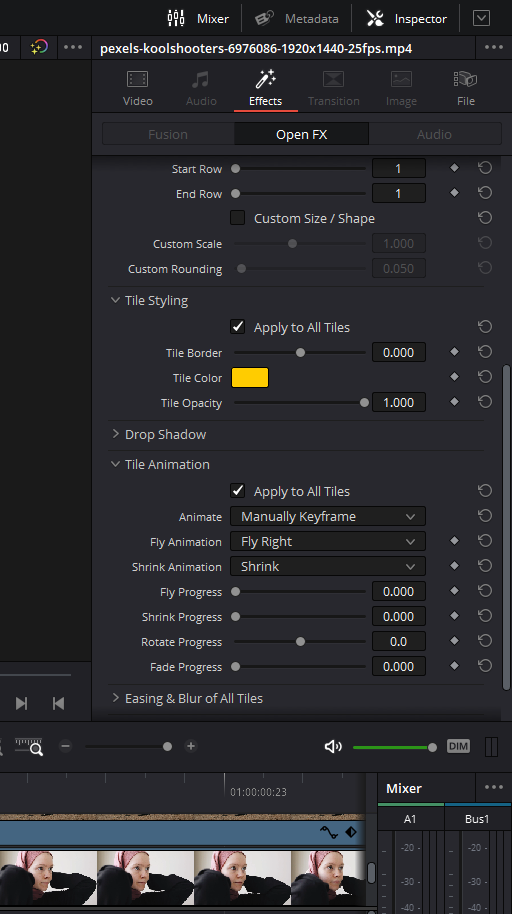
- Muting Tiles: In the Inspector panel, click on the Tiles button under the video collage effect settings, you can toggle individual tiles on and off by selecting the tile number from the Active Tile drop-down menu and clicking the “Mute Tile” checkbox.
- Tile Styling: In the Tiles section you can add borders and drop shadows to your tiles to make them stand out. Adjust settings such as color, width, angle, distance, expand, and blur to achieve the desired look. You can also create custom styles for each tile by unchecking the “Apply to All Tiles” option and adjusting the settings for each tile individually.
- Tile Animations: Bring your video collage to life by applying animations to the tiles. You can either manually keyframe the animations or use automated intro and outro settings. Here are some animation options to consider:
- Fly in/out: Have your tiles fly in from different directions, such as left, right, up, or down. You can customize the speed and direction of the animation.
- Shrink/Grow: Animate your tiles to shrink or grow in size, adding a sense of depth and movement to your collage.
- Fade in/out: Gradually fade your tiles in and out for a more subtle and elegant effect.
- Rotate: Add a touch of dynamism by rotating your tiles as they appear or disappear from the collage.
To apply animations to your tiles, first, choose an animation style and decide whether to apply the animation to all tiles or customize each tile individually. You can also combine different animation styles for a more complex and visually appealing result.
Method 2: Creating Picture-in-Picture Using Collage Effect In Davinci Resolve
The Picture-in-Picture (PiP) technique is a valuable tool for content creators, especially for those who create tutorial videos, gaming videos, or any situation where it’s helpful to display two videos simultaneously. In this guide, we’ll show you how to create a PiP overlay using the Collage effect in DaVinci Resolve.
Setting Up Your Clips for Picture-in-Picture
Start by organizing your clips in DaVinci Resolve. For example, take two clips: a background clip and an overlay clip. We want the overlay clip to appear in the top right corner while the background clip plays.
- Import your clips: Import both the background and overlay clips into DaVinci Resolve.
- Create a timeline: Create a new timeline and drag both clips onto it, placing the overlay clip on a lower video track (e.g., V1) and the background clip on a higher video track (e.g., V2).
Applying the Collage Effect for Picture-in-Picture
Now that your clips are organized, it’s time to apply the Collage effect to create the PiP overlay.
- Select the background clip: Make sure the background clip is selected (Video Track 2) on the timeline.
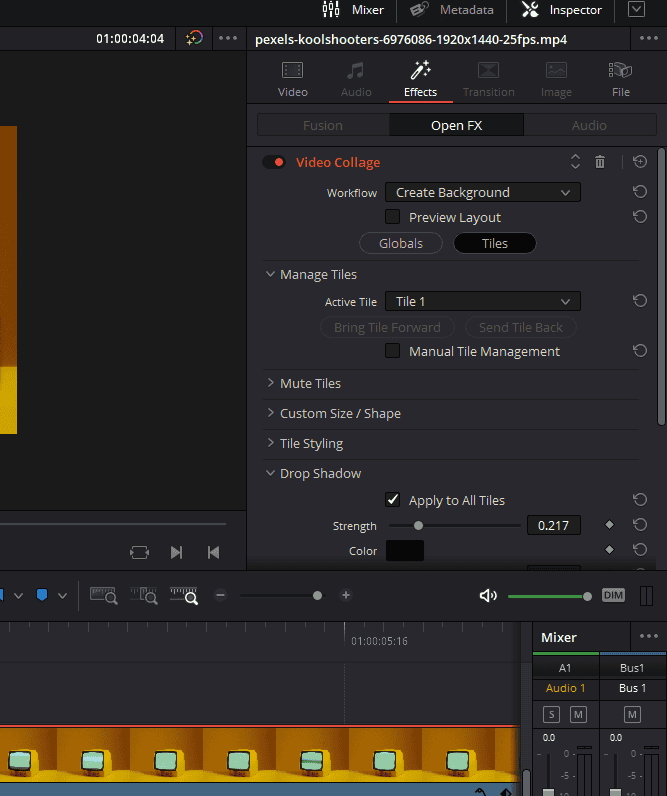
- Apply the Video Collage effect: Drag the Video Collage effect from the Effects Library by clicking on the Effects button on the top left corner onto the background clip. This will create four masks by default.
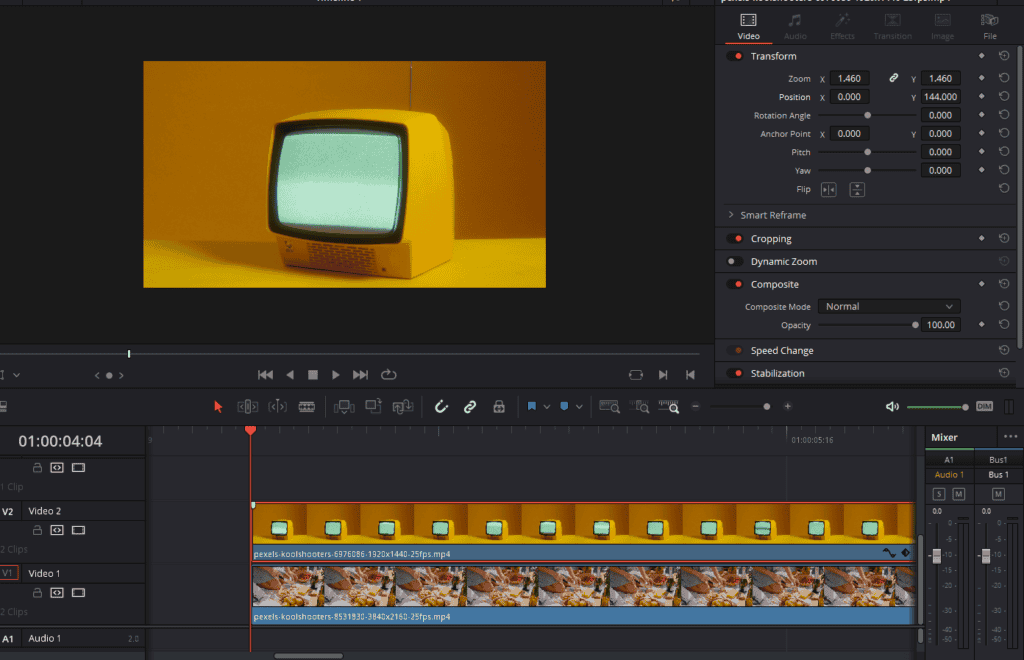
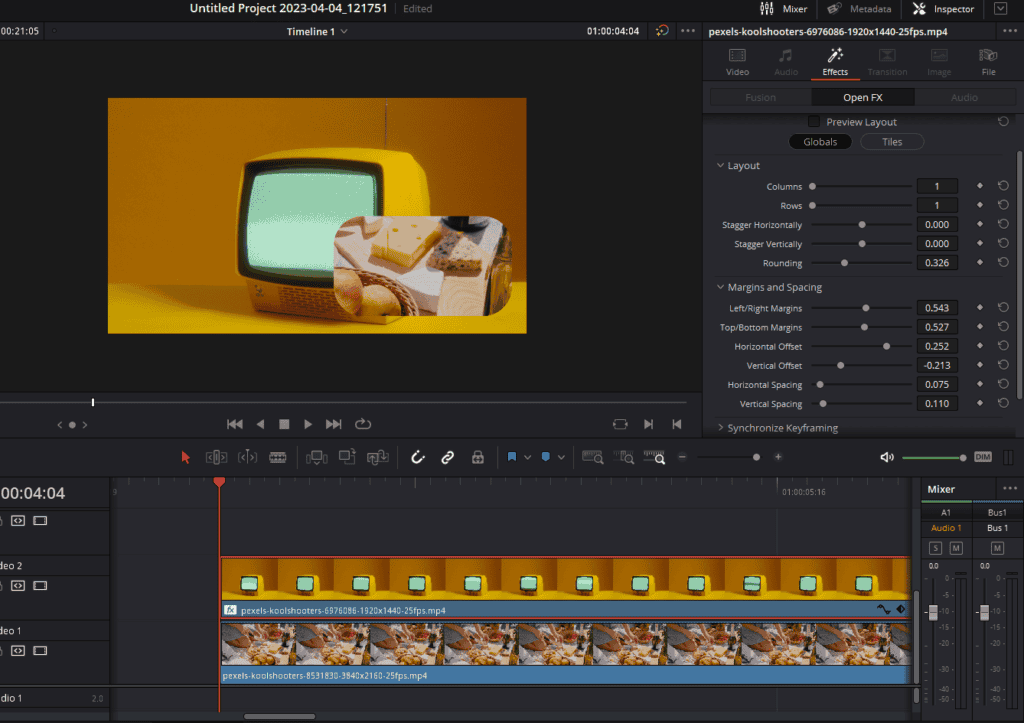
- Customize the Collage effect settings: With the background clip still selected, head to the Inspector panel on the top right corner and click on the “Effects” tab to access the controls for the video collage effect. Since we only need one PiP overlay, adjust the following settings:
- Set the number of columns and rows to 1.
- Increase the rounding to create a rounded rectangle or a circle for the PiP overlay.
- Adjust the left and right margins as needed.
- Use the horizontal and vertical offset sliders to position the PiP overlay in the corner.
- Add a drop shadow and border: For a more polished look, click on the Tiles button at the top in the Video Collage effect and add a drop shadow and a colored border to the PiP overlay. Adjust the drop shadow settings (e.g., angle, distance, expand, and blur) and border settings (e.g., color and width) as desired.
Resizing and Positioning the Overlay Clip
With the PiP overlay settings customized, it’s time to resize and position the overlay clip within the overlay.
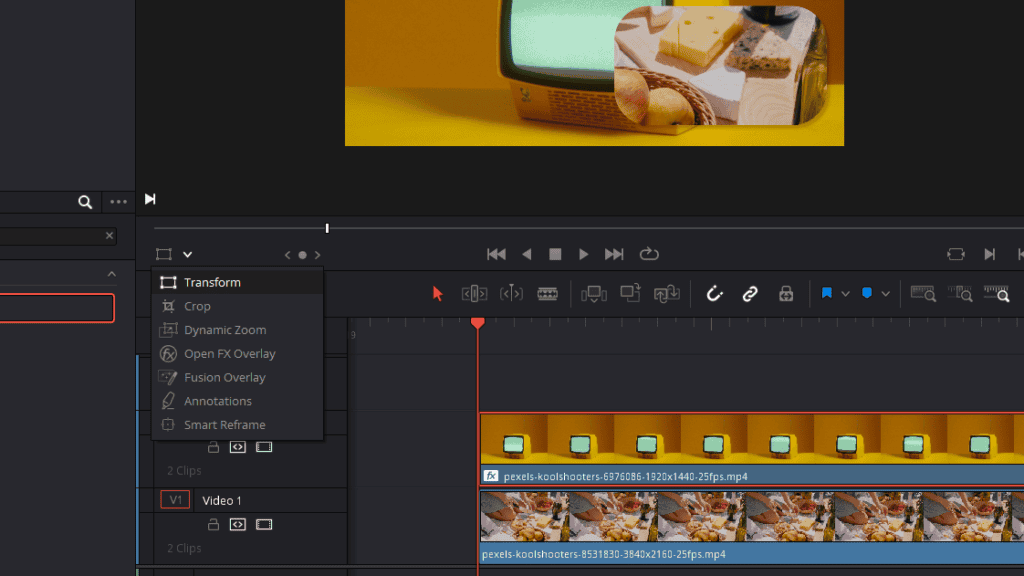
- Select the overlay clip: Click on the overlay clip (Video Track 1) on the timeline to select it.
- Enable Transform controls: Make sure the Transform controls are turned on by clicking the small rectangle icon in the bottom left corner of the Viewer.
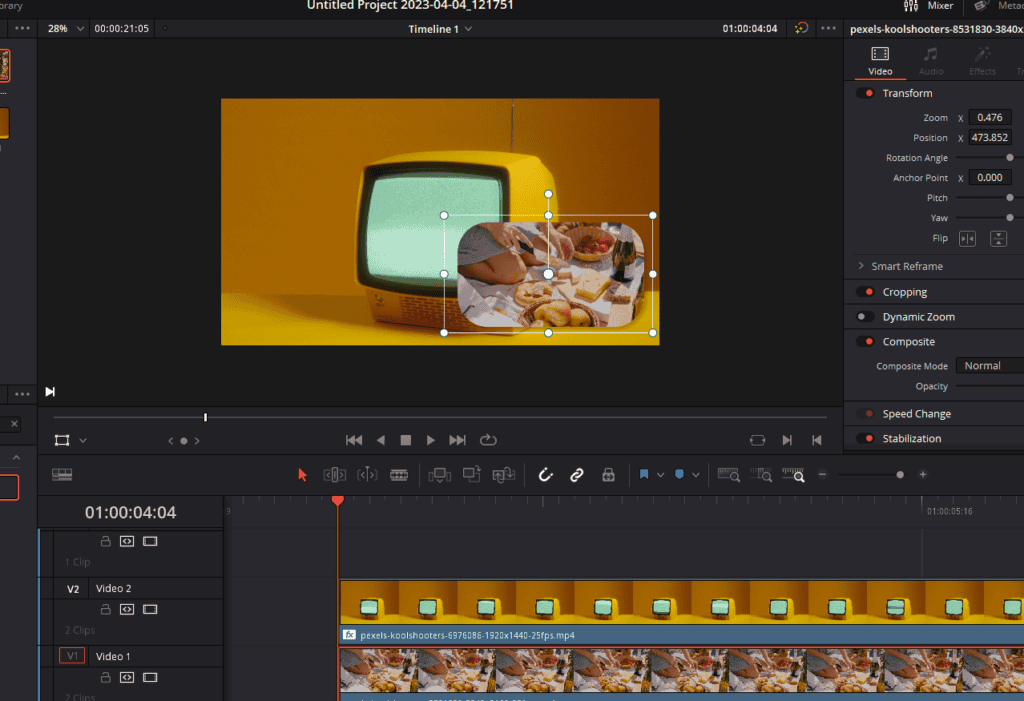
- Resize and position the overlay clip: Drag the corners of the overlay clip to resize it, and click and drag the clip to position it within the PiP overlay. This will create the picture-in-picture effect, with the overlay clip appearing in the top right corner while the background clip plays.
Creating a Picture-in-Picture overlay using the Collage effect in DaVinci Resolve is a straightforward process that adds depth and visual interest to your videos. This technique is particularly useful for tutorials, gaming videos, or any situation where you want to display multiple videos at once. By following these steps, you can enhance your video projects and create engaging content for your audience.
Method 3: Creating Split Screen Using Collage Effect In Davinci Resolve
The split screen effect is a popular technique used in filmmaking and video editing to showcase multiple actions or perspectives simultaneously. In this guide, we’ll show you how to create a simple split screen using the Collage effect in DaVinci Resolve.
Setting Up Your Clips for the Split Screen Effect
Begin by organizing your clips in DaVinci Resolve. For example, you have two clips that you want to display side-by-side in a split screen.
- Import your clips: Import both clips into DaVinci Resolve.
- Create a timeline: Create a new timeline and drag both clips onto it, placing one clip on a higher video track and the other clip on a lower video track.
Applying the Collage Effect for the Split Screen
Now that your clips are organized, it’s time to apply the Collage effect to create the split screen.
- Select the top clip: Make sure the top clip is selected on the timeline.
- Apply the Video Collage effect: Drag the Video Collage effect from the Effects Library onto the top clip. This will create four masks by default.
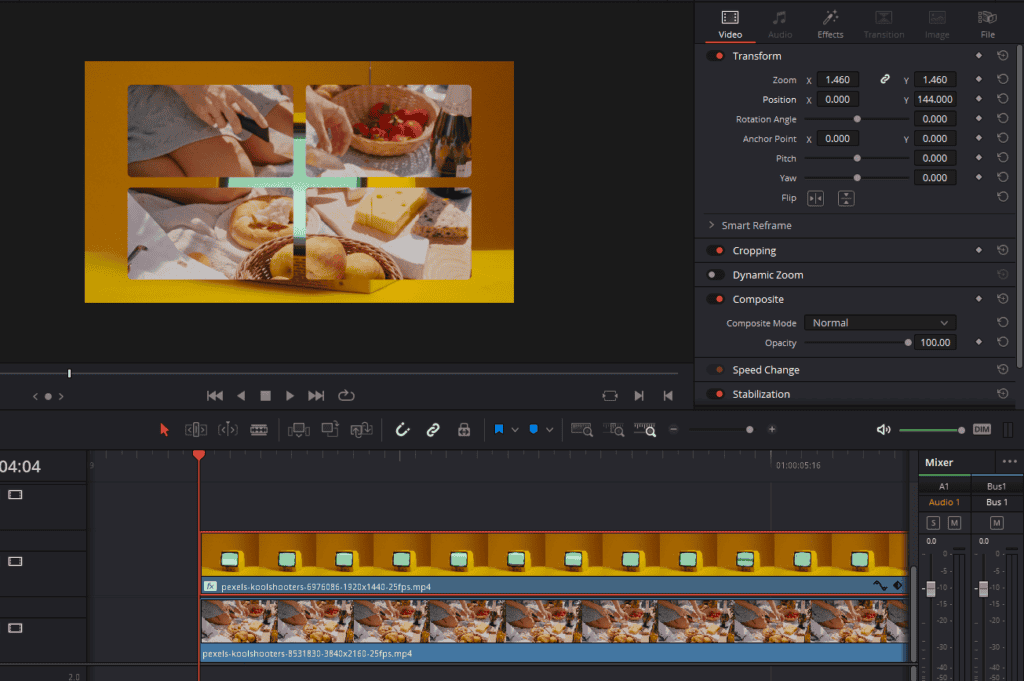
- Customize the Collage effect settings: With the top clip still selected, head to the Inspector panel and click on the “Effects” tab to access the controls for the video collage effect. Adjust the following settings for the split screen:
- Set the number of columns to 1 and the number of rows to 1.
- Reduce the rounding to create sharp corners.
- Minimize the top/bottom margins.
- Increase the left/right margins as needed.
- Use the horizontal offset slider to position the top clip on the right side of the split screen.
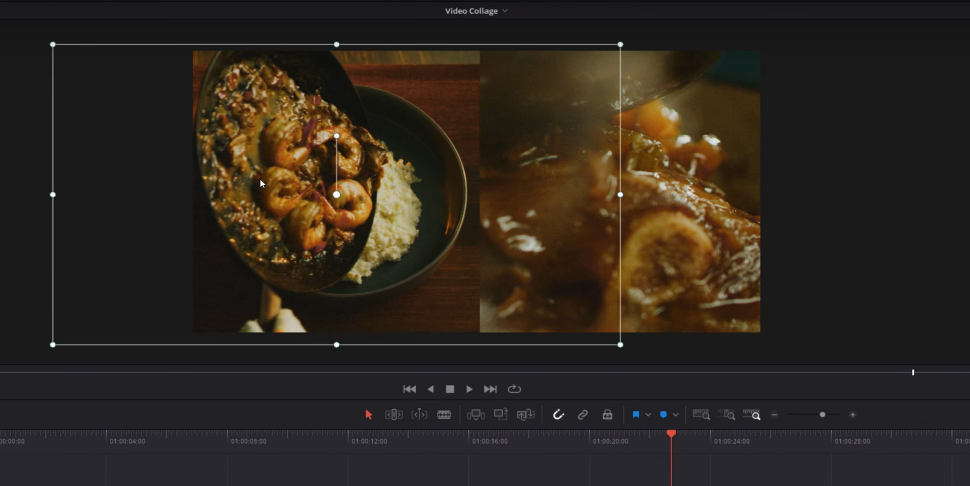
- Position the second clip: Click on the second clip on the timeline to select it. Enable the Transform controls by clicking the small rectangle icon in the bottom left corner of the Viewer. Use the Transform controls to move the second clip over to the left side of the split screen.
Preview Your Split Screen
Play back your timeline to preview the split screen effect. You should now see both clips displayed side-by-side in a seamless split screen.
Conclusion
In conclusion, DaVinci Resolve offers a variety of creative techniques and effects to enhance your video editing projects. By mastering the methods outlined in this blog post, such as creating video collages, picture-in-picture overlays, and split screens using the Collage effect, you can produce visually engaging content that captivates your audience. These techniques add depth and variety to your videos, allowing you to showcase your creativity and technical skills. With practice and experimentation, you will be able to create unique video compositions that stand out and make your work truly memorable.