Hi, I’m Salik, the author of FilmmakingElements.com. I have been a filmmaker for over 10 years. I am also a certified DaVinci Resolve Trainer and I have used DaVinci Resolve for many of my projects. In this article, we introduce you to the 5 Best DaVinci Resolve Glitch Effects. We delve deep into the realm of post-production and video editing. DaVinci Resolve has increasingly become a popular choice for professional and amateur video editors alike, and one of its standout features is its vast array of effects.
Glitch effects, in particular, have found their way into the heart of contemporary video editing, bringing with them a trendy and edgy feel to projects. Whether you’re editing a high-energy music video or looking to introduce dynamic transitions, glitch effects can set your work apart.
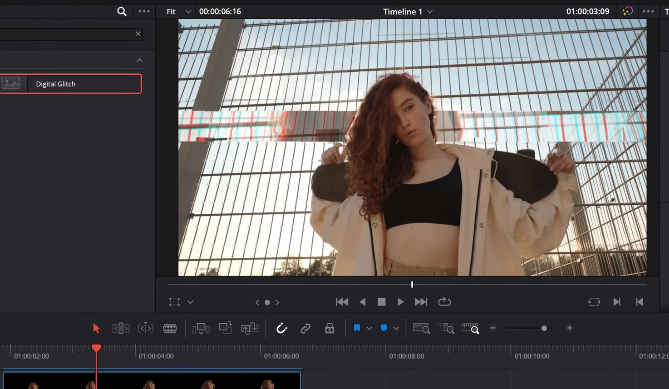
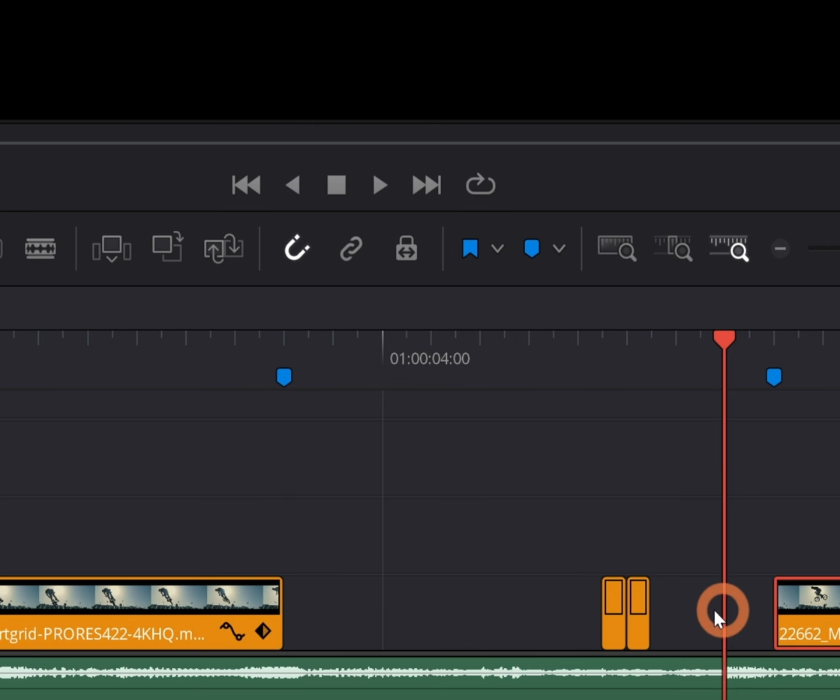
Glitch Effect In Davinci Resolve: Effect 1
Welcome to the first effect in our series on mastering the best DaVinci Resolve effects!
1. Setting Up Your Workspace:
- Start with a blank slate. Launch DaVinci Resolve and open the project you’re working on.
- Add the desired video clip to your timeline in the Edit page of Davinci resolve where you anticipate introducing the glitch effect.
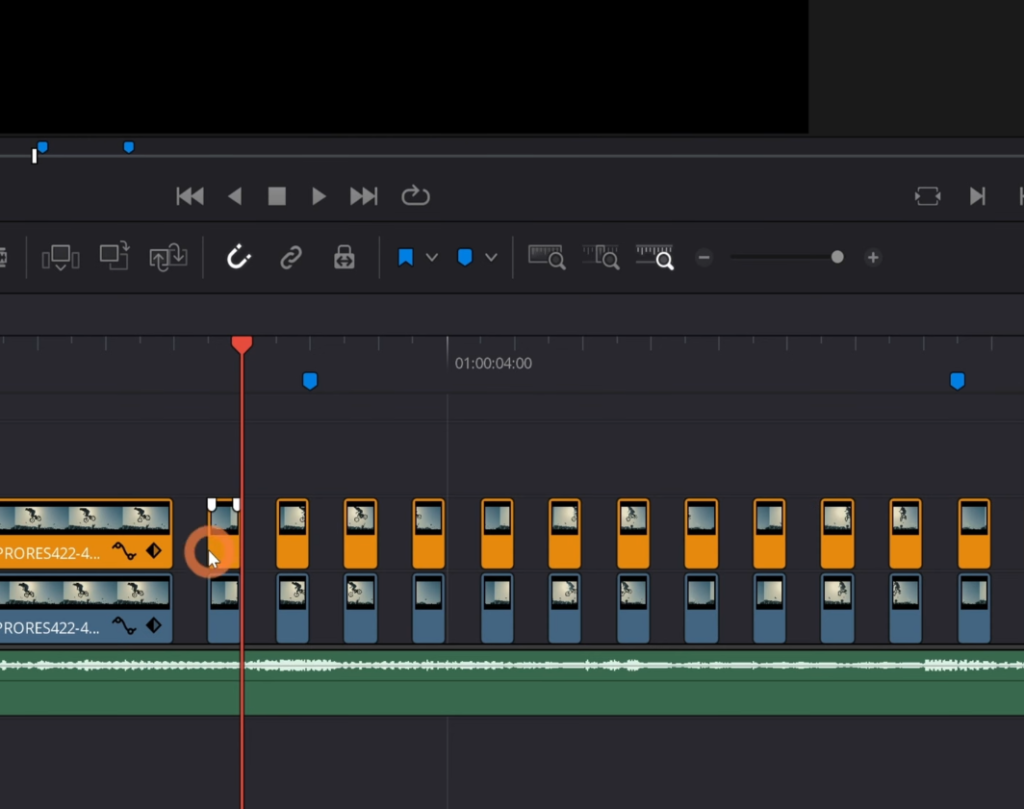
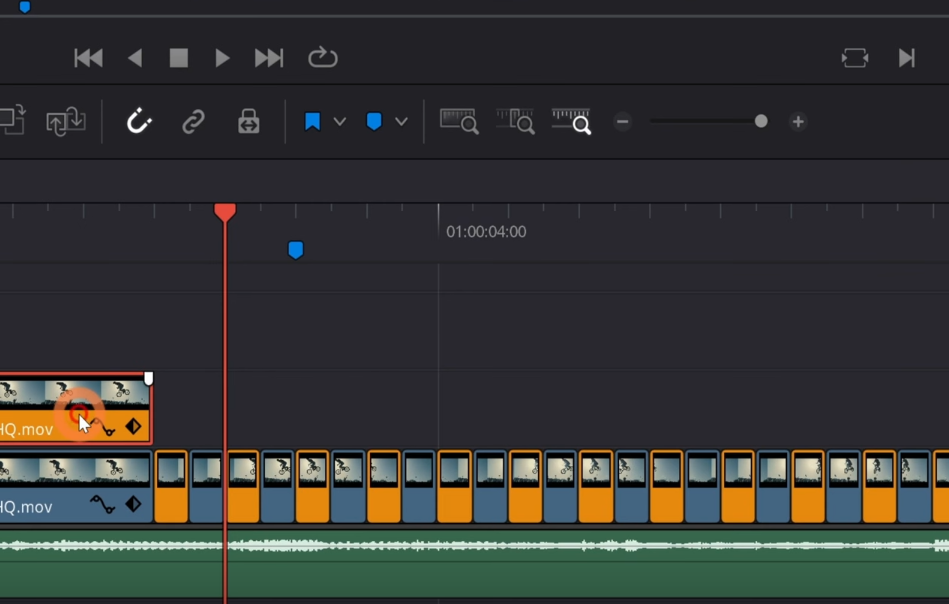
2. Duplicating Your Base Clip:
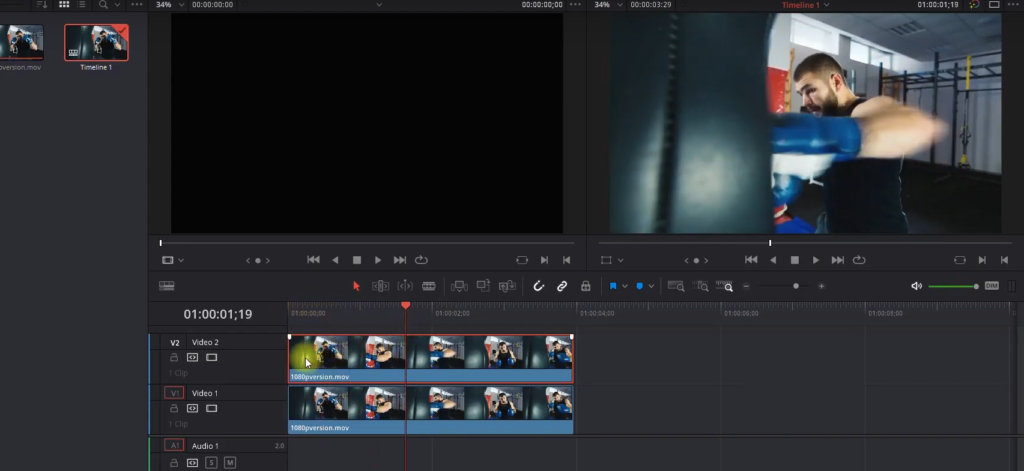
- Hover over your clip. Hold the Alt key on your keyboard.
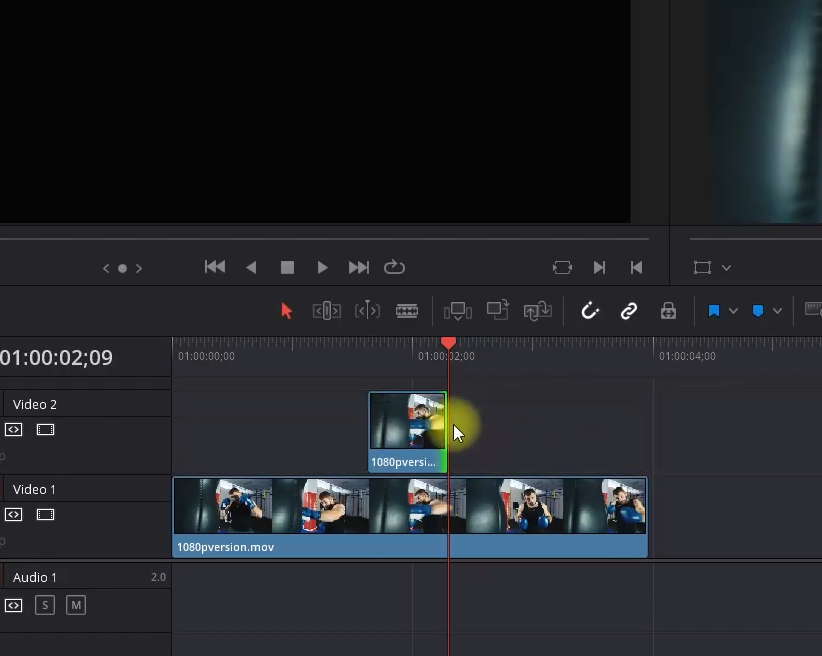
- While still holding the Alt key, drag your clip upwards. This action creates a duplicate. This top layer will be referred to as the V2 clip.
- Position the playhead where you want the glitch effect to start. Trim the V2 clip accordingly.
- Next, move the playhead to where you’d like the glitch effect to conclude. Trim the V2 clip to this point.
3. Diving into Color Customization:
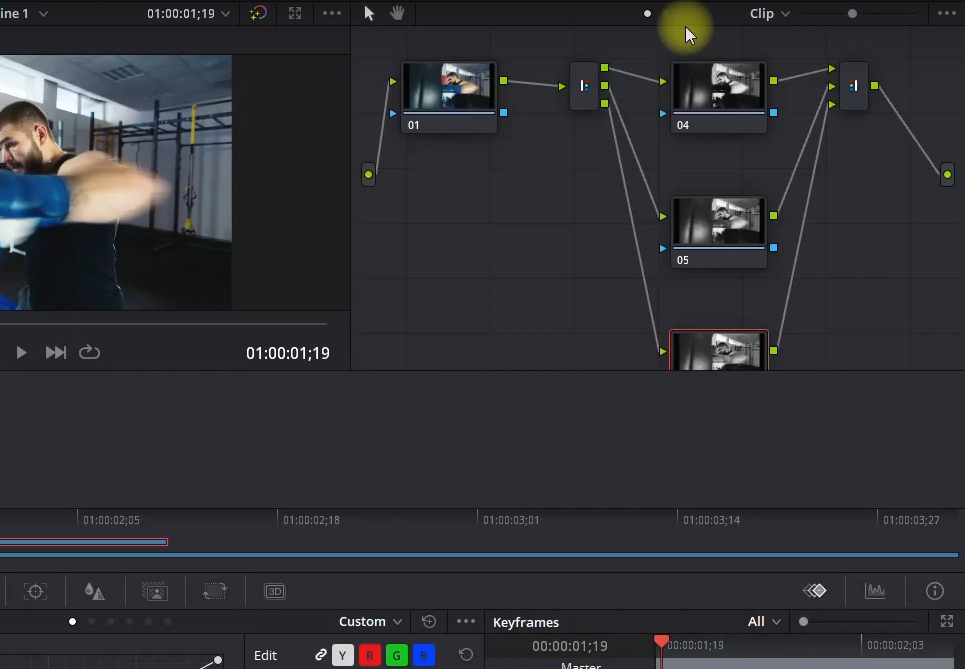
- Navigate to the bottom of the screen and switch to the Color tab.
- With the V2 clip (your duplicated, top layer) selected, use the Alt + Y keyboard combination. This action spawns separate nodes for the red, green, and blue color channels.
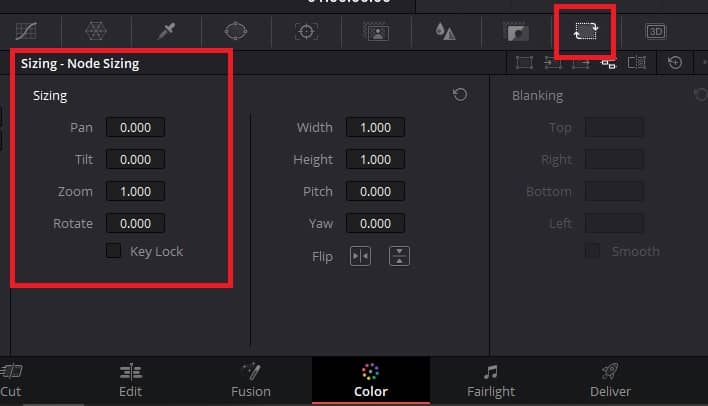
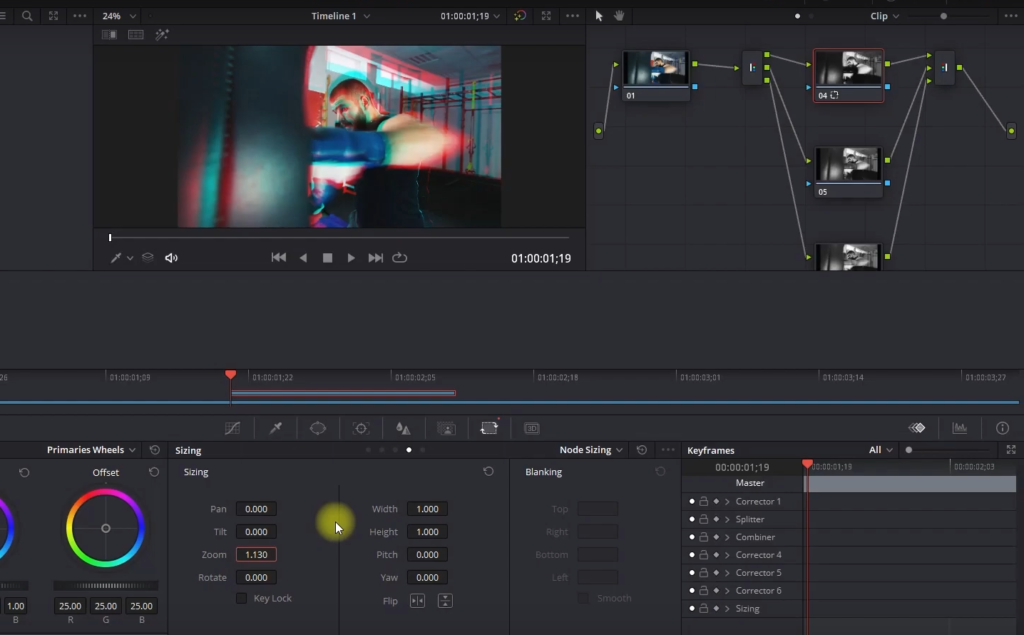
- Click on the top node. Now, transition to the Sizing tab and choose Node Sizing.
- Commence the customization by increasing the zoom to create a visually appealing offset. Each node (representing a color) can be adjusted individually, allowing for diverse visual interpretations of the glitch effect.
4. Layering in the Glitch Effects:
- Head back to the Edit tab.
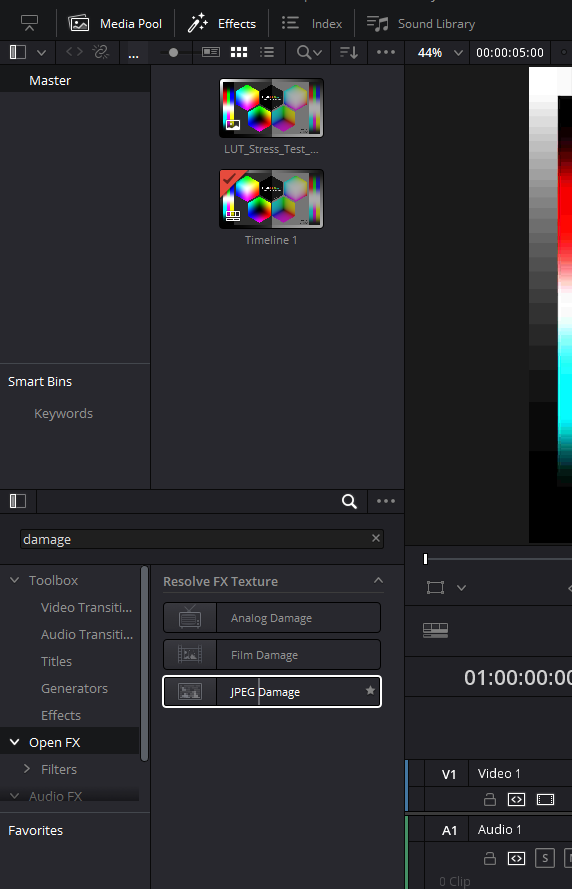
- Navigate to the top left corner and click the ‘Effects’ option. From here, select Open FX.
- In the search bar, type in “Shake.” Drag the Camera Shake effect onto your V2 clip.
- Next, search for “Damage”. From the results, drag the JPEG Damage effect onto the V2 clip.
5. Fine-Tuning the Glitch Effects for Precision:
- With your playhead hovering over the V2 clip, shift to the Inspector located on the top right corner.
- Move to the Effects tab.
- Under the Camera Shake effect:
- Set the Motion and Speed Scale to 1.4. These values are subjective, so adjust based on your personal aesthetic.
- Raise the Pen and Tilt Amplitude to 0.8.
- Modify the PTR Speed to 1.4.
- Change the zoom type to both Outward and Inward to introduce variability.
- Within Shake Quality, opt for the Square Wave motion method. This selection minimizes the traditional shake appearance, making the movement feel more spontaneous and glitchy.
- Under Blinking Handling, select the Reflect border type, ensuring no black edges taint your glitch.
Note: Personalization is paramount. Experiment with the shake settings or delve into the JPEG Damage nuances to achieve a glitch intensity that aligns with your vision. For instance, adjusting the JPEG Damage can bestow a pixelated undertone to your glitch.
6. Playback and Review:
Play your clip. Revel in the dynamic glitch effect that’s been seamlessly integrated. Iterations are encouraged; tweak and tune until your desired visual narrative is realized.
Glitch Effect In Davinci Resolve: Effect 2
While standard glitch effects have made a significant mark in the world of video editing, there’s always room to innovate. Here, we’re taking a leap beyond the ordinary with an evolved glitch technique: The Masked Glitch.
1. Introduction
Glitches are compelling, but their ubiquitous presence calls for a revamp. This second glitch effect promises to elevate your glitch game, driving your effect from standard to stellar. Let’s deep dive into this advanced method.
2. Masking: The Crucial First Step
- Why Masking?
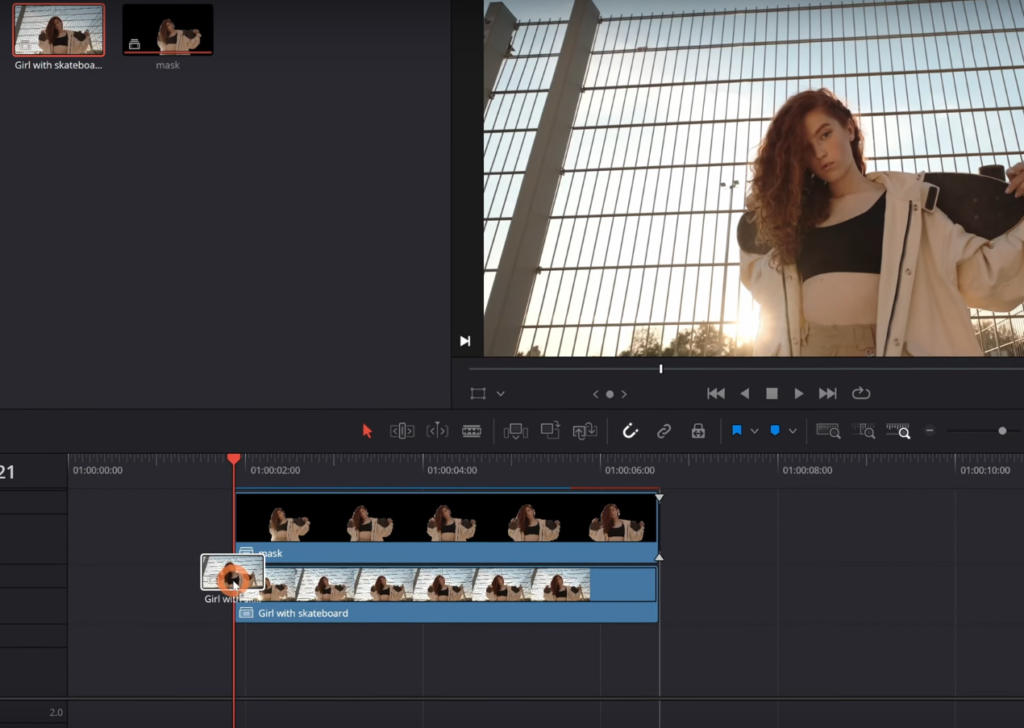
While the glitch effect is impactful, positioning it behind your subject accentuates its appeal, creating depth and dynamism. - Creating the Mask:
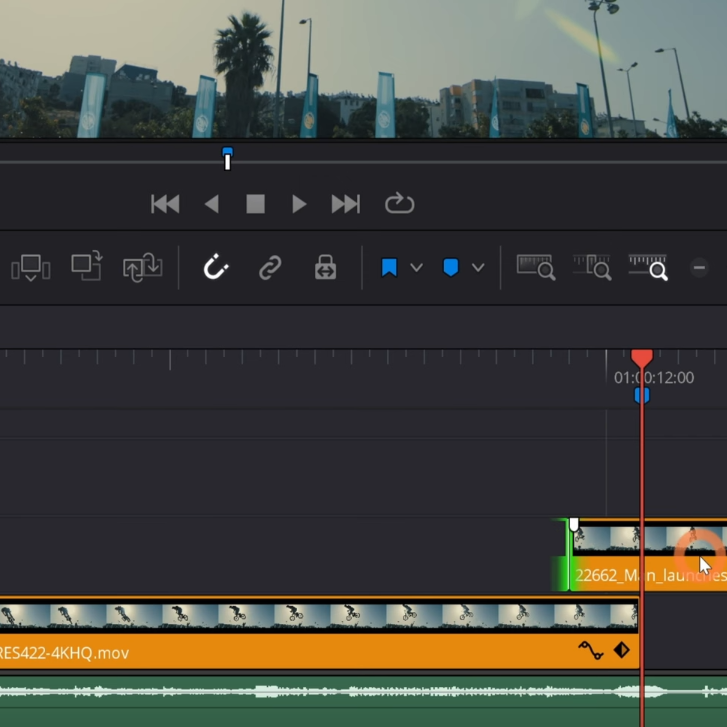
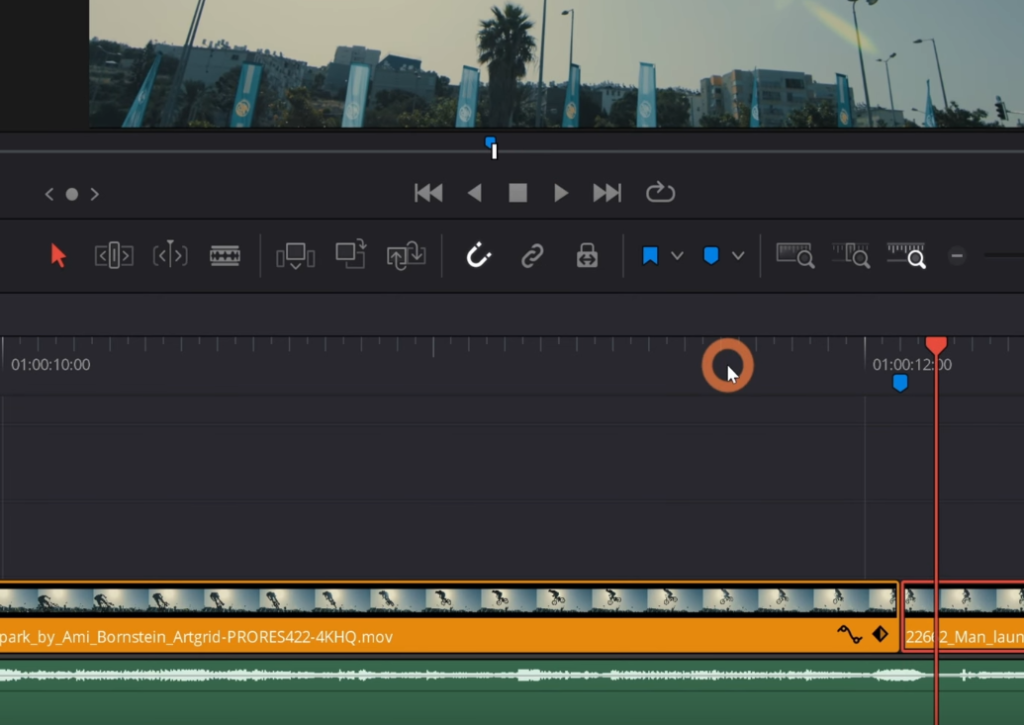
- In the DaVinci Resolve Edit page, load your footage onto the timeline.
- You’ll need to mask out the primary subject to create the desired effect.
Click here to learn, How To Do Masking In Davinci Resolve (3 Ways)
3. Structuring Your Layers
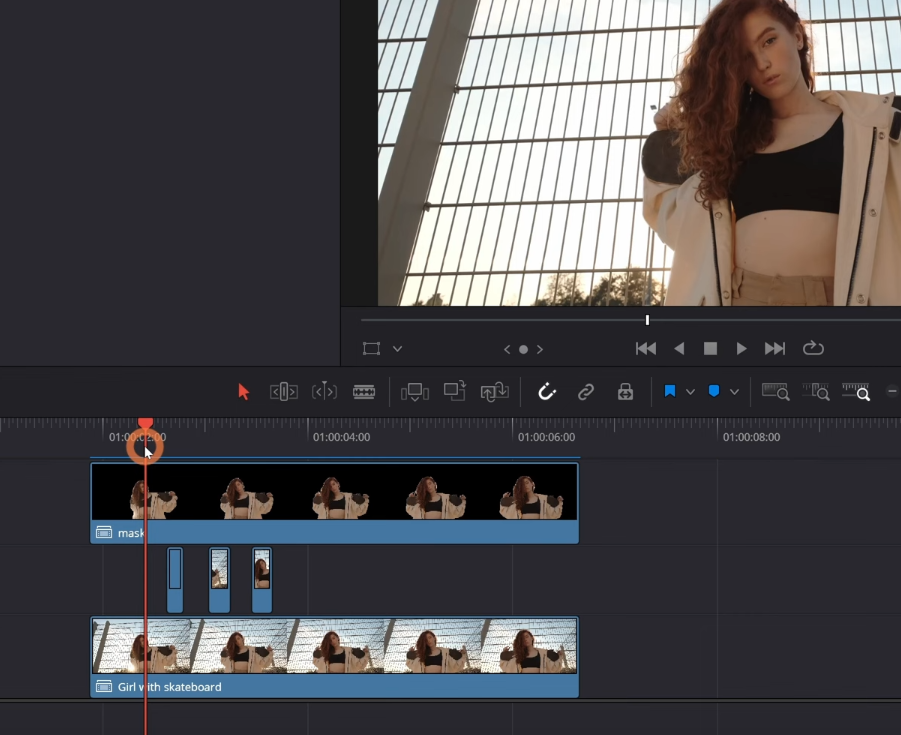
- Positioning the Masked Footage:
Once you’ve masked your video, drag this masked footage to the third video layer. - Laying the Original Footage:
Retrieve the original, unmasked footage and nest it right below, on the second video layer.

4. Infusing the Glitch Effect
- Accessing the Effect:
- Navigate to the effects panel by clicking the ‘Effects’ button on the top-left corner of the Edit page of Davinci Resolve.
- Use the search bar to type “glitch”.
- Opt for the “digital glitch” from the list of results.
- Application:
Drag the chosen glitch effect onto your original footage (V2). This should result in the glitch manifesting behind your subject. - Refinement:
While a continuous glitch effect might seem intriguing, moderation is key. Prolonged glitches can overwhelm the viewer. To sidestep this:- Introduce cuts intermittently within the clip.
- Remove the redundant parts to engineer a rhythmic, “stutter” glitch effect.
5. Ensuring Background Continuity
A common issue that arises post-editing is the disappearance of the background post the glitch effect. To rectify this:
- Return to your media pool.
- Retrieve the original footage.
- Drag and position it onto video layer one.
On playback, you’ll witness a captivating masking glitch effect—a rare gem in the world of video editing.
Glitch Effect In Davinci Resolve: Effect 3
Navigating through the realm of glitches, here’s yet another fascinating effect to spice up your video editing projects – The Time Skip Glitch. This segment breaks down the intricate steps involved in achieving this effect, enabling even beginners to grasp the technique with ease.
1. Introduction
Time Skip Glitch is all about playing with the timeline, marking specific points, and manipulating them. Its essence lies in making quick successive cuts, giving the video a unique jumpy feel.
2. Marking Out Points
- Listening & Marking:
On the edit page of Davinci Resolve, drag and drop your clip on the timeline. Play the clip and decide the spots where you desire the effect to begin and end.- Use the keyboard shortcut ‘M’ (or ‘double M’ as per default settings) to mark these points.
3. Duplicating and Shifting the Clip
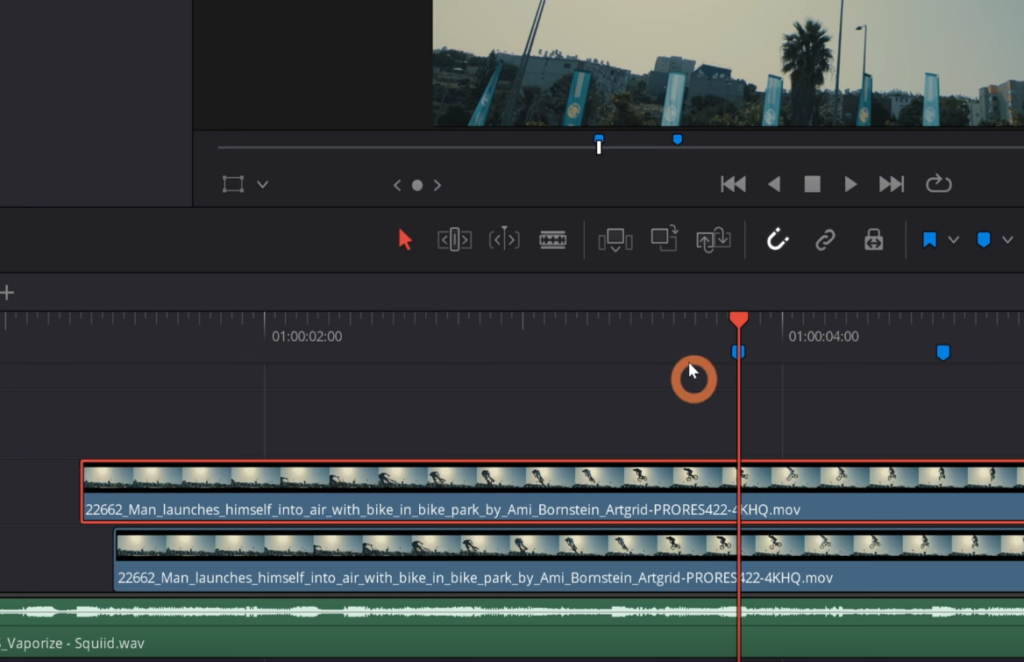
- Cloning the Clip:
Simply duplicate your marked out clip. This can be done by holding the ‘Alt’ key, clicking on the clip, and dragging it above the original. - Efficient Shifting:
Now, nudge the duplicated clip three frames to the left. This count is based on preference and might vary based on individual projects. Remember, there’s room for experimentation!
4. Distinguishing Clips
- Changing Clip Color:
To avoid confusion, especially when you have multiple layered clips, right-click on the clip and change its color by clicking on ‘Clip Color’. This ensures clarity in the editing process.
5. Selective Cutting
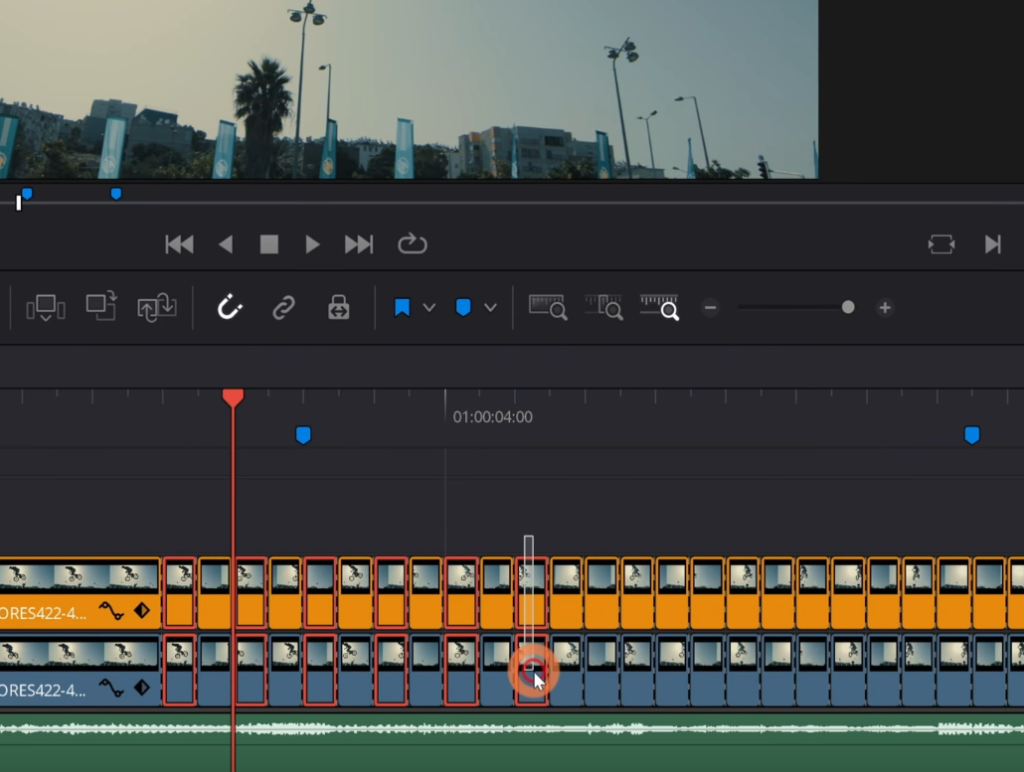
- Dominating the Clip:
Fragment and cut the clip into multiple smaller sections. - Selective Retention:
Holding Ctrl, select every alternate clip fragment and discard them using the backspace key.
6. Finalizing the Effect
- Positioning Clips:
Drag the top layers of clips towards the left, ensuring a pattern where there’s an alternate colored clip for each frame. - Cleaning Up:
Now, remove any unnecessary duplicate clips that were created in the process. - Playback:
Play your video to witness the seamless Time Skip Glitch effect in action!
The Time Skip Glitch adds an element of surprise and rhythm to your videos. It breaks the monotony and introduces a rhythmic beat-like pattern. A well-executed Time Skip Glitch not only stands out but also adds a layer of professional finesse to your projects.
Glitch Effect In Davinci Resolve: Effect 4
As we delve further into the exciting world of video effects in DaVinci Resolve, let’s explore a brilliantly simple effect: The Reverse Time Skip Glitch Effect. As straightforward as it may sound, this effect can elevate your video transitions, lending them a unique texture and feel.
1. Introduction
Unlike its counterpart, the Time Skip Glitch, the Reverse Time Skip Effect is all about retracing steps, mirroring the time, and playing with musical cues. It’s not just about visuals but also about syncing with the soundtrack.
2. Identifying the Right Beat
- Listening & Analyzing:
While the regular Time Skip aligns with a stuttering beat, the Reverse Time Skip requires a different approach. You need a musical note that distinctly stands out.- Play the track and search for that one compelling note that jumps out at you.
- Mark this distinctive beat with a marker (M).
3. Making the Cut
- Segmenting the Clip:
Once the unique beat is identified, make a precise cut (Ctrl + B) on your clip accordingly.- Drag this newly cut section to the second video layer. This will be your working layer for the effect.
- Reversing the Sequence:
Extend the section backward by four frames. This is where the ‘reverse’ element of the effect comes into play.- Once done, drag this elongated segment back down, aligning it with the end of the first clip.
4. Playback & Fine-tuning
- Witness the Magic:
Play back your sequence. The result? A striking “stutter-back glitch” effect that adds depth and character to your transition. - Customize:
Remember, while four frames work as a general rule of thumb, you’re free to adjust. Want a longer rewind? Go ahead and extend more than four frames. In the dynamic world of video editing, it’s all about what suits your aesthetic.
Glitch Effect In Davinci Resolve: Effect 5
Moving forward on our journey through DaVinci Resolve’s potential, we come across an effect that’s almost poetic in its glitchy ambiance – The Time Stutter Glitch Effect. Also playfully called the ‘Glitch in the Matrix’, this effect is not only a nod to a cult classic but a testament to how art can imitate life, and vice versa.
1. Introduction
The Time Stutter effect echoes semblances from our earlier effect, meaning it leverages markers used previously. Its essence lies in repetition and flickering, creating a captivating sense of pause and play.
2. Identifying the ‘Stutter’ Points
- Utilizing Previous Markers:
If you’ve implemented the first effect discussed in this series, rejoice! You can use those very markers here. - Choosing the Perfect Frame:
Decide on the segment of your footage you envision stuttering – perhaps an object hovering or a person momentarily frozen in time.- Make a clear cut (Ctrl + B) at this chosen point.
- Progress by one frame and make another cut. This results in a one-frame section.
3. Creating the Stutter Sequences

- Repetition is Key:
- Skip three frames or adjust according to your preference.
- Create another one-frame section by making cuts on either side.
- Grouping & Replicating:
- Group the one-frame sections together, positioning them at the beginning of the first clip.
- With both segments highlighted, hold the ‘alt’ key to duplicate these clips multiple times. The number of repetitions depends on how long you want the stutter effect to last.
4. Playback & Revel in the Stutter
- Witness the Effect:
Play your sequence. The result should manifest as a flickering, almost ethereal effect, where the subject appears to ‘glitch’ or ‘stutter’ in space and time.
The Time Stutter is more than just a video effect. It’s a visual representation of interruptions, hiccups, and those mesmerizing moments when time seems to falter. With tools like DaVinci Resolve at our disposal, bringing such imaginative concepts to life becomes not just feasible, but an art form in itself.
The Time Stutter effect emphasizes the significance of repetition in video editing. Every loop, every glitch, every repetition tells a story, amplifies the mood, and adds depth to the narrative. Embrace it and watch your videos transform into captivating visual tales!
Thank you, dear reader, for embarking on this visual journey with us. Your time and interest in delving deep into the intricacies of video effects in DaVinci Resolve is immensely appreciated.