
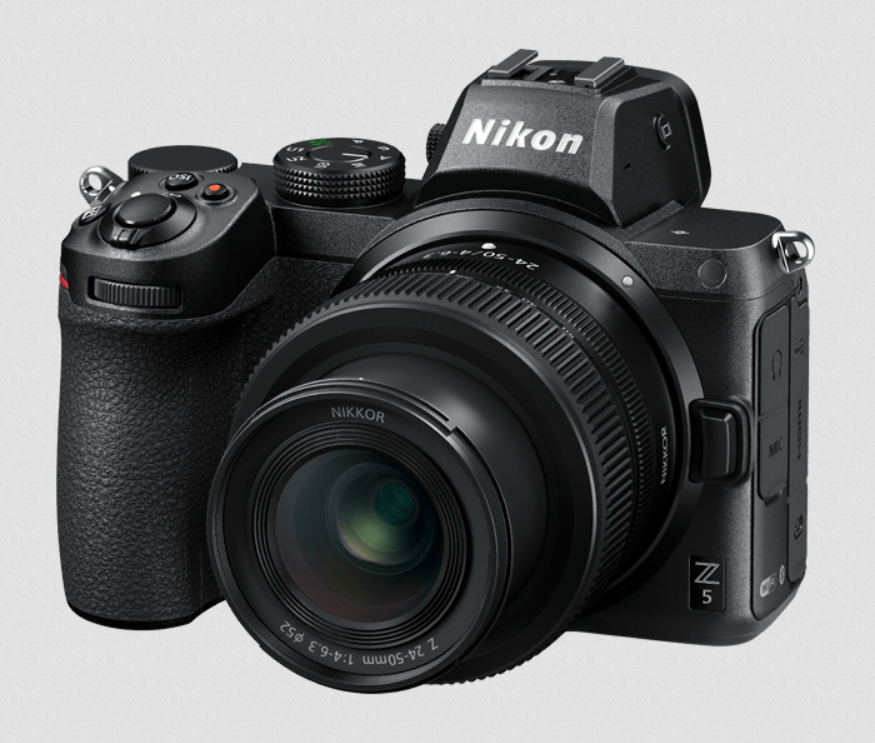
The Nikon Z5 is a highly regarded mirrorless camera, celebrated for its superior image quality, rapid autofocus system, and user-friendly operation. It’s an ideal choice for capturing everyday moments and is equally adept at both photography and videography. However, even with its impressive performance, users might occasionally face challenges, such as autofocus not working properly. This article is here to assist if you’re experiencing this issue with your Nikon Z5.
We will explore the various reasons why the autofocus might malfunction and offer practical solutions to resolve these problems. By identifying the root causes and applying the recommended fixes, you can restore the full functionality of your Nikon Z5’s autofocus system and continue enjoying a smooth photography or videography experience. Let’s delve into troubleshooting the autofocus issues of the Nikon Z5.
Nikon Z5 Autofocus Not Working: Causes and How to Fix It
1. Incorrect Focus Mode
One possible cause of the Nikon Z5 autofocus not working is that the camera is set to an incorrect focus mode. The Nikon Z5 has three main focus modes: AF-S, AF-C, and MF. Each mode is suitable for different shooting scenarios and subjects.
- AF-S stands for autofocus single. This mode is ideal for stationary subjects, such as portraits, landscapes, or still life. In this mode, the camera will lock the focus when the shutter-release button is pressed halfway, and will not change the focus until the button is released or fully pressed. This mode also allows the use of focus peaking, which highlights the edges of the in-focus area in the viewfinder or on the LCD screen.
- AF-C stands for autofocus continuous. This mode is ideal for moving subjects, such as sports, wildlife, or action. In this mode, the camera will continuously adjust the focus as long as the shutter-release button is pressed halfway, and will track the subject across the frame. This mode also allows the use of subject tracking, which automatically selects the focus point based on the subject’s movement and color.
- MF stands for manual focus. This mode is ideal for situations where the autofocus system may not work well, such as low light, low contrast, or complex scenes. In this mode, the user has to manually adjust the focus ring on the lens to achieve the desired focus. This mode also allows the use of focus magnification, which enlarges the image in the viewfinder or on the LCD screen to help with precise focusing.
To select the focus mode, the user can either use the i menu on the LCD screen, or press the Fn2 button on the back of the camera and rotate the main command dial. The selected focus mode will be displayed on the top LCD panel, the viewfinder, or the LCD screen.
If the user is experiencing autofocus problems, they should check if the focus mode is appropriate for the subject and the shooting conditions. If not, they should switch to a different focus mode that suits their needs. For example, if the user is trying to photograph a bird in flight, they should use AF-C mode with subject tracking, rather than AF-S mode with focus peaking. This way, the camera will be able to keep the bird in focus and follow its movement, rather than locking the focus on a fixed point and losing the subject.
2. Manual Focus Mode Activated
Another possible cause of the Nikon Z5 autofocus not working is that the camera is set to manual focus mode. Manual focus mode is indicated by the MF symbol on the top LCD panel, the viewfinder, or the LCD screen. In this mode, the camera will not use the autofocus system at all, and the user has to manually adjust the focus ring on the lens to achieve the desired focus.
Manual focus mode can be activated either intentionally or accidentally by the user. Some possible ways to activate manual focus mode are:
- Using the focus mode selector switch on the lens. Some lenses have a switch on the side that allows the user to choose between M/A and M modes. M/A mode means that the lens can use both autofocus and manual focus, while M mode means that the lens can only use manual focus. If the user accidentally moves the switch to M mode, the camera will not be able to autofocus, even if the focus mode on the camera is set to AF-S or AF-C.
- Using the focus mode selector switch on the camera. The Nikon Z5 has a switch on the front of the camera that allows the user to choose between AF and MF modes. AF mode means that the camera can use autofocus, while MF mode means that the camera can only use manual focus. If the user accidentally moves the switch to MF mode, the camera will not be able to autofocus, regardless of the lens or the focus mode on the camera.
- Using the i menu on the LCD screen. The user can also change the focus mode by using the i menu on the LCD screen. The user can access the i menu by pressing the i button on the back of the camera, and then select the focus mode option. The user can then choose between AF-S, AF-C, and MF modes. If the user accidentally selects MF mode, the camera will not be able to autofocus.
If the user is experiencing autofocus problems, they should check if the camera or the lens is set to manual focus mode. If so, they should switch to autofocus mode by using the appropriate switch or menu option. For example, if the user is using a lens with a focus mode selector switch, they should move the switch to M/A mode, and then select the desired focus mode on the camera. This way, the camera will be able to use the autofocus system and focus on the subject.
3. Autofocus Lock Engaged
Another possible cause of the Nikon Z5 autofocus not working is that the camera has the autofocus lock engaged. Autofocus lock is a feature that allows the user to lock the focus on a specific subject or area, and prevent the camera from refocusing on something else. Autofocus lock can be useful for situations where the subject is not in the center of the frame, or where the subject may move in and out of the focus area.
The Nikon Z5 has two ways to activate the autofocus lock: using the AF-L button or using the AE-L/AF-L button. The AF-L button is located on the back of the camera, next to the viewfinder. The AE-L/AF-L button is located on the top of the camera, next to the shutter-release button. The user can customize the function of these buttons by using the custom setting menu on the LCD screen.
- AF-L button. By default, this button is set to AF lock only. This means that when the user presses this button, the camera will lock the focus on the current subject, and will not change the focus until the button is released. The user can also press this button again to unlock the focus. The user can see the AF-L symbol on the top LCD panel, the viewfinder, or the LCD screen when the autofocus lock is engaged.
- AE-L/AF-L button. By default, this button is set to AE/AF lock. This means that when the user presses this button, the camera will lock both the exposure and the focus on the current subject, and will not change them until the button is released. The user can also press this button again to unlock the exposure and the focus. The user can see the AE-L/AF-L symbol on the top LCD panel, the viewfinder, or the LCD screen when the exposure and autofocus lock are engaged.
If the user is experiencing autofocus problems, they should check if the camera has the autofocus lock engaged. If so, they should release the autofocus lock by pressing the appropriate button again. For example, if the user is using the AF-L button to lock the focus, they should press the AF-L button again to unlock the focus. This way, the camera will be able to use the autofocus system and focus on the subject.
4. Low Light or Low Contrast Scenes
Another possible cause of the Nikon Z5 autofocus not working is that the camera is in a low light or low contrast scene. Low light or low contrast scenes are situations where the subject or the background are too dark, too bright, or too similar in color or tone. These situations can make it difficult for the camera’s autofocus system to detect and lock on the subject.
The Nikon Z5 uses a hybrid autofocus system that combines phase-detection and contrast-detection methods. Phase-detection is a fast and accurate method that uses dedicated sensors on the image sensor to measure the phase difference of the light coming from the subject. Contrast-detection is a slower but more precise method that uses the image data from the image sensor to compare the contrast of adjacent pixels. The camera switches between these methods depending on the shooting conditions and the focus mode.
In low light or low contrast scenes, the phase-detection method may not work well, because the light is too dim or the subject is too similar to the background. The camera may then switch to the contrast-detection method, which may take longer to focus or may not be able to find the subject at all. The user may notice that the camera’s autofocus system is hunting, which means that it is moving the focus back and forth without locking on the subject.
If the user is experiencing autofocus problems in low light or low contrast scenes, they should try the following solutions:
- Use a lens with a larger maximum aperture. A larger maximum aperture means that the lens can let in more light, which can improve the autofocus performance in low light situations. The Nikon Z5 is compatible with the Nikon Z mount lenses, which have a large mount diameter and a short flange distance, allowing for lenses with large apertures. For example, the user can use the Nikkor Z 50mm f/1.2 S lens, which has a maximum aperture of f/1.2 and can capture more light than a lens with a smaller aperture, such as f/4 or f/5.6.
- Use the AF assist light. The AF assist light is a small light on the front of the camera that emits a beam of light to help the autofocus system in low light situations. The AF assist light can be activated by pressing the Fn1 button on the front of the camera, or by using the custom setting menu on the LCD screen. The user can also adjust the AF assist light brightness and the AF assist light range by using the custom setting menu. The user should note that the AF assist light may not work well with some subjects, such as animals or reflective surfaces, and may disturb the subject or other people in the scene.
- Use the manual focus assist features. If the autofocus system still fails to work in low light or low contrast scenes, the user can switch to manual focus mode and use the manual focus assist features to achieve the desired focus. The Nikon Z5 has several manual focus assist features, such as focus peaking, focus magnification, and electronic rangefinder. Focus peaking highlights the edges of the in-focus area in the viewfinder or on the LCD screen, using a color of the user’s choice. Focus magnification enlarges the image in the viewfinder or on the LCD screen, allowing the user to see the details of the subject more clearly. Electronic rangefinder shows a scale on the viewfinder or on the LCD screen, indicating whether the subject is in focus, too close, or too far. The user can activate these features by using the i menu on the LCD screen, or by customizing the Fn1 button, the Fn2 button, or the sub-selector on the back of the camera.
5. Lens Compatibility Issues
Another possible cause of the Nikon Z5 autofocus not working is that the camera has lens compatibility issues. Lens compatibility issues are situations where the camera and the lens are not fully compatible with each other, which can affect the autofocus performance or functionality.
The Nikon Z5 is compatible with the Nikon Z mount lenses, which are designed specifically for the Nikon Z series cameras. The Nikon Z mount lenses have a large mount diameter and a short flange distance, which allow for lenses with large apertures, high optical performance, and fast communication with the camera. The Nikon Z mount lenses also have a control ring that can be customized to adjust various settings, such as aperture, exposure compensation, or ISO sensitivity.
The Nikon Z5 is also compatible with the Nikon F mount lenses, which are designed for the Nikon DSLR cameras. The Nikon F mount lenses have a smaller mount diameter and a longer flange distance, which require an adapter to be used with the Nikon Z series cameras. The Nikon F mount lenses also have a focus mode selector switch that can be used to switch between autofocus and manual focus modes.
To use the Nikon F mount lenses with the Nikon Z5, the user needs to use the Nikon FTZ mount adapter, which attaches to the camera’s Z mount and allows the F mount lenses to be mounted on the camera. The Nikon FTZ mount adapter also retains the autofocus and vibration reduction capabilities of the F mount lenses, as well as the exposure and metering information.
However, not all Nikon F mount lenses are fully compatible with the Nikon Z5 and the Nikon FTZ mount adapter. Some Nikon F mount lenses may have limited or no autofocus functionality, or may not work at all with the Nikon Z5 and the Nikon FTZ mount adapter. Some examples of Nikon F mount lenses that are not fully compatible are:
- AF lenses. These are lenses that use a mechanical coupling to drive the autofocus motor in the camera body. These lenses do not have a built-in autofocus motor in the lens, and rely on the camera’s autofocus system to focus. These lenses are not compatible with the Nikon Z5 and the Nikon FTZ mount adapter, and can only be used in manual focus mode. These lenses are indicated by the AF symbol on the lens barrel.
- AF-P lenses. These are lenses that use a pulse motor to drive the autofocus system in the lens. These lenses have a built-in autofocus motor in the lens, and do not rely on the camera’s autofocus system to focus. These lenses are compatible with the Nikon Z5 and the Nikon FTZ mount adapter, but they do not support the focus peaking and focus magnification features in manual focus mode. These lenses are indicated by the AF-P symbol on the lens barrel.
6. Dirty or Damaged Lens Contacts
Another possible cause of the Nikon Z5 autofocus not working is that the lens contacts are dirty or damaged. Lens contacts are the metal pins on the lens mount that connect the lens to the camera. They transmit the electrical signals that control the autofocus system, the aperture, the exposure, and other functions. If the lens contacts are dirty or damaged, they may interfere with the communication between the lens and the camera, and affect the autofocus performance or functionality.
The lens contacts may become dirty or damaged due to various reasons, such as dust, moisture, oil, fingerprints, corrosion, or physical impact. Some signs that the lens contacts are dirty or damaged are:
- Erratic or inconsistent autofocus behavior. The autofocus system may not work at all, or may work intermittently, or may focus on the wrong subject or area.
- Erroneous or missing information on the LCD screen or the viewfinder. The camera may not display the correct aperture, exposure, or focal length information, or may display an error message, such as Lens not attached or F–.
- Reduced or lost functionality of the lens or the camera. The lens may not be able to adjust the aperture, the exposure, or the vibration reduction, or the camera may not be able to use the metering, the flash, or the custom settings.
If the user is experiencing autofocus problems with the Nikon Z5, they should check if the lens contacts are dirty or damaged. If so, they should try the following solutions:
- Clean the lens contacts. The user can use a soft cloth, a cotton swab, or a lens cleaning pen to gently wipe the lens contacts on both the lens and the camera. The user should avoid using any liquids, such as water, alcohol, or lens cleaning fluid, as they may damage the lens contacts or the camera. The user should also make sure that the lens contacts are dry before attaching the lens to the camera.
- Inspect the lens contacts. The user can use a magnifying glass or a flashlight to examine the lens contacts on both the lens and the camera. The user should look for any signs of damage, such as scratches, dents, bends, or breaks. The user should also look for any signs of corrosion, such as rust, oxidation, or discoloration. If the lens contacts are damaged or corroded, the user may need to repair or replace the lens or the camera, or contact a Nikon service center for assistance.
7. Camera Firmware Outdated
Another possible cause of the Nikon Z5 autofocus not working is that the camera firmware is outdated. Firmware is the software that controls the camera’s functions and features, such as the autofocus system, the image processing, the menu settings, and the compatibility with lenses and accessories. Firmware updates are released by Nikon to improve the camera’s performance, fix bugs, or add new features.
If the camera firmware is outdated, it may not be able to use the autofocus system properly, or it may not be compatible with the latest lenses or accessories. The user may notice that the camera’s autofocus system is slow, inaccurate, or unreliable, or that the camera does not recognize the lens or the accessory attached to it.
If the user is experiencing autofocus problems with the Nikon Z5, they should check if the camera firmware is updated to the latest version. If not, they should update the camera firmware by following these steps:
- Download the latest firmware. The user can download the latest firmware from the Nikon Download Center. The user should select the Nikon Z5 model from the list, and then download the firmware file to their computer. The firmware file is a compressed file with the extension .bin.
- Prepare a memory card. The user should format a memory card in the camera, and then insert it into a card reader or a slot on the computer. The user should copy the firmware file to the root directory of the memory card, which is the top-most folder that contains no other folders. The user should not rename or modify the firmware file, and should not copy any other files to the memory card.
- Update the camera firmware. The user should turn off the camera, and then insert the memory card with the firmware file into the camera’s memory card slot. The user should then turn on the camera, and go to the setup menu on the LCD screen. The user should select the firmware version option, and then follow the on-screen instructions to update the camera firmware. The user should not turn off the camera, remove the battery, or remove the memory card during the update process, as this may damage the camera or the firmware. The update process may take several minutes to complete.
- Confirm the firmware update. After the update process is finished, the camera will turn off automatically. The user should then turn on the camera, and go to the setup menu on the LCD screen. The user should select the firmware version option, and then check if the firmware version displayed on the screen matches the firmware version downloaded from the Nikon Download Center. If the firmware versions match, the firmware update is successful. If the firmware versions do not match, the firmware update is unsuccessful, and the user should repeat the update process.
- Also Read: LUTs For Nikon Z5: Free Download
- Also Read: Nikon Z5 Not Turning On: Causes and How To Fix It