Make Motion Graphics in DaVinci Resolve in 5 Easy Steps- Fusion Tutorial
Hello everybody, in this article, we’re going to talk about how you can set up some animated motion graphics inside Davinci Resolve without too much trouble. We’re going to use tools called vector shapes inside the Fusion page for this.
How to create a fusion composition
To create an empty fusion composition where we can add our vector shapes with motion graphics, we should go to the effects library. While we’re on the edit page or the cut page, you can go straight into Effects as well.
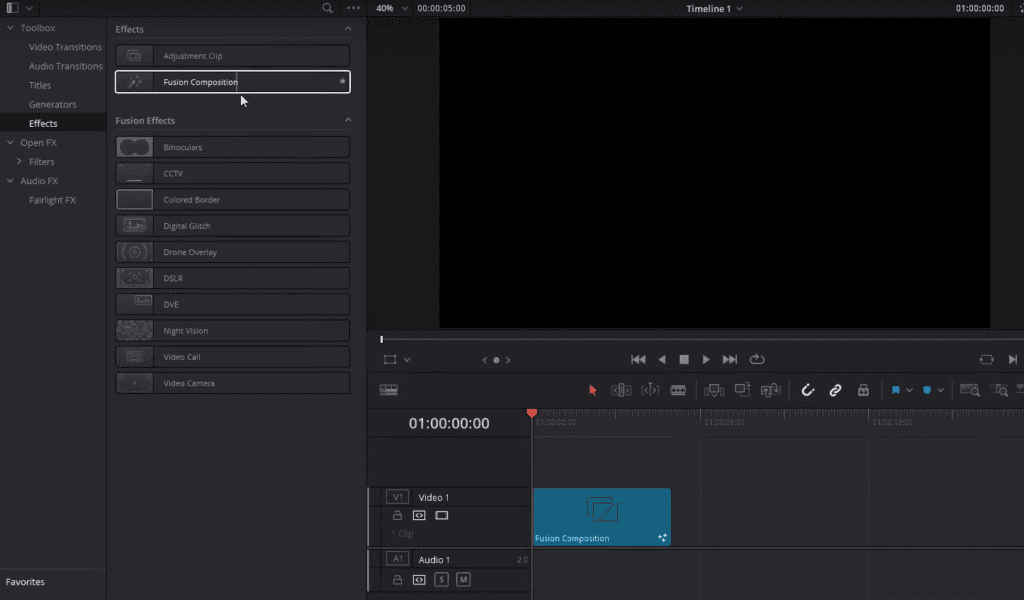
And then, either way, at the top of FX, you’re going to be looking for fusion composition, which you can drag into your timeline. On the edit page, you would find that right in Effects library effects and then right up, Fusion Composition at the top.
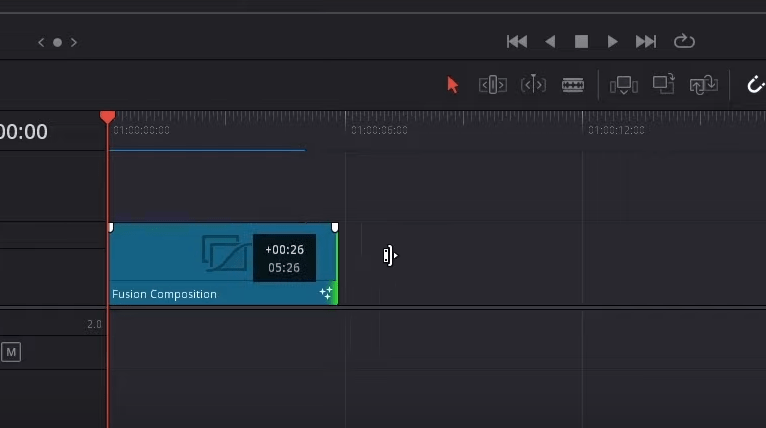
Now we can change the duration later for this fusion composition, but if you already know how long you want your motion graphic to be, you can left-click on the border and drag it out to be the duration you need for your final clip. Let’s say we needed a ten-second clip.
I’m letting go an additional 5 seconds for a total of 10 seconds. Now we can take this fusion composition clip and then go over to the Fusion tab.
How Fusion Tab In Davinci Resolve Works
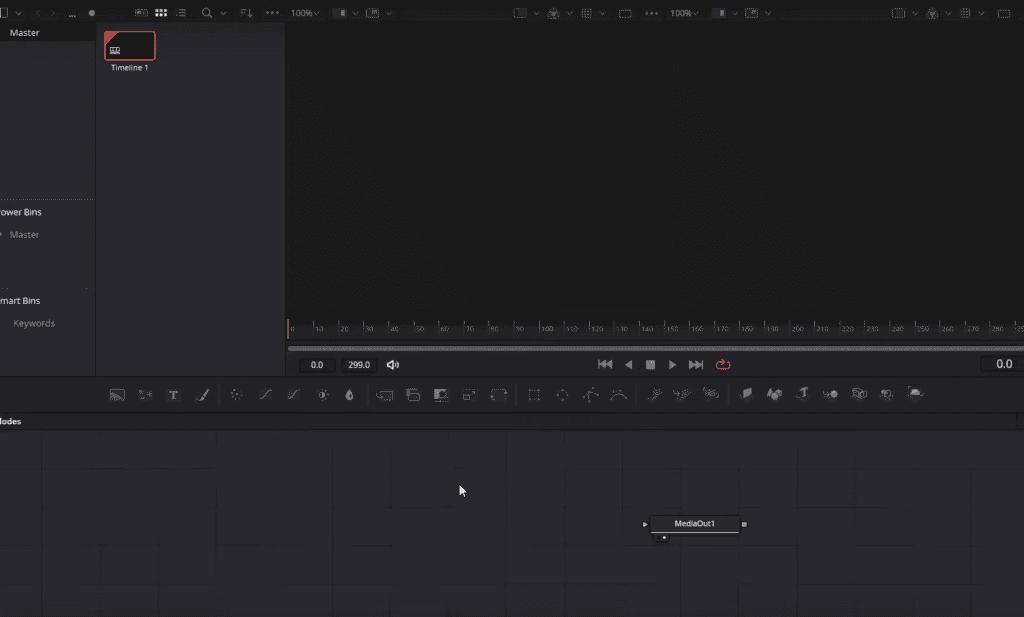
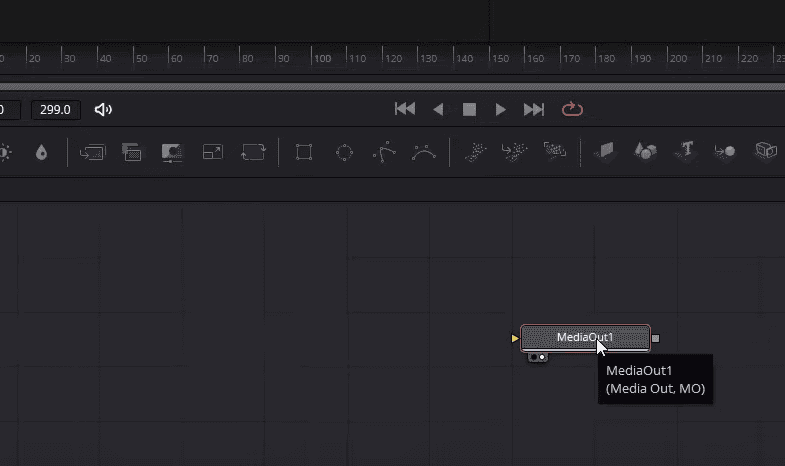
The Fusion page allows you to create a lot of different 2D and 3D graphics. And the way you do that is by using nodes, combining nodes to create other effects, and then merging them all at the end before you generate a final media output, which will be what your viewer sees when you export your video.
Make Motion Graphics in DaVinci Resolve – Fusion Tutorial
1. Adding vector shapes, shape grid node, and shape transform node
To create a vector shape node, we need to right-click somewhere on the node graph, go to Add tool, and then go down to Shape. Inside of the shape category, you’re going to have all the vector shape nodes prefixed by an “s” for Shape.
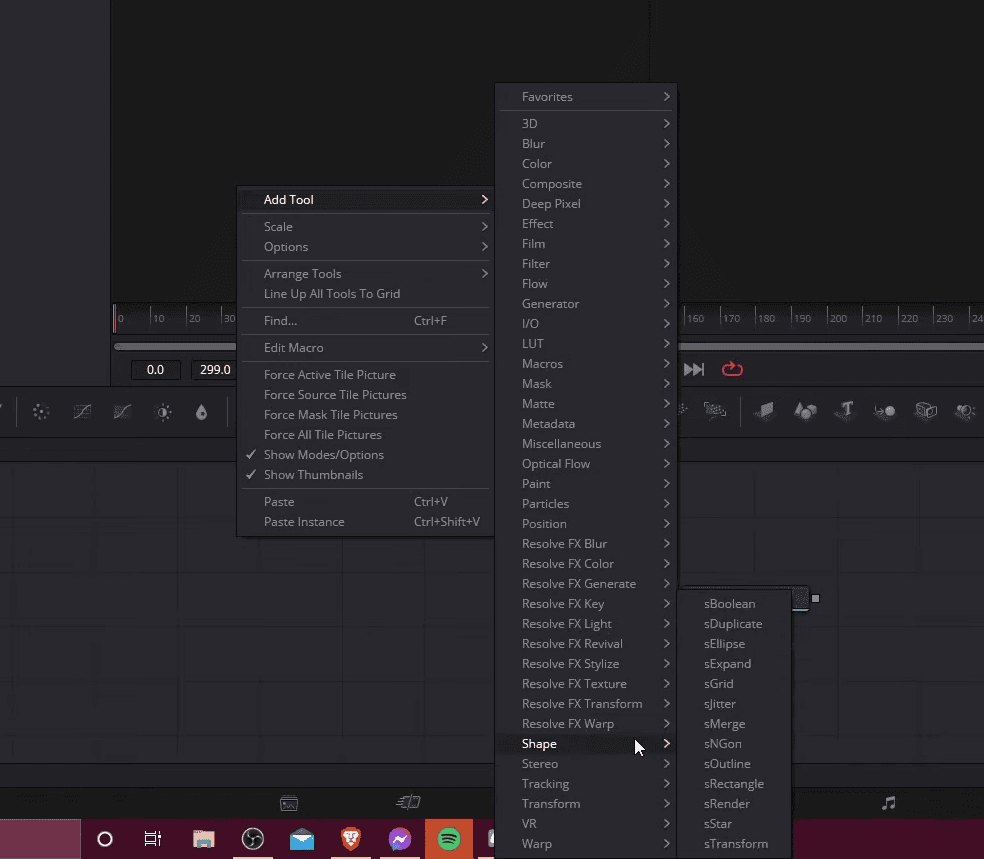
You can combine these nodes to create your motion graphics. One that you’re going to need is “sRender.” To generate an actual image from these vector shapes, you need “sRender” before feeding it into media out.
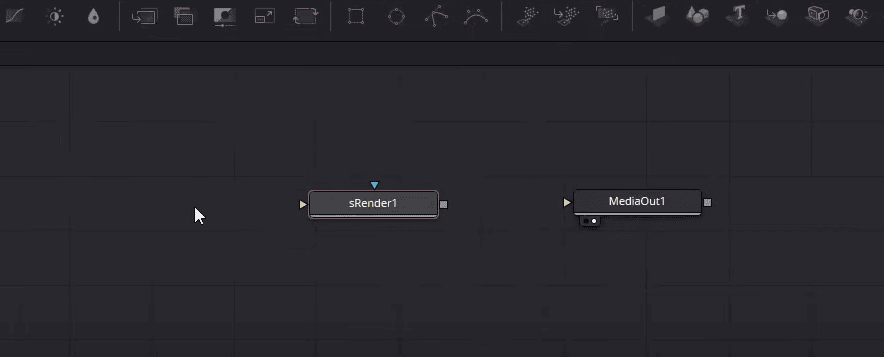
We’re going to need that on the node graph. I’m just going to drag it into position there. Let’s right-click and add another note. Down in Add Tool >Shape, we can pick out an actual shape that we’d want to animate from.
For the most basic shapes, you can look at “sRectangle” or “sEllipse.” You also have “sNGon,” which will be a shape with any number of sides, specifically a Polygon with several sides. Then “Sstar” would allow you to create shapes that have points sticking out at the end, like a star, but doesn’t necessarily need to look like a classic star.
Let’s go ahead and try the “sNGon” node. And we’ll work with triangles in this article. I’m going to feed this output to the input that’s the Orange connector for “sRender.” Now I’m going to show “sRender” on the left side. We have this view pop up.
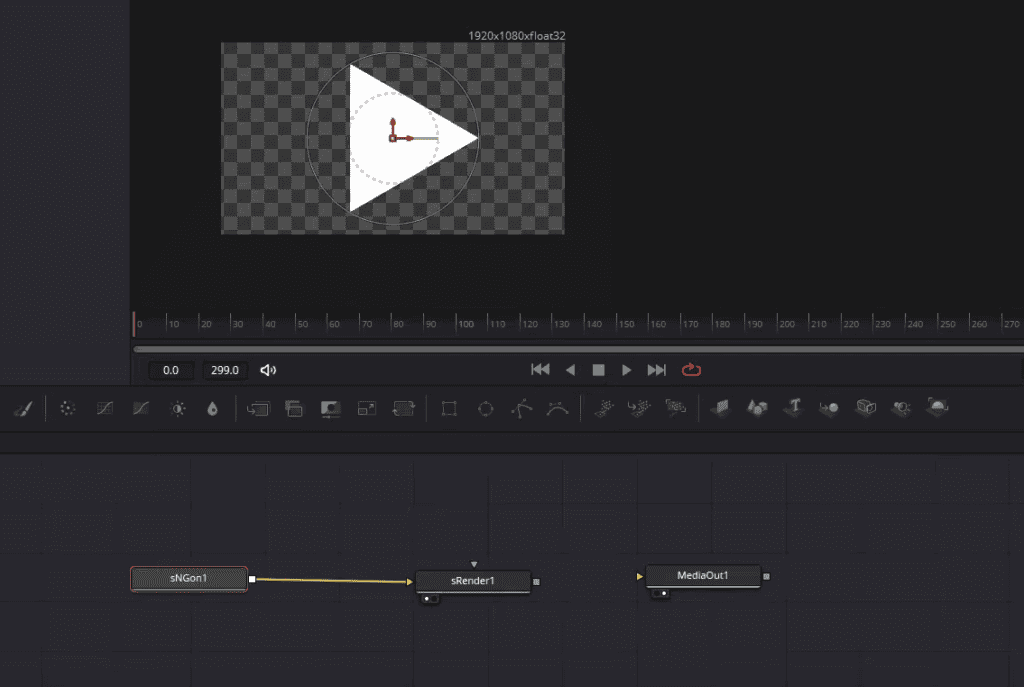
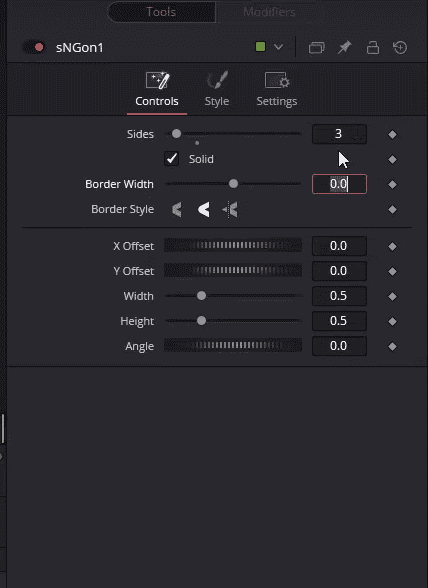
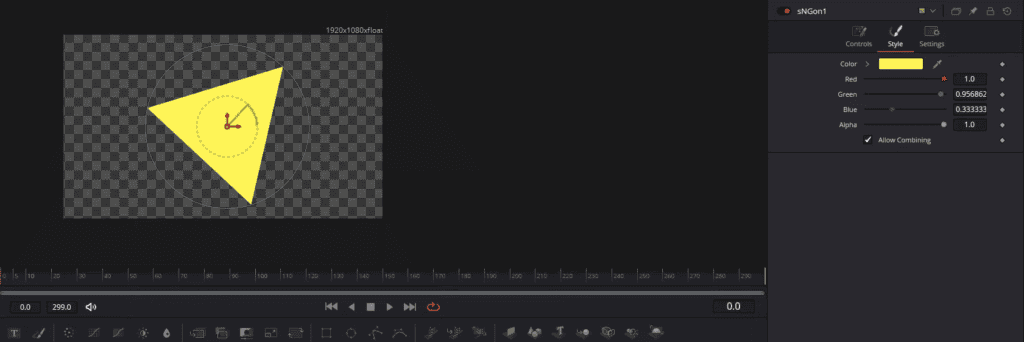
By default, we can see that the “sNGon” is six-sided, but for a triangle, we would need it to be three. Let’s change the number of sides in the Inspector down to three, and we have a triangle.
We can rotate it to be whichever angle we want it to be with this shape. You can also change the color of it over on the Style tab. Choose any RGB color. I’ll grab a typical yellow color over.
If you’re animating a single shape, it might end up looking kind of boring. One helpful tool you have in here that you can add between “sNGon” and “sRender” is the “Grid Node.”
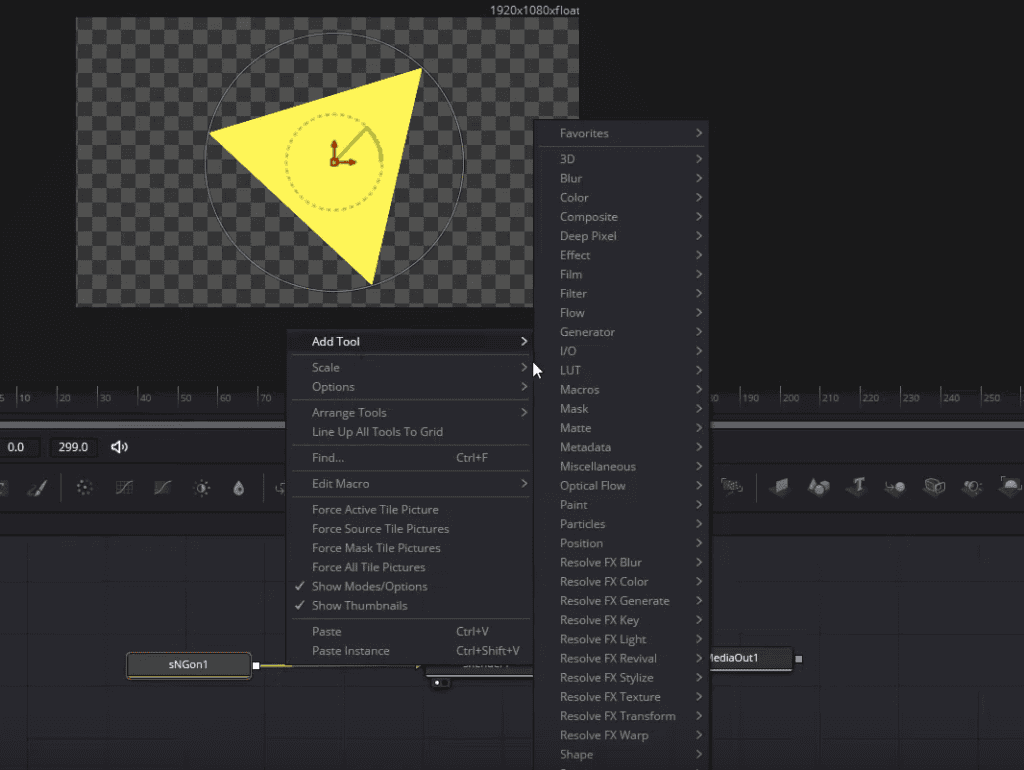
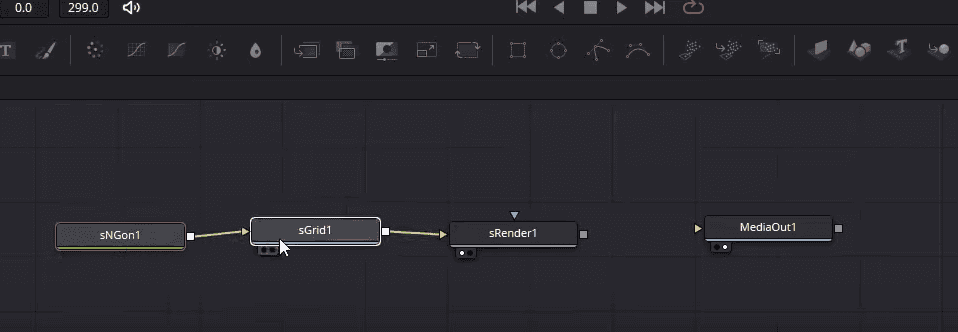
I’m going to right-click go to add tool once again. Note that because I had sNGon selected and I right-clicked on the line, it automatically positioned the new “sGrid” node between sNGon and sRender. The grid node does pretty much exactly what you would expect. It takes your base input and multiplies it in a grid.
If you want to duplicate the same animation across 9 or 27 different identical shapes, then the grid note is super handy for that. Now for our video frame, we can quickly see that these shapes are way too big.
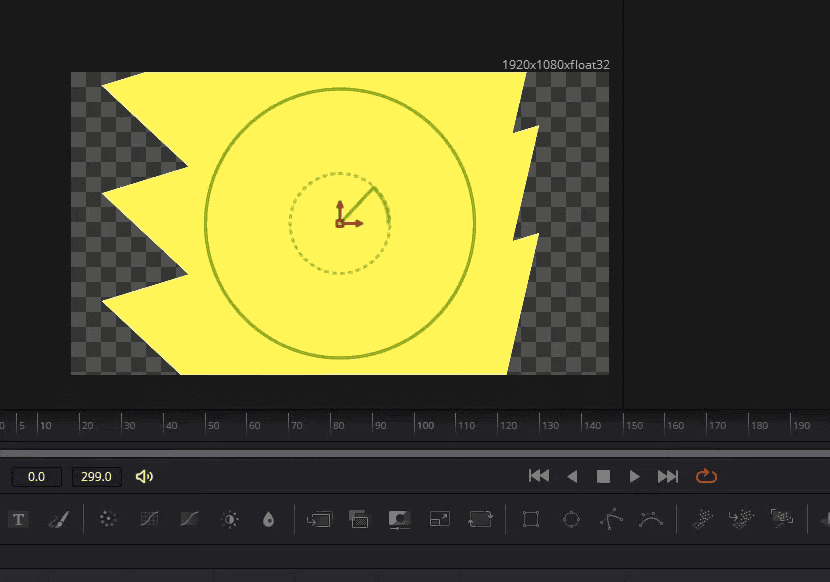
Unless we were trying to use combined vectors to create a more interesting shape, let’s shrink the size of sNGons and make it so we can see them all individually.
I will take the width and height and drop it down to 0.15. Remember that although our preview frame is shrunken right, we’re still editing a 1080p resolution video.
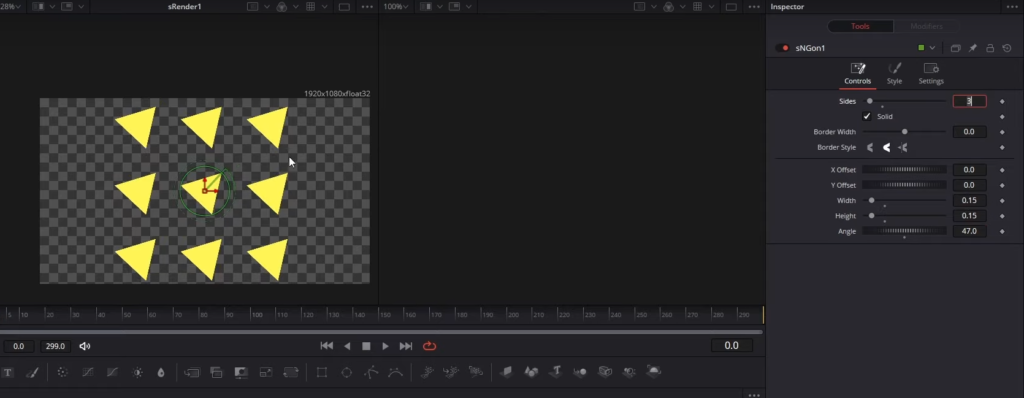
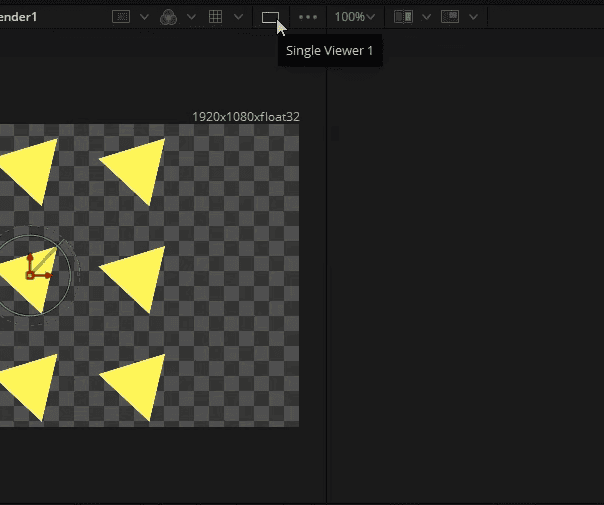
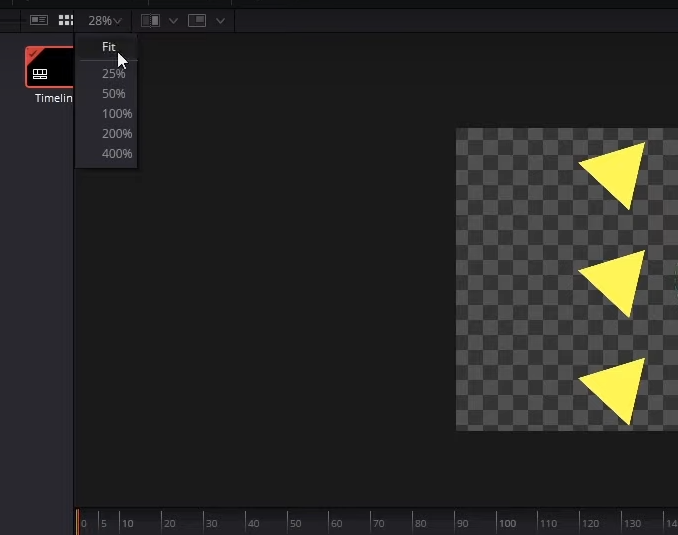
When you put it on like a YouTube screen, it’s going to be a lot bigger than this. If we only want to look at one preview window rather than two at the same time, we can click on the Single viewer button. That will give us more space to work with. And then up in the top left, where we see a percentage, we can change this to fit, and that will give us more room on the screen.
The next node that we’re going to want to add in will be the sTransform node, and there are two spaces we can choose for it. Depending on what we want to do, we can add it right after sNGon 1. If we have a sTransform after this, then each of the transforms are going to be adjusting the individual shapes, the sNGon triangles, and if we add it after Sgrid, it’s going to be changing the entire grid at once.
If you wanted, let’s say a rotation on all nine of these triangles, but where they circle a center point instead of each of them individually rotating around their centers for each of these triangles.
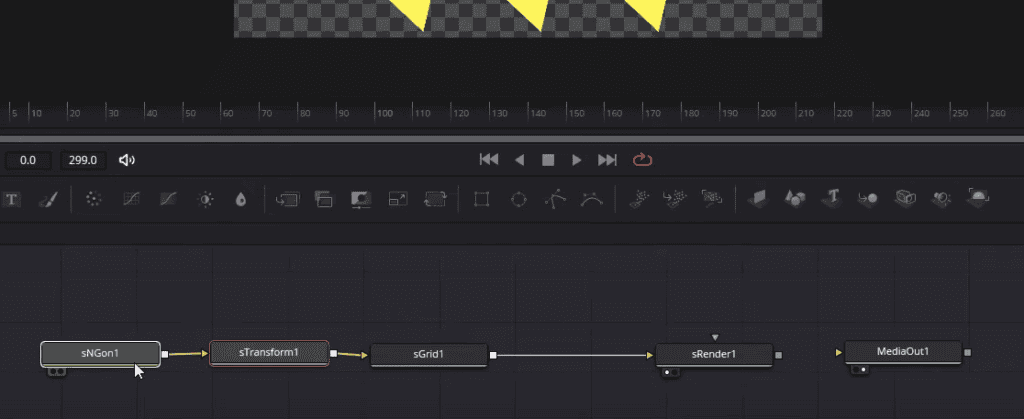
If you want them each to rotate individually, then you should add the Stransform node after sNGon 1 here. I’m going to have sNGon 1 selected; I will right-click on the line, Add Tool> Shape>sTransform. We can see if we adjust the rotation; it will be adjusting it for each of the objects individually.
It is one object; it’s just being cloned nine times by the grid. But where you put the transform does matter.
- Also Read- How To Make Youtube Shorts In Davinci Resolve- Detailed Guide
- Also Read- How to Use Dual Screens in DaVinci Resolve ? ( Easy 2 Screens Workflow)
- Also Read- How To Put GIFs in Davinci Resolve (2 Easy Ways)
2. Animating Our Motion Graphics
If we adjust settings like the rotation without doing any keyframing, it doesn’t exactly make that much sense to have the sTransform node there because you can see over in sNGon that you can already adjust the angle.
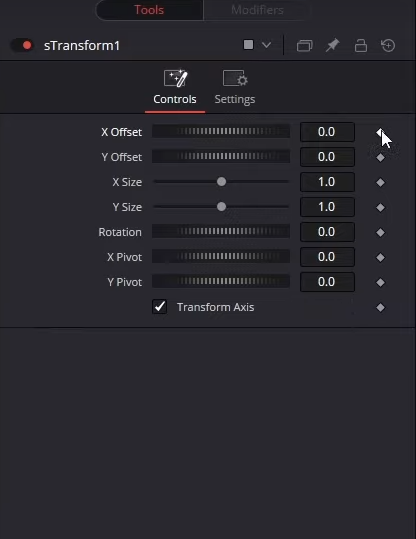
I guess you could use the sTransform purely for positioning X and Y offset, but the sTransform node will be much more useful if we add keyframes, and you can do that with diamonds over to the right of each property in the Inspector.
If we want these triangles to be constantly rotating throughout ten-second animation, then what we should do is go to frame zero, keyframe the rotation at whatever value we want it to start at.
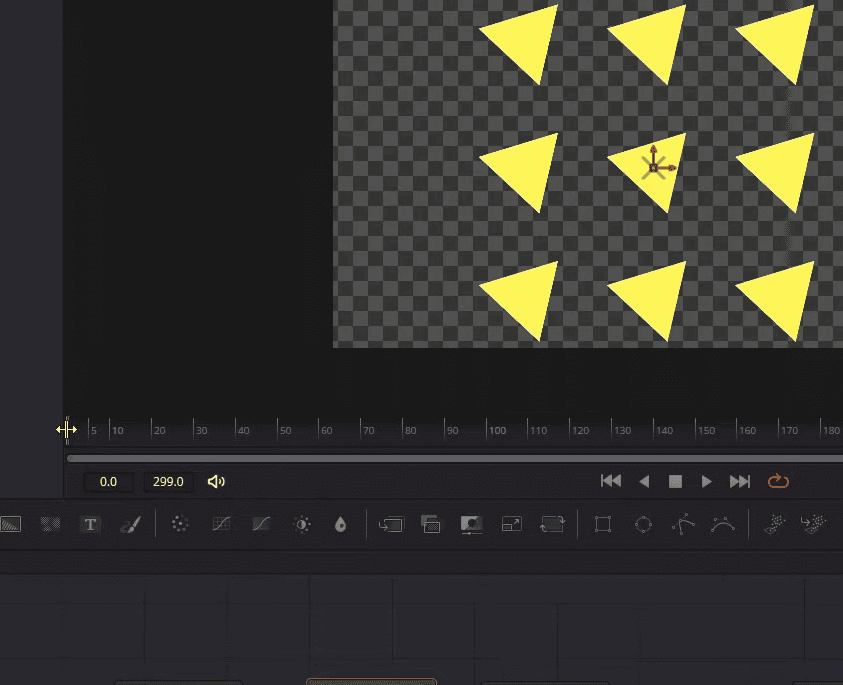
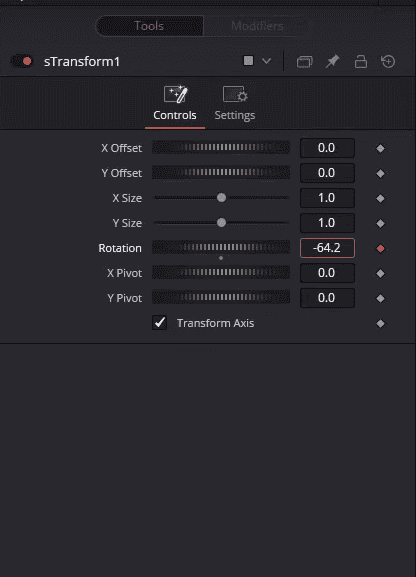
If you wanted the rotation to start at a different angle, you could set a value, either positive or negative; it’s just going to be the direction of the rotation, then we can go all the way to the end and type in a number.
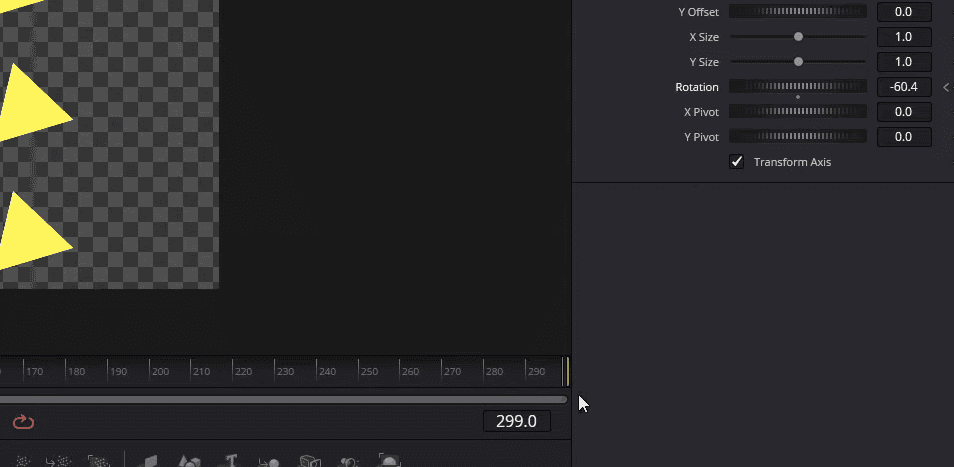
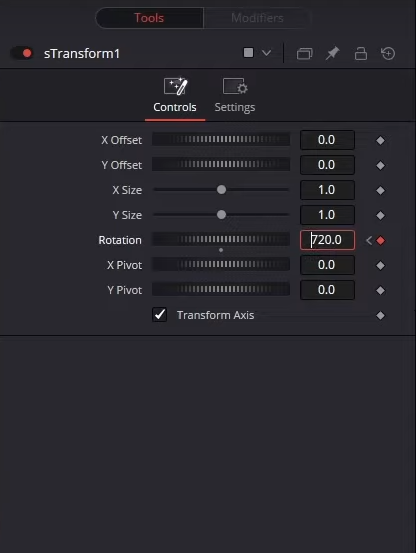
Every 360 degree is a full rotation. If we wanted to go back to zero and then I have two rotations, we could type in 720, and now if we hit Play. The triangles will rotate a little over 720 degrees, about 780 degrees throughout this ten-second animation.
If you want it to go faster, you can move keyframes forward or increase the number on the end rotation.
I could go to the end, type in something like 1500 for the rotation, and then that’s going to make it go much faster when we hit Play in the timeline; you can also see that the rotation is happening around a pivot point, so by default that’s 0 in X and Y offset. If you want this rotation to go around the corner of the object, then we could adjust the pivot. Now when we hit Play, all of these rotations will be going around that pivot point.
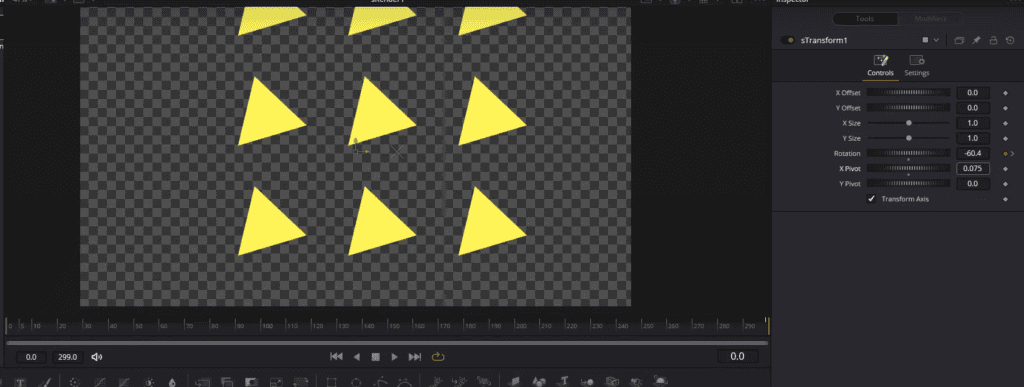
3. Making The Motion Graphics Look More Intuitive
If we want more triangles, we can go to the grid and increase the number of Grid Cells X and Y. Maybe I make it 7*7. And now we have a lot more vector shapes being generated. Note that when you increase the number of cells that the grid may not be fully displayed within the picture, that’s okay.
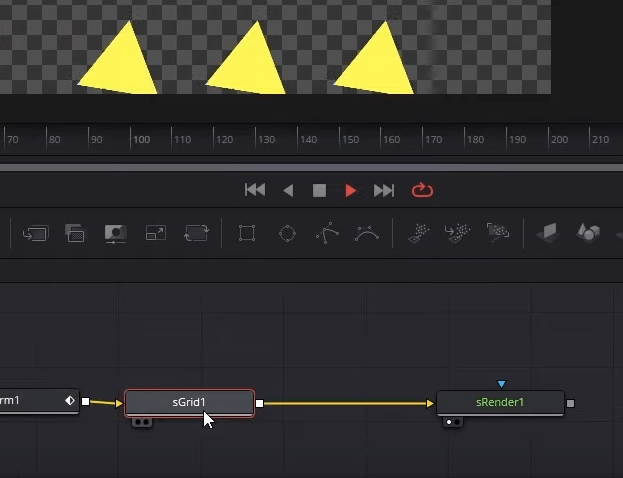
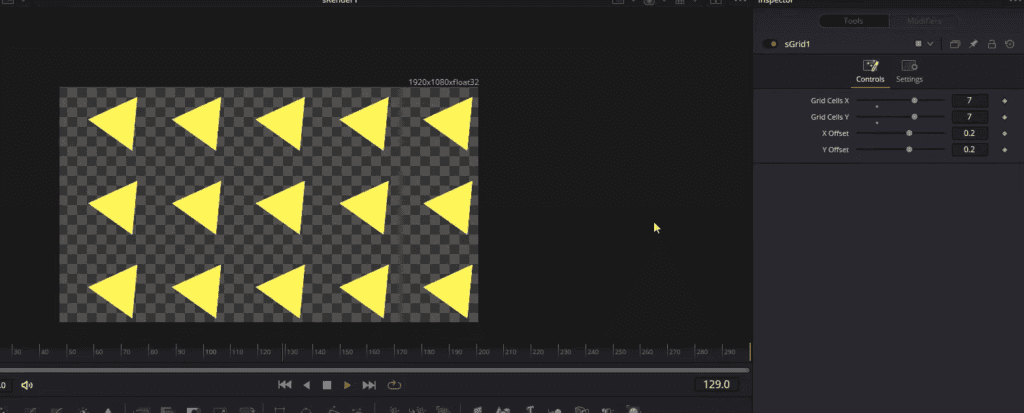
Note that depending on the size of your shapes and if you put them in a grid, how many grid cells you have, many of your shapes may not render on the screen, but that’s okay because you can bring them in from off the screen as well.
If we adjust the X & Y offset on the transform as a keyframed property, we can also bring some of the off-screen shapes into the frame.
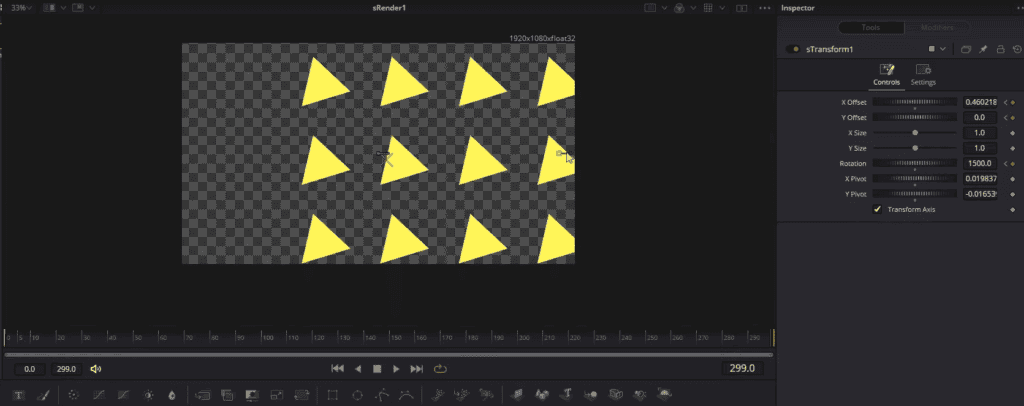
I’m going to keyframe at frame zero. We’ll have that be zero as the X & Y offset. Then we’ll go over to the end and use the gizmos to control this. I’ll bring this down to the right; the keyframe gets created automatically because we already had a keyframe at frame zero. It knows to automatically create new keyframes for any other frame we change the property on.
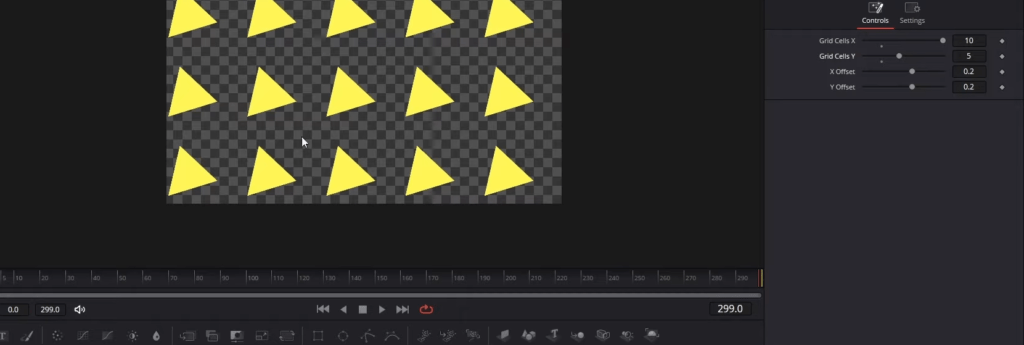
I might increase the number of X cells. Maybe we don’t need as many Y cells since the screen can only show three vertically at a time.
4. Adding More Shapes To The Motion Graphics Composition
Now, of course, with these node setups, it’s possible to have multiple different types of shapes. If I right-click on the node graph, we can go to Add Tool, go down to Shape, and then let’s choose sMerge.
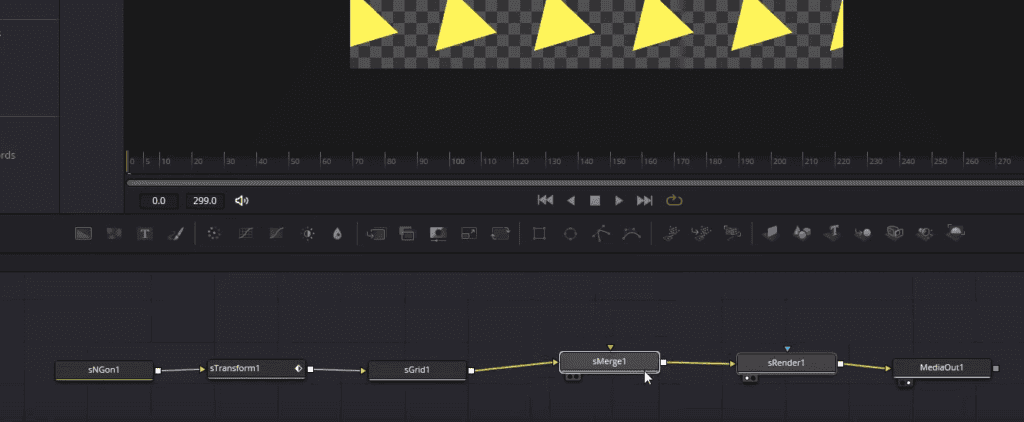
This will allow us to combine two or more sequences. I’ll feed spread into the orange, which is the background on the sMerge, and then the merge to the render and the render to the media out. That would complete our sequence. We’d be able to go over on the edit page and see all these shapes basically playing back and rendering.
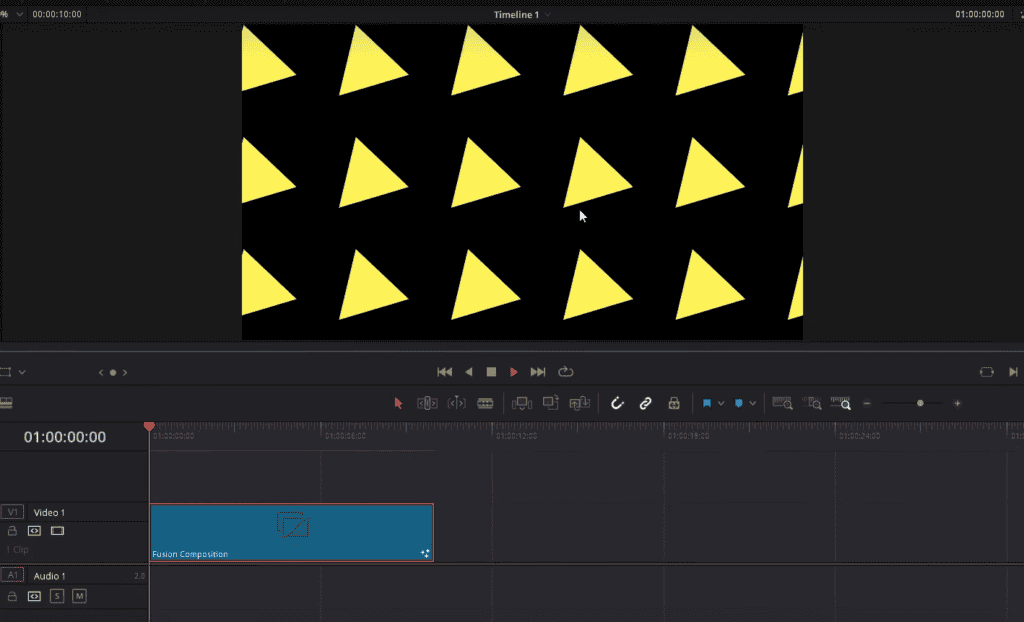
But to add more, we can take sMerge and add some extra shape tools. Let’s go ahead and add a sEllipse.
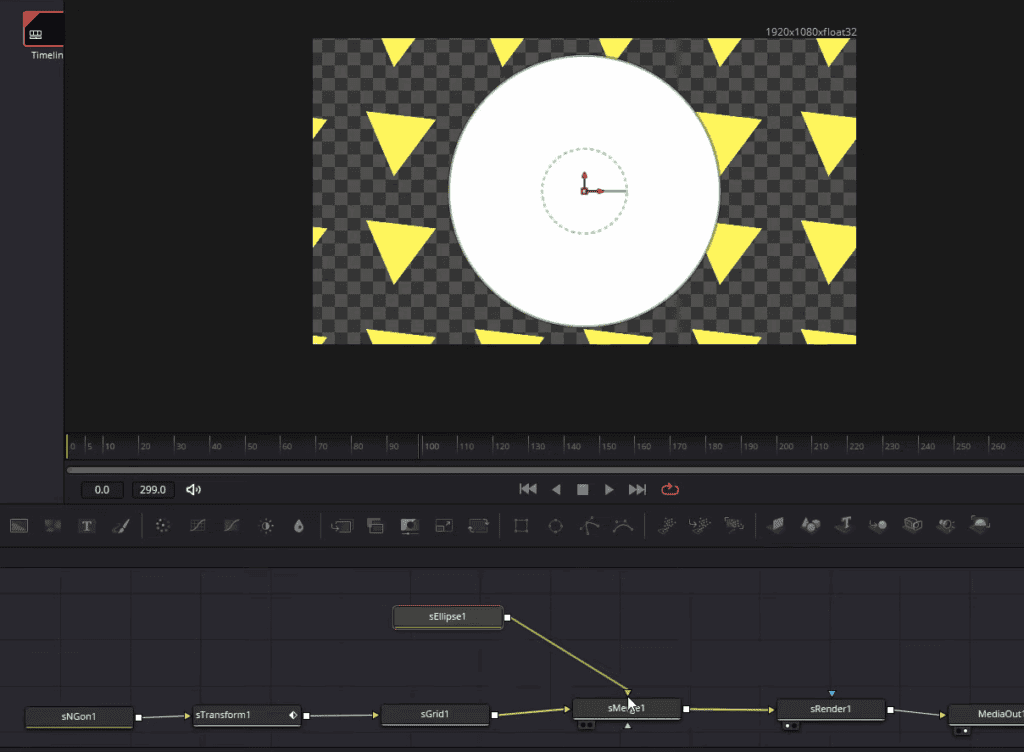
You can see that whenever you have it connected to the green, it shows in front. The green is the foreground connector, and the orange is the background connector.
And you can take that a step further by having more imports on sMerge. If I copy this sEllipse, I feed that into sMerge. , let’s change the color, and you’ll see the input three shows on top of two. You can think of it like video tracks.
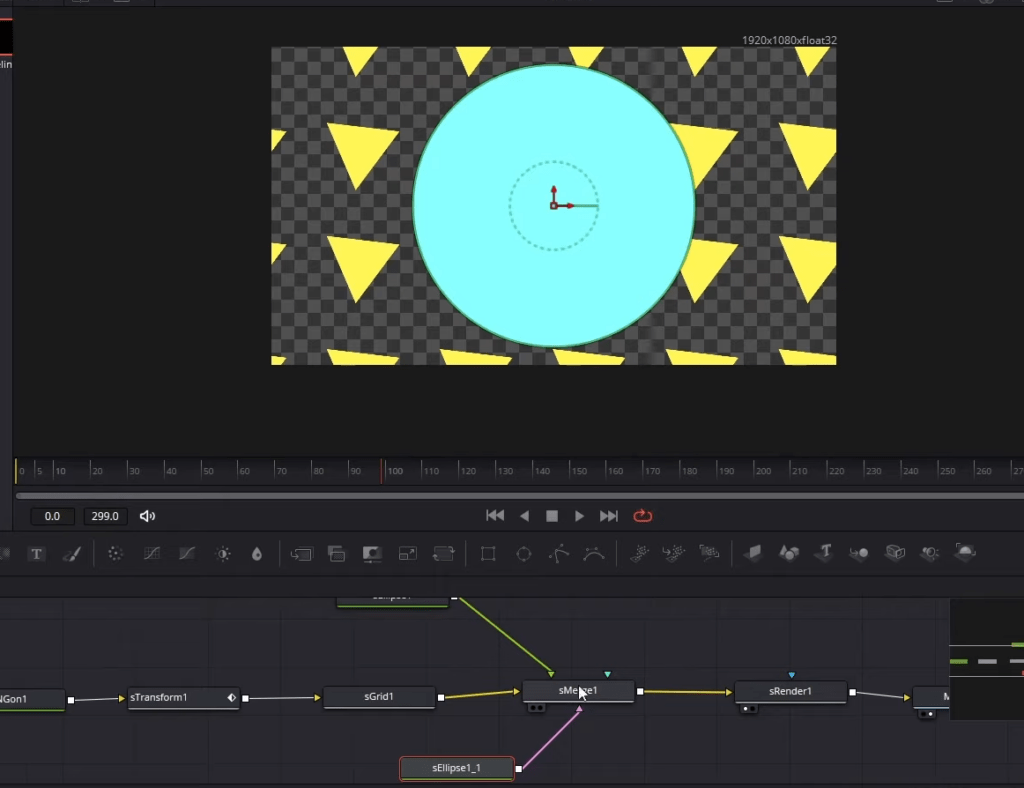
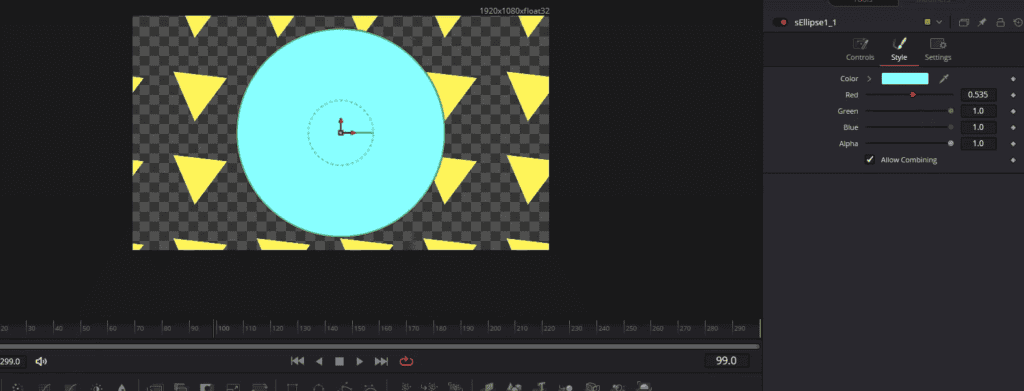
Video one ends up being the bottom; video two is on top of that, then video three, so on and so forth. If we want to overlap the shapes, drag one of them out and then the other ellipse.
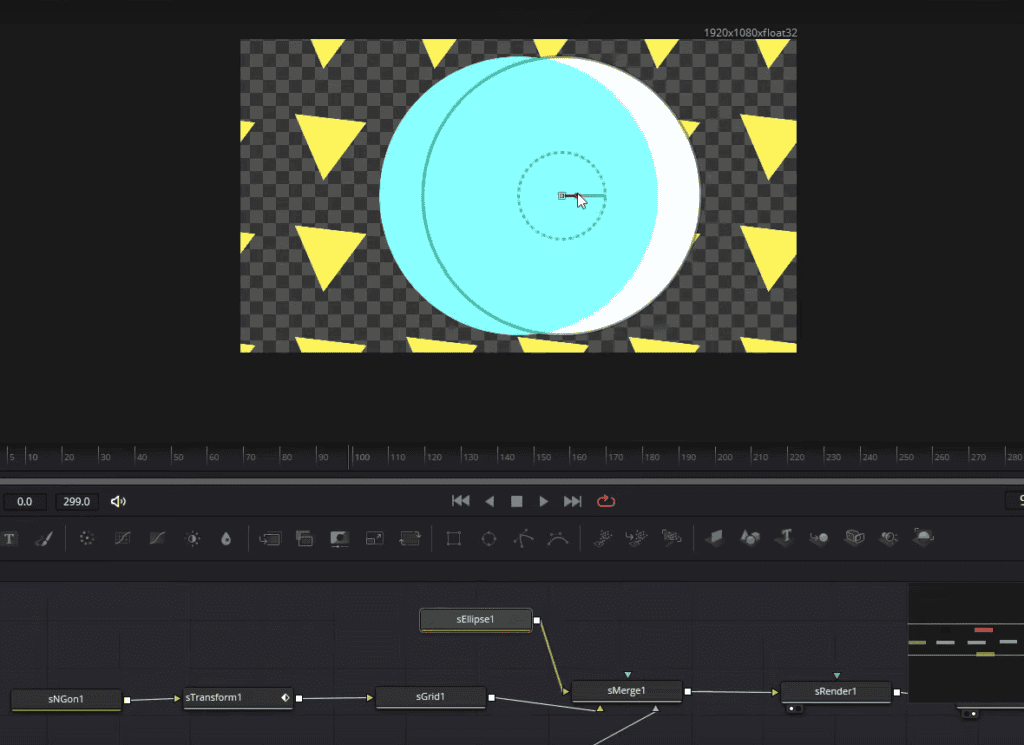
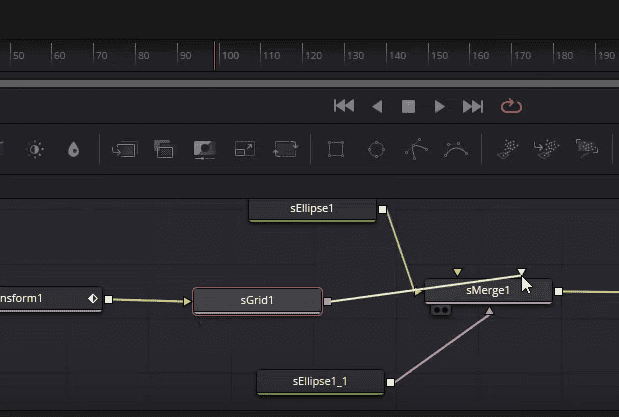
I’m going to disconnect the triangle grid and have that show in front. Let’s connect this to input four because we don’t have to have something and input one still technically.
5. Adding Text in the Composition
There aren’t vector shapes for text, but you don’t need that. You can use text nodes and then merge them after the sRender. If we take a text, we add a merge node, a standard merge node, not a vector-shaped merge node.
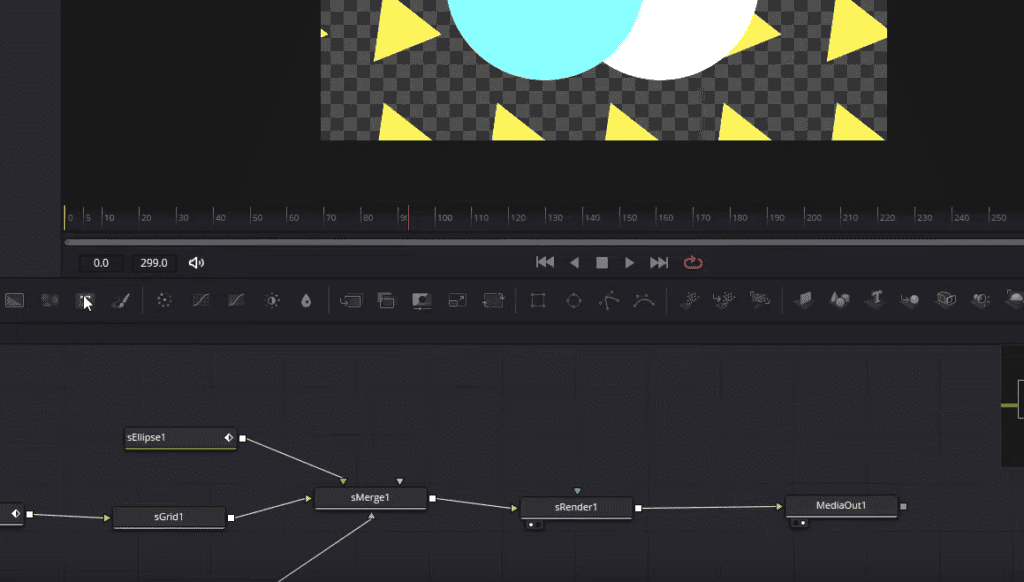
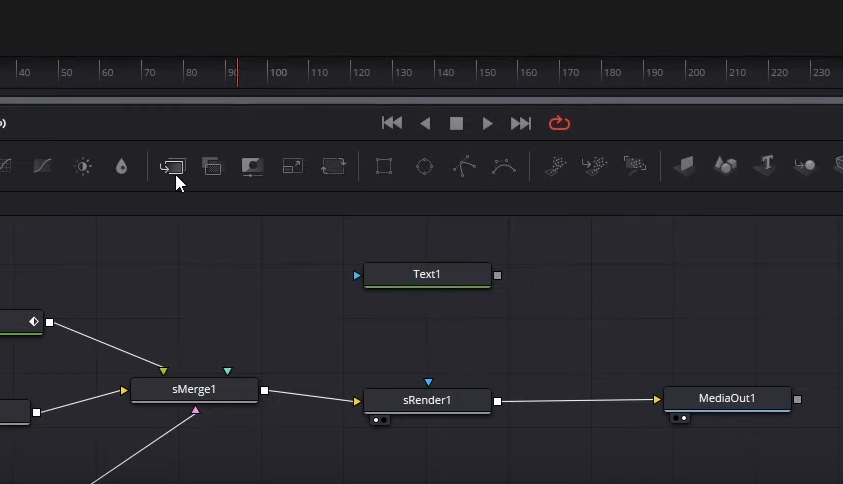
Then we can take sRender as the background, so that’s the orange connector, and then the text as the green foreground connector feed that to media out. Now we could add text for a title in addition to this motion graphic.
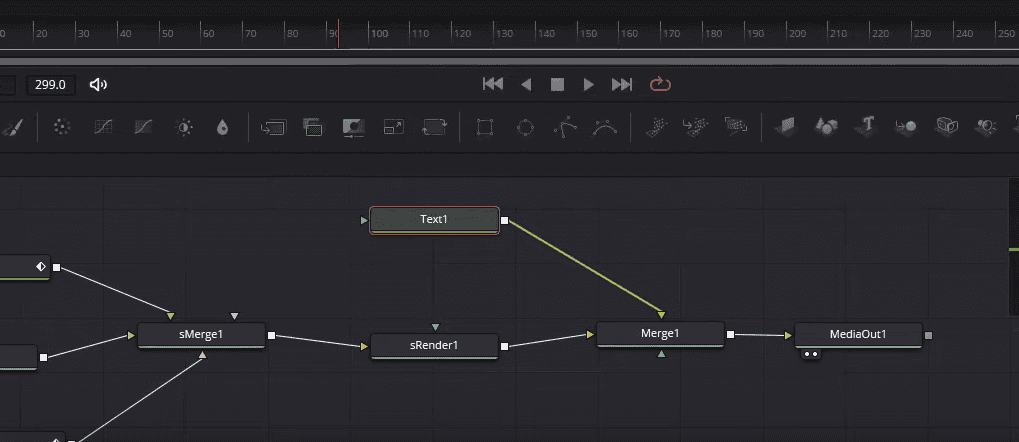
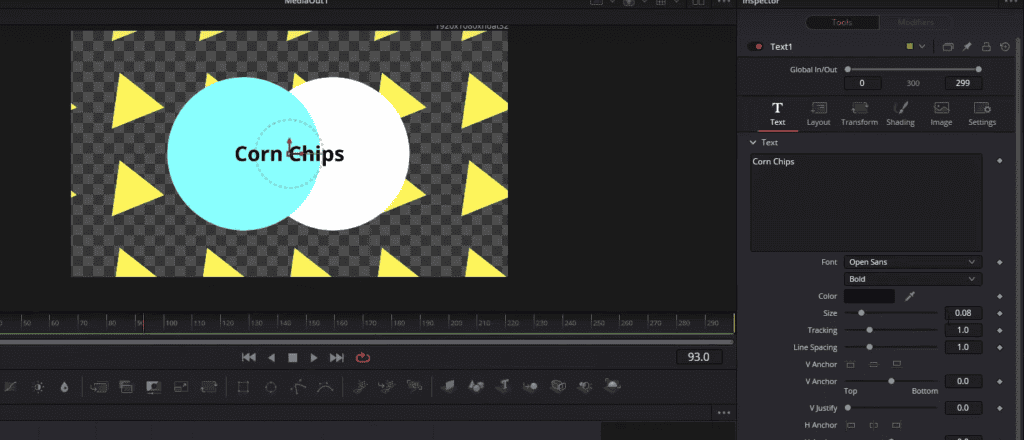
Now you can click on the text node, type in the text, and edit it according to your liking.
I’ll take the text node, go over to the shading tab, and where we have the Alpha setting for the fill, I’m going to keyframe it; we’re going to set this to zero, make it completely invisible. We can go to frame 30, make the Alpha 1.0, and that’s going to keyframe it there as well automatically. The text should be invisible until frame 15, and then it should become fully visible at frame 30.
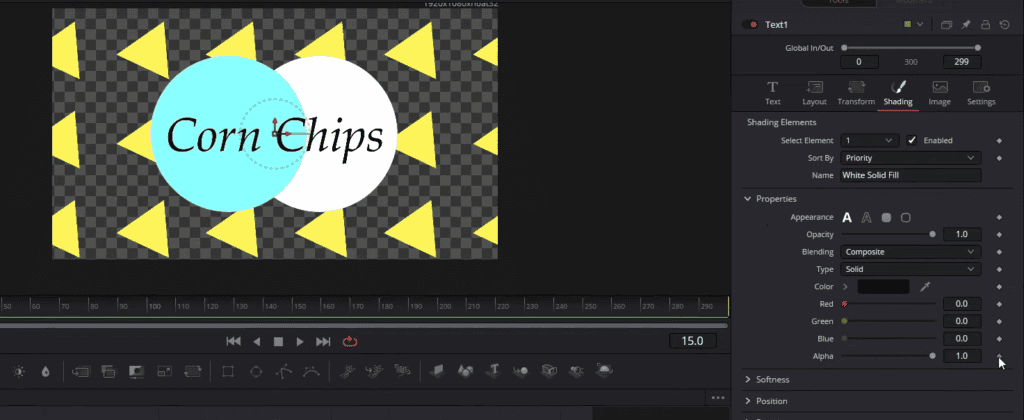
You can add other nodes like sJitter node for more cool effects in your motion graphics in Davinci Resolve. So that’s it! That’s how you Make Motion Graphics in DaVinci Resolve.
Thanks For Watching!
Happy Editing!





Got a Question?
Find us on Socials or Contact us and we’ll get back to you as soon as possible.