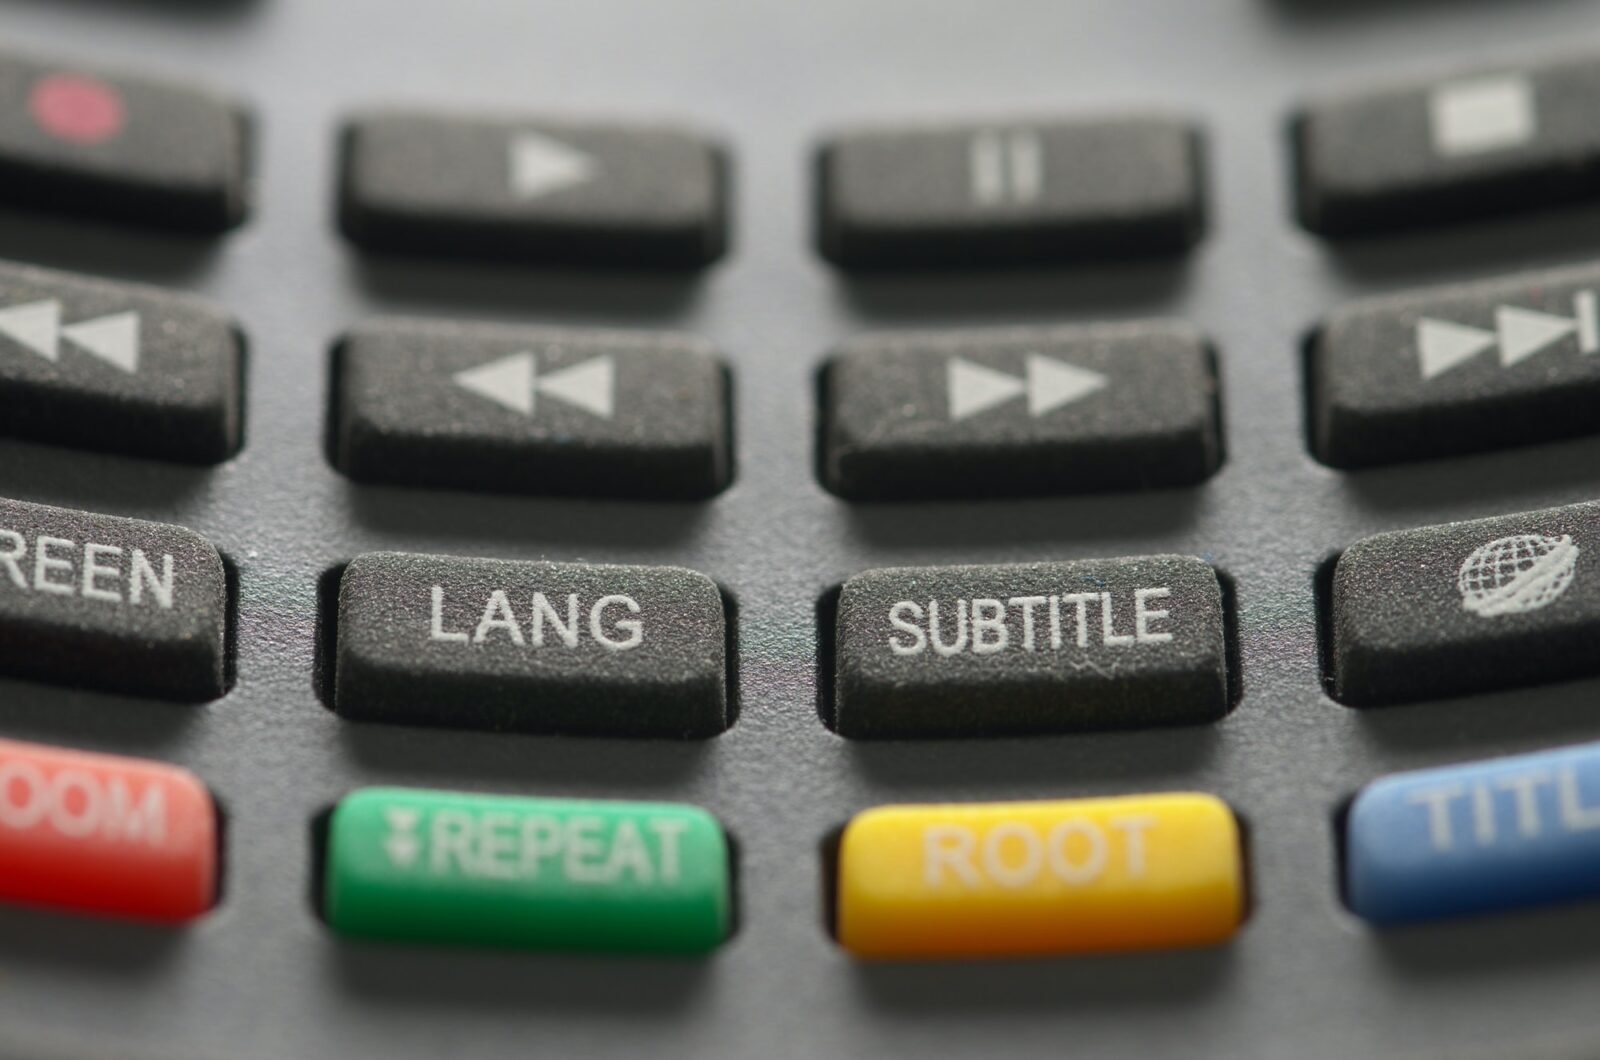
Hello everybody, and welcome back to Filmmaking Theory. Our today’s topic is how to add subtitles in DaVinci Resolve? and how to export subtitles from DaVinci Resolve? If you are new to this blog, let me introduce myself first. I’m a certified DaVinci Resolve trainer, and I write daily blogs about DaVinci Resolve. So, let’s get started with the topic.
How to Add Subtitles in DaVinci Resolve?
I’ve already added my clip to the timeline for the tutorial purpose. If you want to know How to Add Subtitles in DaVinci Resolve, follow the below-mentioned steps.
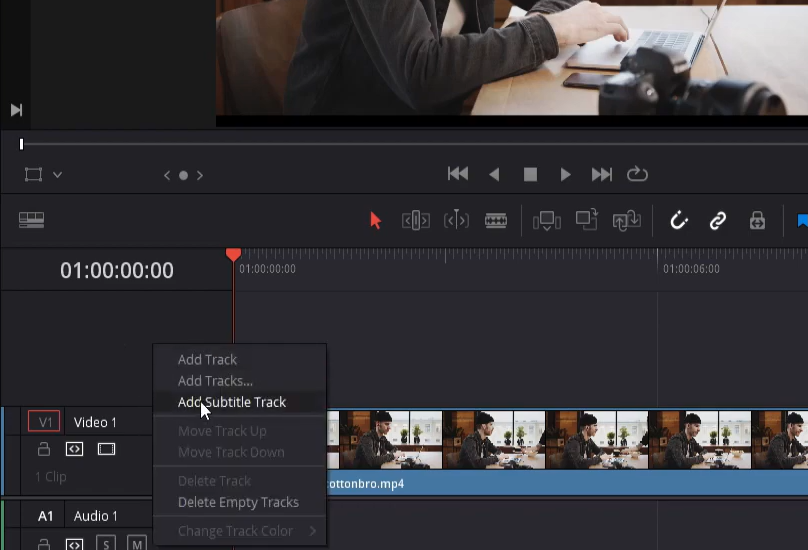
- Right-click on the dark Gray space above or below your audio and video tracks.
- Then choose Add Subtitle track, as shown in the above screenshot. And you’ll see subtitle track one pop up here.
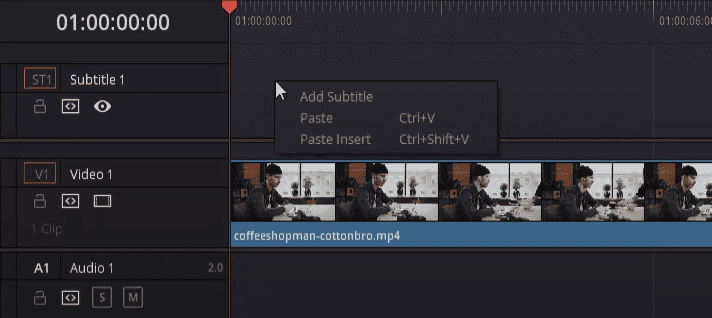
- You can add your first subtitle by right-clicking and choosing Add Subtitle in the timeline beside subtitle one track, as shown in the screenshot. You’ll see that it will add the subtitle wherever your timeline cursor is positioned.
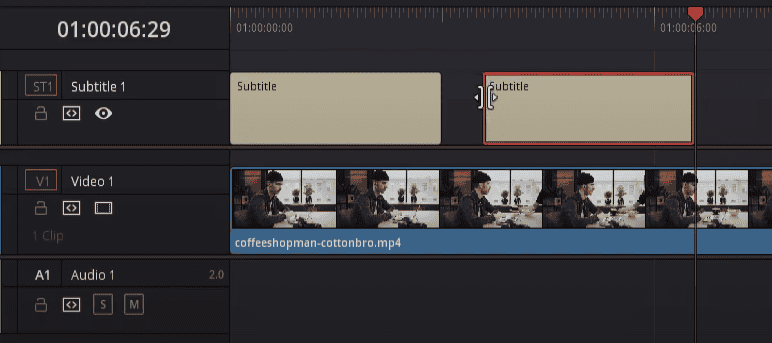
- If you pull this over a little further and right-click and add a subtitle, it will be added right from the timeline cursor plus 3 seconds, as shown in the screenshot.
If you want to change the dialogue on your subtitles,
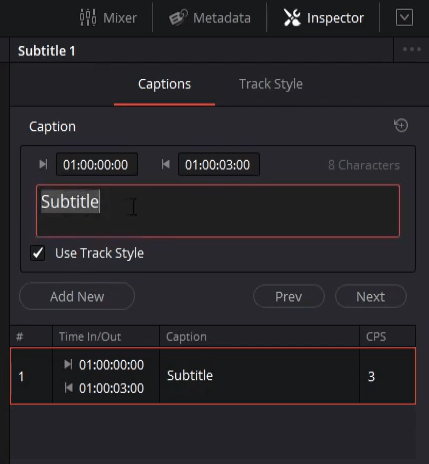
- Left-click on the subtitle in the timeline.
- In the Inspector option in the top-right menu, a text box will appear where you can edit the subtitle, as shown in the screenshot.
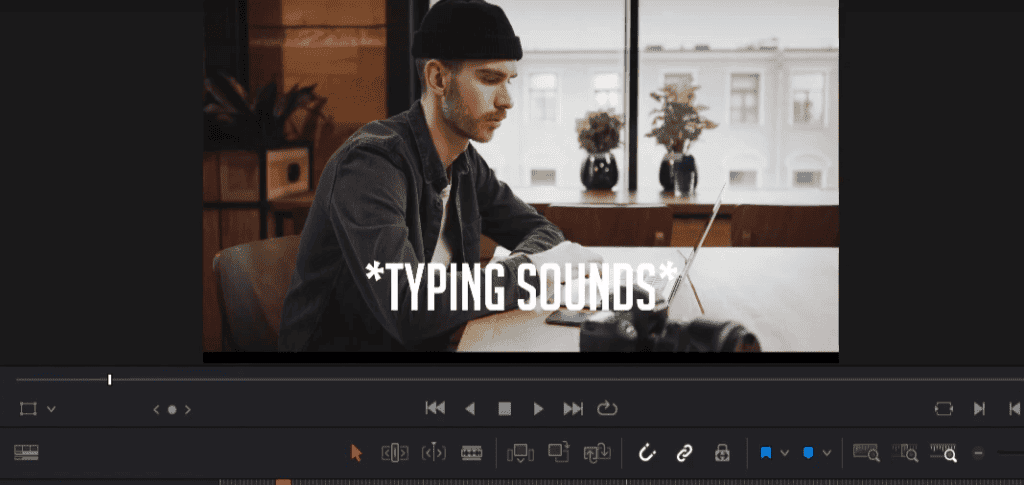
- I’m going to change the subtitle to be “*typing sounds*”. Let’s go to the start of the video and hit play, and you should be able to see the subtitles just sitting there at the bottom, as shown in the screenshot.
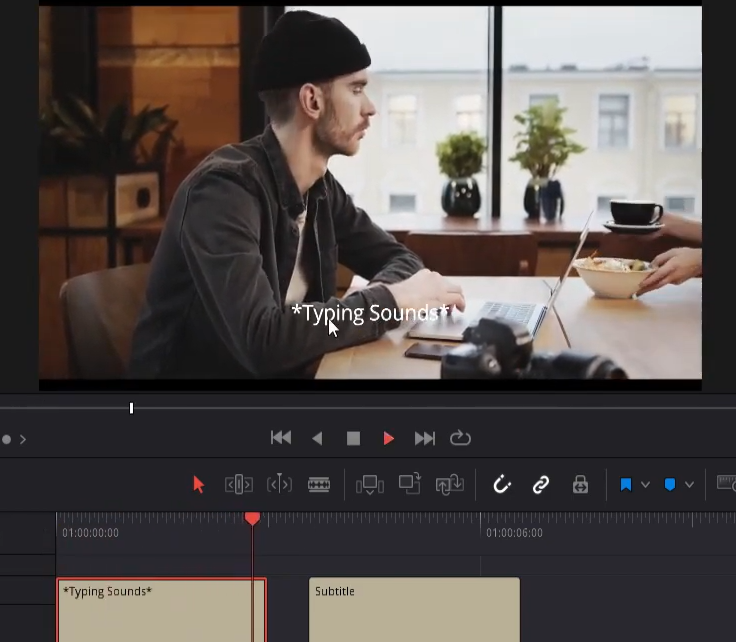
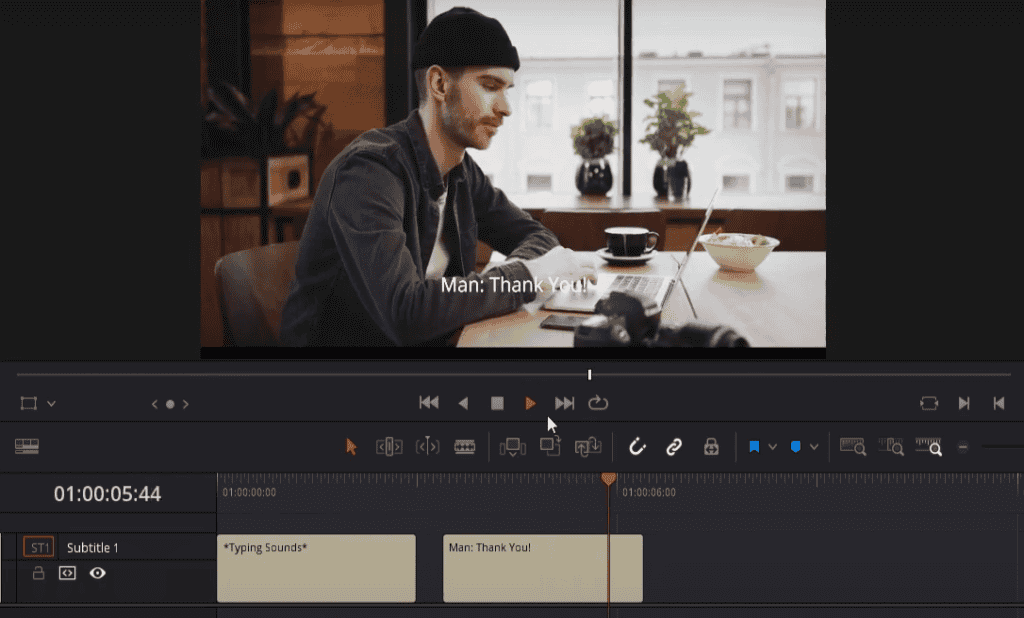
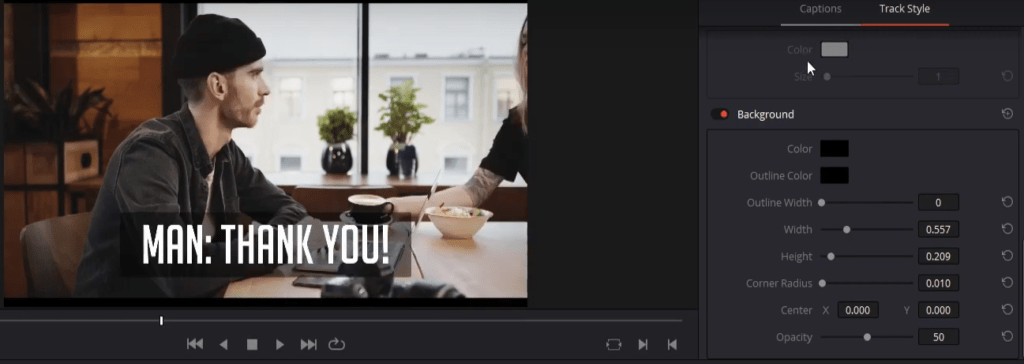
Next, in my video clip, the guy speaks to the waitress. I will turn off snapping and position the timeline cursor where I want the next subtitle line to appear. I’ll enable snapping, and I’ll pull the subtitle to the left so that it snaps to the timeline cursor. Now we can write in our captions. I’ll add, “Man: Thank you!”. Let’s go back and play through our subtitles. Firstly our first subtitle, i.e., *Typing sounds* and then that subtitle clip ends, and the second one pops in with the man saying thank you, as shown in the screenshot.
I hope now you know how to add subtitles in DaVinci Resolve, now it’s time to know about some additional settings we can do in the subtitles in DaVinci Resolve.
Additional Settings in Subtitles in DaVinci Resolve
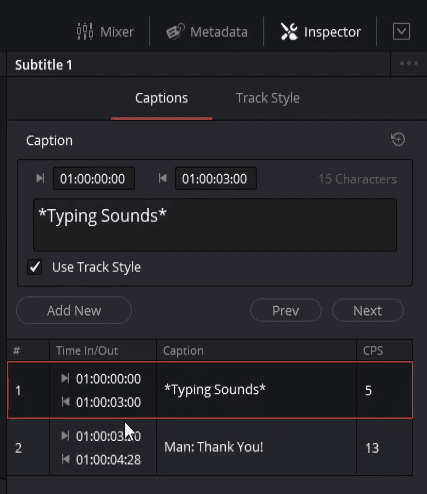
Along with some basic changes like changing the text of subtitles, we can also do some advanced changes to subtitles. We can also adjust the duration of the subtitles to make a little more sense here. That’s the process for what you’re going to do for your entire video. In the Subtitle Inspector option, you can also see that you can click through your subtitles by left-clicking on the list, as shown in the screenshot. And if you add more, you’d be able to scroll down.
If you want to burn your subtitles into the video and make them a permanent part of your video that can’t be separated from the video file itself, you can also change the track style. Like you’d be able to change individual title clips that you just put into the video tracks.
Over on track style, you can customize many settings about how your subtitles should display, as shown in the screenshot. For instance, the size and the font. I’ll just change this to, let’s say, big noodle titling. I use that way too much of my videos, so let’s increase the size.
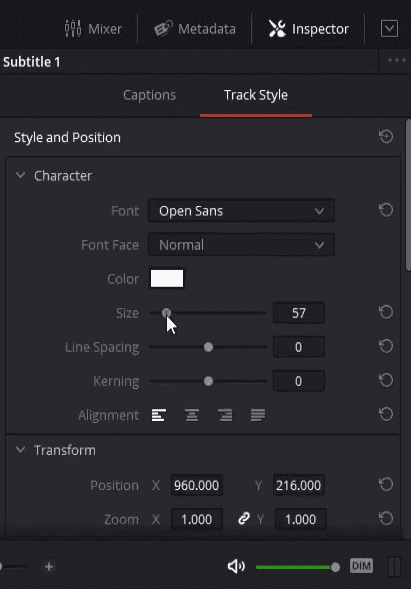
As shown in the screenshot, we have giant bold and very tall text for our subtitles. So it would be impossible to miss that.
There are also other settings you can see down here, like stroke. By default, it is a one Pixel white stroke around all subtitles, but you can turn that off, and you can also add in a background. For instance, if I put the background to the correct width and height, I’d have a bit of black background, partially transparent for all our subtitle clips, as shown in the screenshot.
Now, as I mentioned, this is only really relevant if you’re going to burn it directly into the video file. Because if you export your video and the captions are embedded, then the captions’ actual display will be determined by the program you’re using to display them.
If you open your video up in Windows Media Player Classic or VLC Media Player, they’re not going to end up looking like the edited captions. They’re going to look a lot more like the default captions. And that also applies if you export it as a .srt file and upload it to YouTube.
Some settings like font color can be included in a .srt file, but whether that will display or not will depend on whatever platform you’re using. Don’t expect the edits you have done to your subtitles to go through to the final subtitles; unless, of course, you’re bringing it into the video. Now, we know everything about how to add subtitles in DaVinci Resolve. Now, the next question arises, how to export subtitles from DaVinci Resolve?
- Also Read- Best Tools and Softwares for Indie Filmmakers!
- Also Read- How to write a tragic film story?
- Also Read- 5 Most Critical Elements of Filmmaking! What Makes a Good Movie?
How to Export Subtitles from DaVinci Resolve?
You need to follow the below-mentioned steps to export subtitles from DaVinci Resolve.
- When you’re ready to export your video with the subtitles, you want to go over to the Deliver tab in the bottom menu.
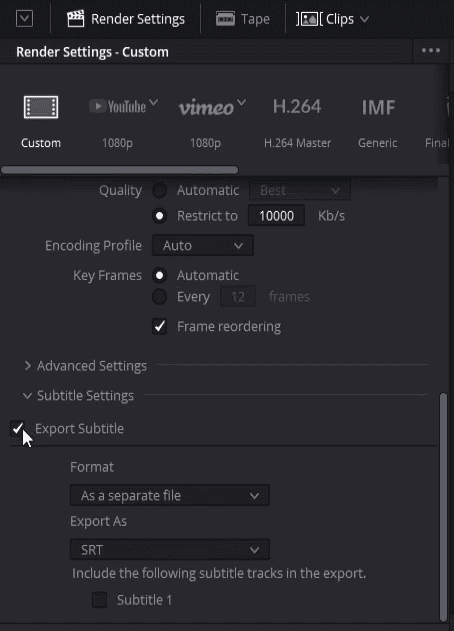
- Then go to Rendor Settings- custom, you can scroll down to the bottom, and there’ll be an option called subtitle settings, as shown in the above screenshot.
- Expand that drop down and then export subtitle.
- You’re going to want to check that export subtitle option.
There are three different formats in which you can export subtitles from DaVinci Resolve, as shown in the screenshot.
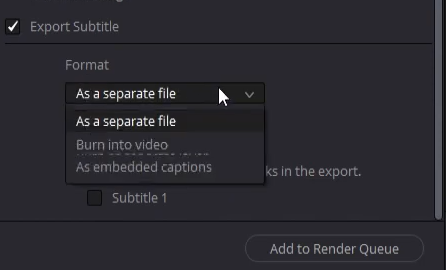
As a Separate File Option
If you upload to YouTube, you can select the “as a separate file” option and .srt format. You would also upload the .srt file that includes the video’s subtitles, and similarly on other platforms that do support added subtitles. When you export as a separate file, you must check the subtitle tracks you want to include in the export, as shown in the screenshot. You can have multiple subtitle tracks, but they will be exported as their own individual file.
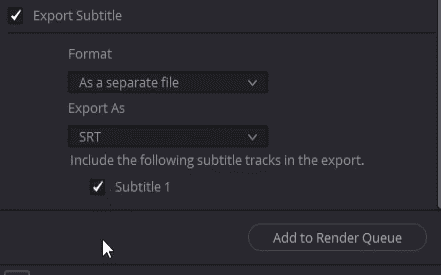
If you have subtitle two and you check that, and you have subtitle one, and you check that, then you’re going to get two SRT files that you can change between when you’re playing the video file in the video player.
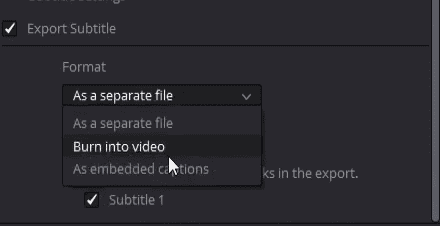
Burn Into Video Option
There’s also a burn into video option, as shown in the screenshot. As I mentioned before, it allows you to get the custom fonts and backgrounds and stuff like that in your captions. But they end up being more like just a title clip that you put in your video track. They’re not separate from the video, which may be okay in some cases.
Still, in other cases, like watching a YouTube video, people may want to change the display language. So, you may not want to burn subtitles into the video but rather include it as a separate file or embedded captions instead so that you can change on a whim rather than having them permanently displayed in your video.
As Embedded Captions Option
The third option is embedded captions, as shown in the screenshot, which means the subtitles are included in the video file. If you open it up in a program like VLC Media Player or Windows Media Player and you right-click on your video, then you’ll be able to see it in the subtitles menu.
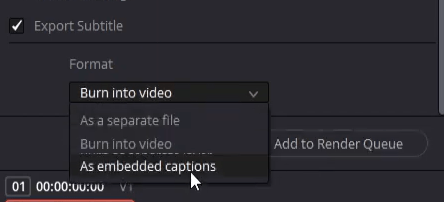
The subtitle tracks you added to the video should appear there, and you can toggle those on and off if you want them to display. But, you’ll notice that it doesn’t include the formatting we set up inside DaVinci Resolve because it’s an added caption.
So, I hope you were able to find the answer to all of your questions regarding DaVinci Resolve, like How to Add Subtitles in DaVinci Resolve? and How to Export Subtitles from DaVinci Resolve? And if you have any more doubt regarding DaVinci Resolve, make sure to check out our other articles. If you have any suggestions feel free to contact us.