
If you are a video producer and content creator who likes to have that wide cinematic aspect ratio but have to shoot in 1920×1080 p. Well, if you are, stick around because, in this article, we are going to show you how to add cinematic black bars in DaVinci Resolve , as well as how to remove black bars in Davinci Resolve while you’re editing without having to drop black bars in over the top of your footage—and still having that flexibility to reframe ever so slightly.
But then, more importantly, We are going to show you how to export it out of DaVinci Resolve very neatly in that wide cinematic aspect ratio, without a 1920×1080 p frame.
Before getting started, if you’re new around here, let me introduce myself; I’m a certified DaVinci Resolve trainer and a colorist. It’s my passion to share some of that knowledge back that I’ve acquired over the last decade and hopefully give you a starting point.
So that if you are a beginner in video production or video editing or color grading, whatever it might be, I can give you a bit of a leg up and help you adjust to that learning curve and get results a little bit more quickly.
How to Add Cinematic Black Bars in DaVinci Resolve
So, without further ado, now let’s get back into today’s topic and find out how to add cinematic black bars in DaVinci Resolve . If I turn on the metadata panel and then look at the particular clip. We’ve got a lot of clips in here, as shown in the screenshot. We’re doing some of the party scenes. Many of those are shot at a high frame rate in a 1920*1080 aspect ratio.
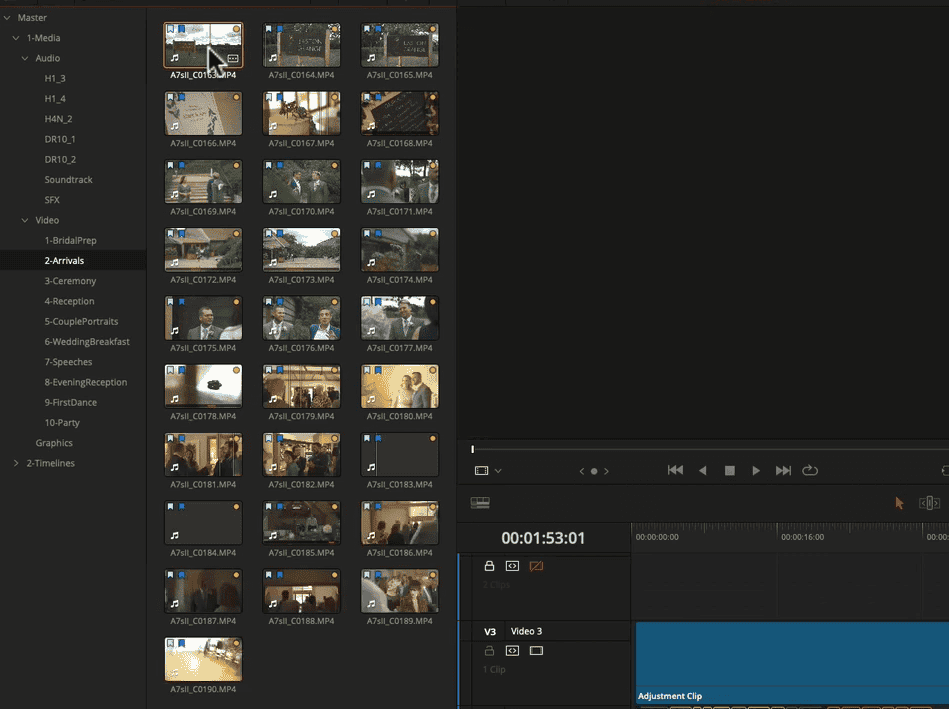
Almost all are 16:9 aspect ratio, which is absolutely fine. This means we’ve got that wide aspect, and you can see in the viewer, in the screenshot that’s a full 16:9 aspect ratio image. If you close this panel off for a minute, you can see that it looks all right.
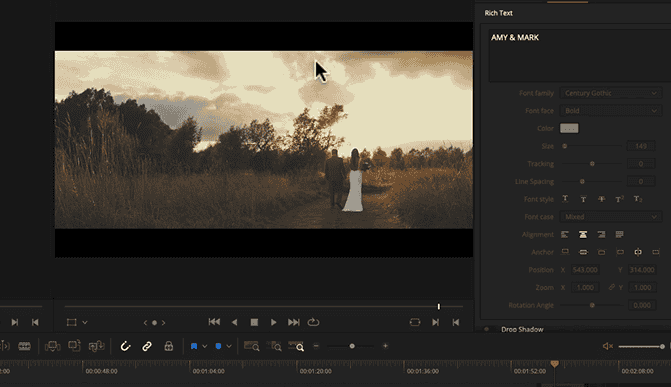
But if you will click on the clip, you’ll notice that there’s some black at the top, as shown in the screenshot.
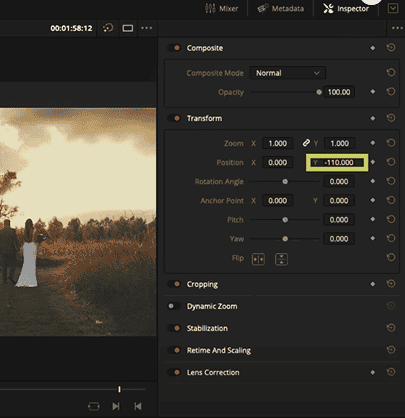
And this is because if you go to the inspector, you can see that the transform controls are slightly changed in the position, as you can see in the screenshot. That’s because we want the black bars and the wide aspect ratio. And so, we will edit with this particular feature turned on.
It means that DaVinci Resolve has a nice feature called output blanking. So, rather than bringing in the black bars, you used to do with png files and PSD files, layering them on the top and then editing all of your video clips underneath, you can simply use this feature.
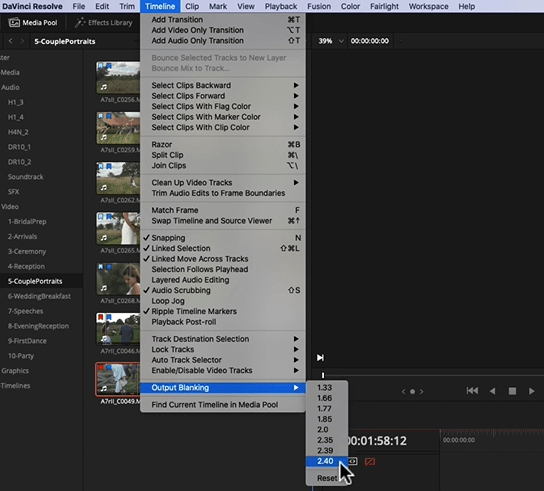
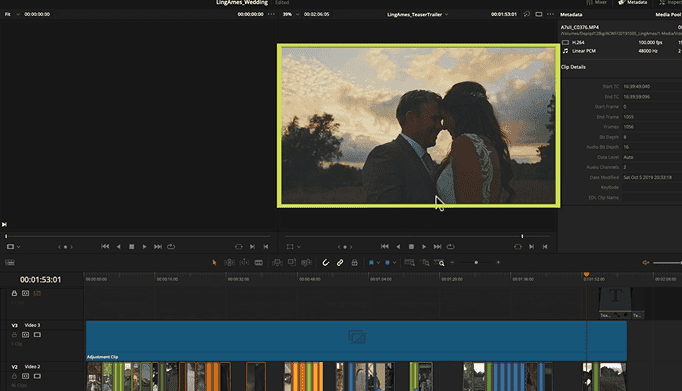
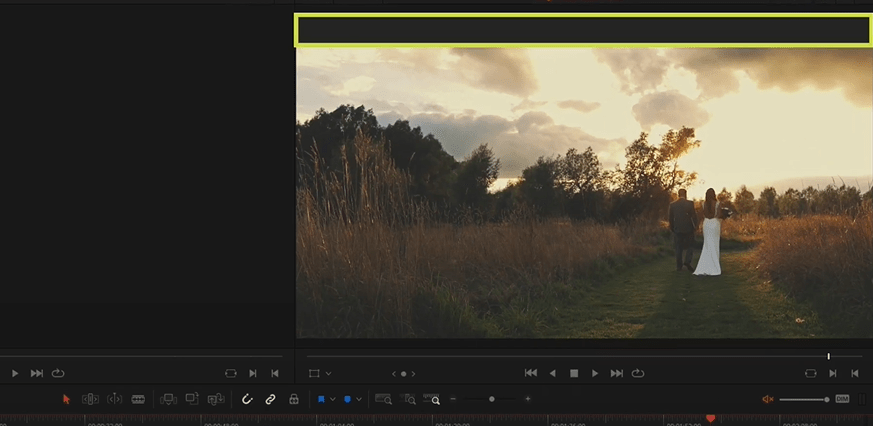
When you come to output blanking in the timeline menu, you can get a range of different blanking options; 2.35 is the one I use. It’s the one that is probably commonly used as well. Click that and turn it on, and you can see that the black bars actually appear, as shown in the screenshot. What we’ve done is when we started editing the clip, we simply turned on the output blanking. And the great thing is that we can now select the individual clips and simply adjust their transform and find an excellent composition that we are looking for, and then simply lock that.
When it comes to exporting, we can simply export this as a 1920x1080p. It will export exactly like that with the blanking applied. However, we don’t want letterboxing when it comes to putting out the image differently. We just want to put out the video with a wide aspect ratio, which is commonly done in many cases. And that’s fine, we can do that, but we can’t do it in the way you might think.
- Also Read- RAW, UNCOMPRESSED, AND LOG VIDEO: DIFFERENCE EXPLAINED
- Also Read- How to Change Aspect Ratio in Davinci Resolve ( Best Explained)
- Also Read- Setting Up An Affordable Color Grading Suite at Home. (Explained)
How to Remove Black Bar in DaVinci Resolve
We can’t simply go to the deliver page and change our resolution to a custom resolution that would be about the right scaling level and simply go to render out. Because it just won’t work. So, we need to find a different way of doing things. The great thing about DaVinci Resolve is that it has a couple of features that can help us with this.
First of all, I’m going to the project settings; there are two ways of doing it. One is a project level and another one is at a timeline level.
At Project Level
Let’s go to the project level first. So, at the project level, you’ll notice that in master settings, my timeline resolution is 1920×1080; that’s what I use for the most part. It’s the resolution I know I’m going to be delivering in. Even though I’ve got 4k media, I will generally have DaVinci Resolve scale that down to fit the frame, and then I’ll edit at 1920x1080p. It just means that I’ll have the ability to crop, pan, and scan the 4k images.
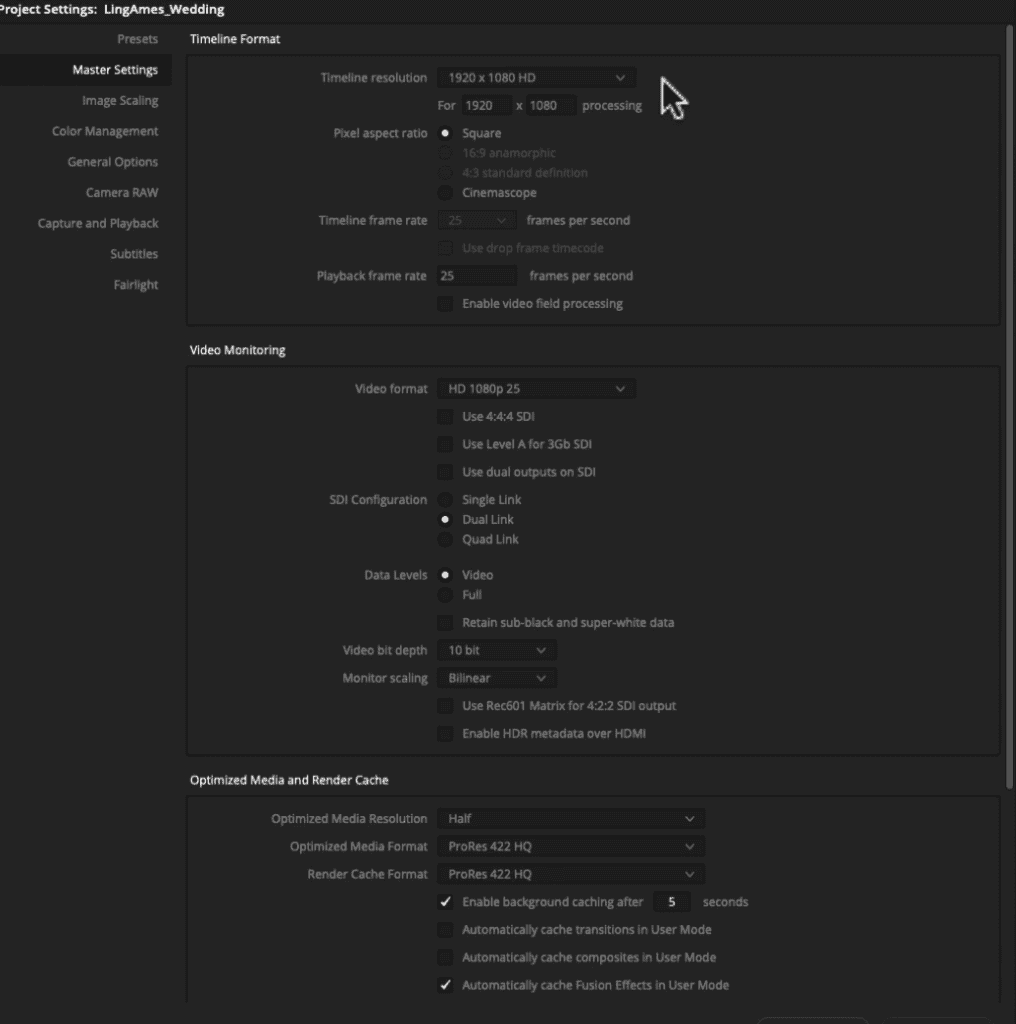
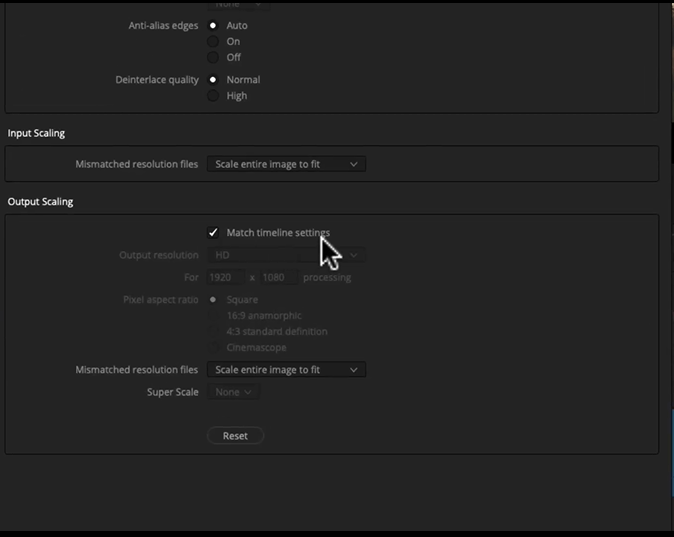
Image scaling is an important area, as sown in the screenshot. Input scaling, first of all, will choose all of the images as they come into the timeline and scale them according to this. Anything 1920x1080p will fit perfectly because it’s the same as the timeline resolution. Anything that’s been mismatched, which means anything that’s not 1920x1080p, will be scaled to fit the entire frame. What’s going to happen is, if we’ve got lower resolution clips, they’re going to be scaled up, and if you’ve got higher resolution clips, they’re going to be scaled down.
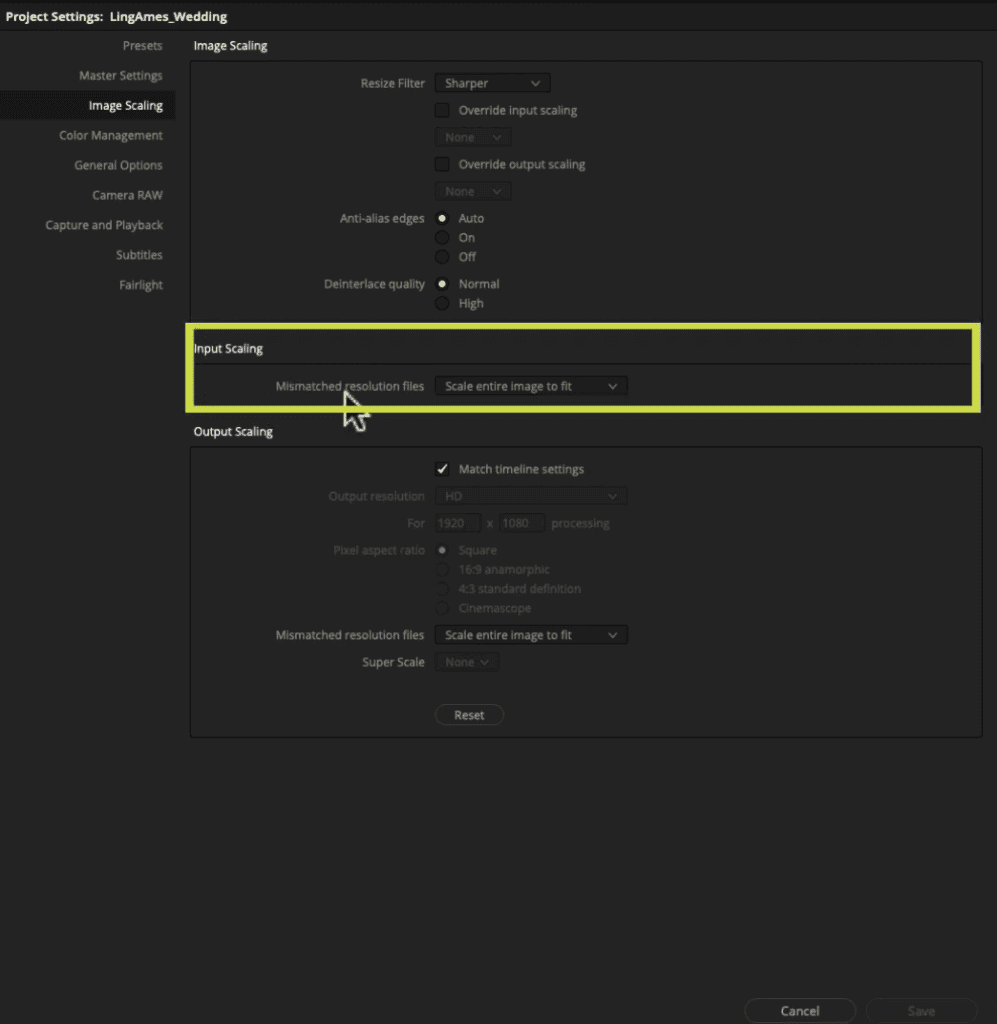
We want to look at the output scaling; right now, we’ve got output scaling matched to the timeline settings. We’re going to match our output at 1920x1080p, which is absolutely fine. But in our case, we need to change that, so turn off that setting.
We’re not going to have a customized setting. Also, change the project settings; we do not want to scale the entire image to fit in our output scaling; we want to change it to center crop without resizing, as shown in the screenshot.
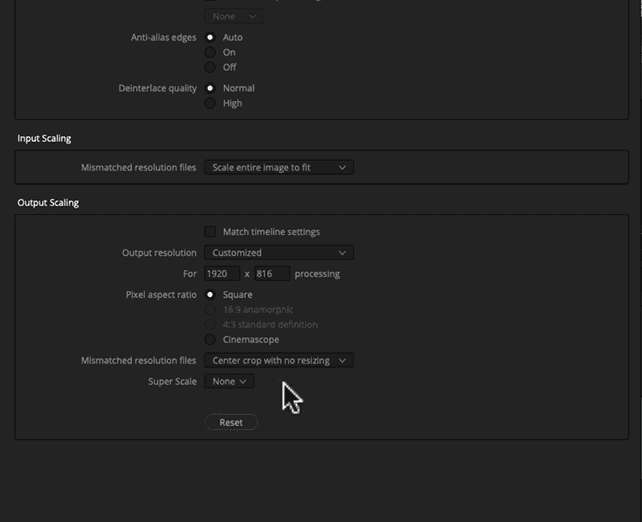
We’ve got to turn off our output blanking, which is still on, and boom! Now we are where we wanted to be, and we can now output at this, making sure our resolution is set to the custom 1920x816p, as shown in the screenshot. Now, if we render it out, you’ll see that it’s rendering correctly, and when it finishes, you can see that that has rendered as it was supposed to have done.

However, there’s a couple of reasons why that might not suit you. Basically, what we’ve done here by adjusting the project settings is that it has affected every single timeline in our project, and that’s a bit of a problem. Potentially, if you have got some 1920x1080p clips that you want to keep in 1920x1080p, you don’t want the cinematic aspect ratio on certain elements or want to do both. If you want to have a letterbox version and a non-letterbox version, you will have some difficulties.
At Timeline Level
So, what we’re going to do is turn this back. You can just turn on the match timeline setting option and hit save. That will go back, but obviously, you can see that we’ve still got the transform error.
- Go to the timeline- output blank and turn that back on, and we’re back to where we were right at the start.
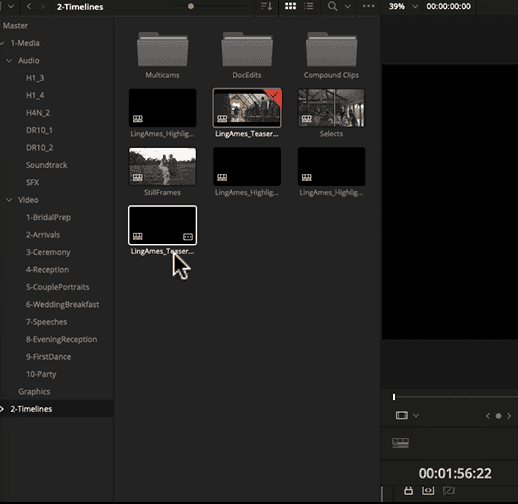
- Go to the timelines, navigate to timelines however you want to do that, whether you’ve created a bin for them or turned on smart bins for your timelines.
- Then, go to the timeline you’re working in, as shown in the screenshot. I would advise you to duplicate the timeline.
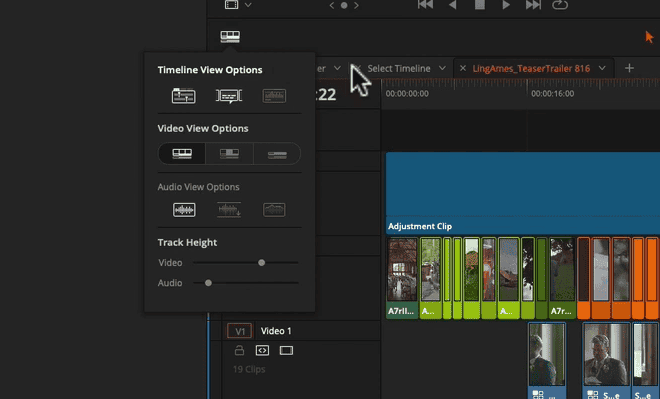
- Load it up into the viewer; another nice little tip here is I’m going to go across to the timeline view options and turn on stack timelines, as shown in the screenshot. This essentially will give you timeline tabs in your workspace. We’ve basically got the two timelines; they’ll be exactly the same. Of course, at the moment, they’re exactly the same, and that’s fine.
- Please go into the one that we’re going to crop and change. So, we’re in the one that we want to crop and change highlighted in orange. Now, let’s work on getting rid of these black bars. We can’t do it in project settings because that will affect the other timeline.
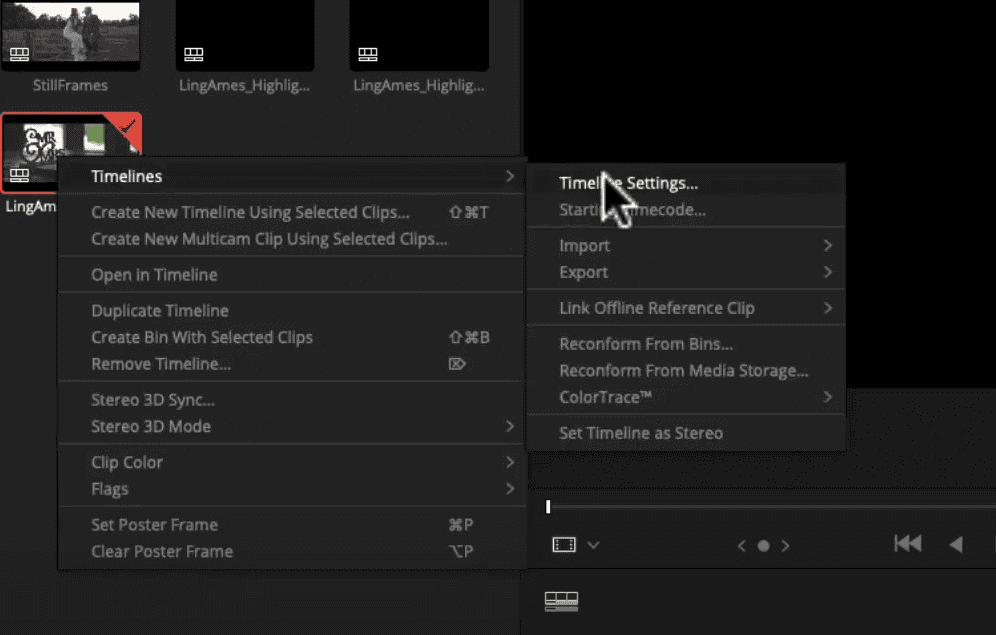
- Go back to the media pool and go to the timeline we’re working on. Right-click, come to timeline and timeline settings, as shown in the screenshot. We don’t want to change the format, but we want to change the output and what we’re going to do from here.
- Set the output resolution to custom settings. We’re going to turn off use timeline settings for output scaling. We’re going to change that to 816p. Also, make sure the center crop with no resizing is turned on, as shown in the screenshot.
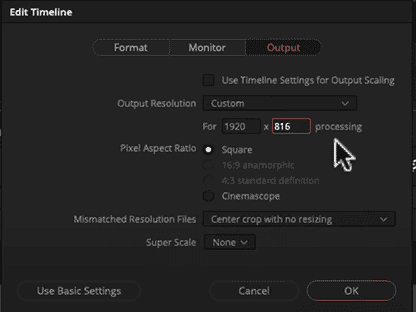
Hit ok, and then what you’ll notice is that that’s cropped in, but we’ve still got our output blanking turned. Go and turn that off, and now we’ve got our cropped in a perfect image. Going back and forth between the two timelines, you’ll see that black bars are missing without changing the resolution.
Go to our delivery page you’ll see it’s showing up correctly; make sure our custom resolution is set correctly. Add it to the render queue.
So, I hope you were able to find the answer to all of your questions regarding DaVinci Resolve like How to Add Cinematic Black Bars in DaVinci Resolve ? and How to Remove Black Bar in DaVinci Resolve? And if you have any more doubt regarding DaVinci Resolve, make sure to check out our other articles. If you have any suggestions feel free to contact us.